
This guide has not yet been updated for the current season. Please keep this in mind while reading. You can see the most recently updated guides on the browse guides page
Vote received! Would you like to let the author know their guide helped you and leave them a message?

Your starting gear for the Devourer's build.
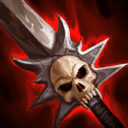
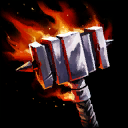
![]() Leather Cowl is the recommended starter. The lifesteal added together with
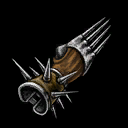
Leather Cowl is the recommended starter. The lifesteal added together with ![]() Spiked Gauntlet will give you some good early sustain. The passive will give you bonus attack speed when with your support, giving you +15% attack speed before you even have your boots built. This'll be incredibly helpful during the early minutes with clearing waves and any boxing you might do, as well as empower
Spiked Gauntlet will give you some good early sustain. The passive will give you bonus attack speed when with your support, giving you +15% attack speed before you even have your boots built. This'll be incredibly helpful during the early minutes with clearing waves and any boxing you might do, as well as empower ![]() Vengeful Assault.
Vengeful Assault.
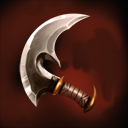
Has some Physical power to boost ![]() Suppress The Insolent's damage, and a slight amount of movement speed when your support isn't with you, which can help outmanouevre your opponent or escape / chase during those times.
Suppress The Insolent's damage, and a slight amount of movement speed when your support isn't with you, which can help outmanouevre your opponent or escape / chase during those times.
Grab ![]() Spiked Gauntlet with
Spiked Gauntlet with ![]() Leather Cowl for decent early sustain and to begin your
Leather Cowl for decent early sustain and to begin your ![]() Devourer's Gauntlet, to be finished later.
Devourer's Gauntlet, to be finished later.
Additionally, spend the last 300 gold on as many ![]() Healing Potion and/or
Healing Potion and/or ![]() Multi Potion as you feel comfortable with / want to bring with you. More potions = more potential to stay in lane longer but will set you back 50 gold each potion, so you'll need to farm slightly more as well.
Multi Potion as you feel comfortable with / want to bring with you. More potions = more potential to stay in lane longer but will set you back 50 gold each potion, so you'll need to farm slightly more as well.
If preferred, ![]() Death's Toll or
Death's Toll or ![]() Gilded Arrow are alternate starter items you can use. Read the items section of the guide for more information on these.
Gilded Arrow are alternate starter items you can use. Read the items section of the guide for more information on these.
 Leather Cowl
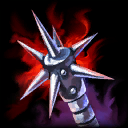
 Spiked Gauntlet
 Healing Potion
 Multi Potion
The standard ![]() Devourer's Gauntlet build. Solid, versatile build that's recommended. You may also opt to replace some of the items with items listed as possible replacement (or other items if you're feeling frisky).
Devourer's Gauntlet build. Solid, versatile build that's recommended. You may also opt to replace some of the items with items listed as possible replacement (or other items if you're feeling frisky).
The build order is interchangeable. You will always begin with building ![]() Devourer's Gauntlet into
Devourer's Gauntlet into ![]() Ninja Tabi (or Warrior), but what you build after that will depend heavily on the situation at hand.
Ninja Tabi (or Warrior), but what you build after that will depend heavily on the situation at hand.
 Hunter's Cowl
 Devourer's Gauntlet
 Dominance
 Rage
Rage
 Deathbringer
 Poisoned Star
 Elixir of Speed
The various relics to be picked.
 Purification Beads
 Aegis Amulet
 Heavenly Wings
 Horrific Emblem
 Belt of Frenzy
These items can be used as a replacement for items from the main build. If there is a "preferred replacement slot" for them, it'll be listed here, too. The main build will work fine, but everyone's tastes may vary, so these are your options.
 Bloodforge
 Fail-Not
 Hydra's Lament
These items can be used as a replacement for items from the main build. If there is a "preferred replacement slot" for them, it'll be listed here, too. The main build will work fine, but everyone's tastes may vary, so these are your options.
 Qin's Sais
 The Executioner
 Demon Blade
 Runeforged Hammer
These items can be used as a replacement for items from the main build. If there is a "preferred replacement slot" for them, it'll be listed here, too. The main build will work fine, but everyone's tastes may vary, so these are your options.
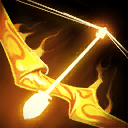
 Silverbranch Bow
 Ichaival
 Asi
Asi
 Odysseus' Bow
These items can be used as a replacement for items from the main build. If there is a "preferred replacement slot" for them, it'll be listed here, too. The main build will work fine, but everyone's tastes may vary, so these are your options.
 Brawler's Beat Stick
 Toxic Blade
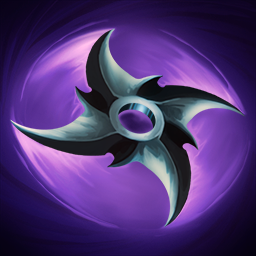 Shadowsteel Shuriken
These are alternative starter items you can use if you prefer these over ![]() Leather Cowl.
Leather Cowl.
Both of these starters each have 2 upgrades that are also strong and useful, depending on what you like, need, or what build you're going for. More information on these and their upgrades can be found in the items section of the guide.
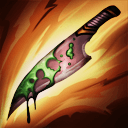
 Death's Toll
 Y
Y
 B
B
 A
A
 X
X

Tap each threat level to view Artemis’s threats
Tap each synergy level to view Artemis’s synergies
![]() Introduction
Introduction
Table of Content:
Additional information:
|
|
Certified Season4 Top-Guide
This
|
|
// Pros & Cons \\ // Ability Description \\ // Combos \\ // Builds & Items \\ // Gameplay - Early, Mid, Late \\
// Summary \\ // Lore, Base stats, Changelog \\ |
![]() Pros & Cons
Pros & Cons
|
|
|
// Pros & Cons \\ // Ability Description \\ // Combos \\ // Builds & Items \\ // Gameplay - Early, Mid, Late \\
// Summary \\ // Lore, Base stats, Changelog \\ |
![]() Skills / Abilities
Skills / Abilities
Description: Passive / Self / Buff
This passive allows |
|
Description: Active / Enemy / CC (root + cripple) / Damage Aside from being
This ability provides a decent amount of CC. However, the limitation of having maximum 3 traps up at a given time, the low damage, and the easy counter make this ability relatively weak and useless in most scenarios. If an enemy does walk in, however, they make for a nice and easy target for basic attacks. They're also vulnerable to your passive ability and/or other abilities. Be careful when placing this trap, as enemies who trigger it and take damage from it, will turn minion aggro** on you, regardless of where the trap was set off. This ability's main usage is only the root. The damage is too low to justify leveling this ability early. Because of this, this ability will be leveled last. Usage: How and when.
|
|
Description: Active / Self / Buff
With this ability, you can allow yourself to chase/escape easier due to the movement speed, and deal high damage in a short time frame due to the high attack speed buff. As this is Usage: How and when.
|
|
Description: Active / Enemy / CC (slow) / Damage
This ability is what you'll be using constantly. It is fairly costly for Usage: How and when.
|
|
Description: Active (Ultimate) / Enemy / CC (stun) / Damage / CC immunity
The stun is great for setting up kills for yourself or teammates. Since the boar acts as a pet, it can be used as mobile cover, aid in battle, etc.... There's a wide variety of ways to use this ability. As this is an ultimate, you cannot level it whenever. It is a very powerful tool, and since each level increases its decent damage and stun duration, it's very important to level this ability. Therefore, you should level this ability whenever it's available. Usage: How and when.
|
|
Combo: Transgressor's fate + Basic attacks This combo is pretty straightforward. Simply cast and drop Estimated difficulty rating: MEDIUM. Reasoning: This combo is flagged medium not because it's hard to pull off, but requires some luck to be on your side. This combo cannot be executed as long as the enemy does not run into your trap, or you're to far out of range when the trap is triggered.
Combo: Transgressor's fate + Basic attacks & Vengeful Assault This combo is very identical to the first one, except that this time you will be combining Estimated difficulty rating: MEDIUM. Reasoning: This combo is flagged medium not because it's hard to pull off, but requires some luck to be on your side. This combo cannot be executed as long as the enemy does not run into your trap, or you're to far out of range when the trap is triggered.
Combo: Transgressor's fate + Basic attacks (& Vengeful Assault) + Suppress the Insolent (+ Basic attacks) Expanding on previous combo(s), this combo is almost identical to the previous ones, but uses Estimated difficulty rating: MEDIUM. Reasoning: This combo is flagged medium not because it's hard to pull off, but requires some luck to be on your side. This combo cannot be executed as long as the enemy does not run into your trap, or you're to far out of range when the trap is triggered.
Combo: Calydonian Boar + Any above combo The title should explain this pretty well. Simply start by using Estimated difficulty rating: EASY. Reasoning: This combo is flagged easy instead of medium. This is because once the enemy is stunned and immobilized it should not be hard to pull of any of the other combo's after it.
|
|
The Words (*)
*CC: Or Crowd Control, is your ability to, simply said, control a crowd. This would mean having the ability to force something/somebody or mutliple objects/people into doing something as you demand it. **Aggro: Aggressiveness. "To pull Aggro": Making something/somebody aggressive towards you. ***Poke: To touch something/somebody gently. Usually done to cause a reaction. Mostly doesn't have any permanent/lethal consequences. In the context of SMITE this would be damaging enemies from a safe distance to force them to retreat. *Vicinity: An area, an area around a certain location. "Your vicinity": the area around you. *Zone / zoning: To zone something/somebody is to force them to take a certain path or to got to a certain area. A zone is a named area (e.g. "jungle" zone). **Gank: Similar to "flanking". To attack an (unsuspecting) enemy from the side or back. ***Split-push: To push (an objective) from different angles, forcing potential enemies/defenders to split their defenses. |
|
// Pros & Cons \\ // Ability Description \\ // Combos \\ // Builds & Items \\ // Gameplay - Early, Mid, Late \\
// Summary \\ // Lore, Base stats, Changelog \\ |
![]() Builds & Items
Builds & Items
|
|
Passive: Gain 10% additional attack speed when near an allied god. When alone, gain 5% movement speed instead. This will pretty much give you 15% total attack speed when you're laning together with your support. This will not only help with clearing minion waves, it'll also help with early boxing if the enemy duo is being particularly aggressive. When your support rotates, you will have 5% extra movement speed instead which, while not a lot, is always useful. Combining Upgrade: |
|
ninja tabi
|
My preference goes out to With Aside from 25% attack speed, Difference with Since the addition of |
|
|
This is your core item with the Devo's build.
Evolved: When fully stacked, the item will be providing these stats:
|
|
Death's Temper |
|
|
Diamond Arrow Ornate Arrow |
|
|
Warrior Tabi
|
Compared to
|
|
|
Compared to a fully stacked
|
|
asi
|
Compared to a fully stacked
|
|
qin's sais
|
This item is one that complement high attack speed gods/builds, or those who have a short progression chain (
However, there's the passive, and that is what makes The passive makes you deal a scaling percentage of your enemies' health points (scaling from 3 to 5%, depending on the target's maximum amount of HP), regardless of protections. If you're facing enemy gods who still seem to be a tower of indestructible force even though you've bought |
|
|
The downside to Stacks are also per target, so if you switch targets, you'll need to apply the stacks again. Luckily, |
|
Dominance
|
A strong item that brings a variety of stats to the table. Featuring high Physical power, some mana, a good amount of MP5 and a hefty amount of Physical penetration, this is definitely a good item choice.
Compared to
|
|
wind demon
|
Wind demon is
If you do decide to purchase this item, it will give you more critical hit chance, and attack and movement speed. Compared to
|
|
|
If you're going with critical hits,
|
|
Fail-Not
|
On top of that, this item has some good base stats. It adds 40 Physical power, 10% Physical penetration, 20% Cooldown reduction and 10% critical strike chance. Note: Due to its low base critical strike chance, it is recommended that you pair it with either |
|
Poisoned star
|
This item works extremely well with |
|
|
An "evolving" item,
For every kill you get, |
|
Shadowsteel Shuriken
|
Unfortunately, if you consider this item, you must have at least one other crit item for it to be worth it, otherwise the critical hit chance will be too low to reliably counter healing. Aside from critical hit chance and the anti-heal passive, it also has some attack speed and Physical power. |
|
Toxic Blade
|
The anti-heal needs to be stacked, stacking up to 2 times and reduces the enemy's healing by 17.5% per stack, for a total of 35% anti-heal when both stacks are applied. A stack lasts for 6 seconds, and can only be applied through basic attacks, not abilities. It also brings the benefit of more health and attack speed, which will also help in combat, as well as movement speed which can help during escapes or chases. On top of that, the item also holds a flat 15 penetration. This would make this a valuable item to buy as an alternative option during the early to mid game in case a healer is bothering you. The downside of this item is that, aside from the penetration and attack speed, it doesn't provide much benefit to your offensive capabilities (no power). |
|
|
|
|
|
While not exactly the best item to pick,
|
|
|
Apparently a controversial choice, but a choice that'll work nonetheless.
Whenever you cast an ability, your next following basic attack will do 40% extra damage. This'll make an incredibly noticeable difference if you can weave a basic attack through all the abilities you would and should be casting in combat. A slightly less useful, but still helpful, additional passive is that this item will increase your MP5 based on your missing mana. |
|
|
Sporting a whopping 40% attack speed, this item will boost your arrow-rate by a ton. Additionally, it has a lightning chaining effect that activates on every fourth basic attack. This lightning hits your target and 4 nearby enemies for 15 damage, +60% of your physical power. A good fit in lots of builds, but be careful not to exceed the attack speed cap by too much if you're not going |
|
Ichaival
|
When boxing an enemy, for each hit (basic attack only) you land, you gain a buff and the enemy you hit a debuff. This buff gives you an additional 15 Physical power and the debuff will lower the enemy's attack speed by 10%. This (de)buff can stack up to 3 times, giving you 45 Physical power at max stacks and lowers the enemy's attack speed by up to 30%. Stacks last for 5 seconds. Additional hits refresh the duration. |
|
Silverbranch Bow
|
Adding another 30% attack speed, 30 Physical power and 10 flat penetration through its base stats, this is already a good item in and of itsself. With that comes a simple but potentially very powerful passive as well: For each 0.02 attack speed you go over cap, you gain 2 Physical power. This'll work extremely well when you consider all the attack speed items you might have, combined with your |
|
ward
|
|
|
Should you be in need of wards (e.g. high enemy jungler activity near your lane), then you should buy these. If the enemy jungler, or nobody on the enemy team for that matter, makes for any danger of sudden ganks, there is no immediate need to buy these and would be better off buying potions for sustain. |
You do, however, have the added bonus of being capable to find enemy wards with this. If you see an enemy ward being placed (upon enemy ward placement, if you're looking at it you can see the ward appear for a split second), use the |
|
healing potion
|
|
|
|
|
|
Chalice of healing
|
Chalice of mana
|
|
|
|
|
|
aegis amulet
|
|
The upgraded version of this relic decreases its cooldown. |
The upgraded version of this relic decreases the cooldown. |
|
heavenly wings
|
Horrific emblem
|
|
This is the formerly called "Sprint". It gives a 20% increased movement speed to you and allies near you. This is a good option to attempt escapes, but is most effective when combined with You should not grab this relic unless nobody else on your team has it and The upgraded version of this relic gives you a Fatalis effect while it is active. |
Instead of applying buffs to you and your allies, it applies debuffs to your enemies. When used, all enemies within range will be slowed by 30% and their attack speed will be reduced by 15%. It has a cooldown of 120 seconds. These debuffs make it an incredibly strong relic to use in all sorts of situations, both for combat, chasing and sticking to an enemy, or even escaping. The downside is that enemies can cleanse this with CC immunity abilities or The upgraded version of this relic reduces the attack speed from affected enemies by 25% instead of 15%, and additionally reduces the damage they deal by 15%, increasing its combat potential even more. |
|
Belt of Frenzy
| |
|
Activating this relic will give you and your allies in range a 10% damage boost and a 15% attack speed buff for 5 seconds. Its upgraded version increases the duration to 8 seconds and additionally adds 10 penetration to all gods affected. | |
|
// Pros & Cons \\ // Ability Description \\ // Combos \\ // Builds & Items \\ // Gameplay - Early, Mid, Late \\
// Summary \\ // Lore, Base stats, Changelog \\ |
![]() Gameplay - How to play
Gameplay - How to play
|
Early game summary
| |||
|
Farming: Yes
|
Objectives: Limited
|
Rotations: No
|
Jungling: Limited
|
|
Level: 1-9
| |||
|
Mid game summary
| |||
|
Farming: Yes
|
Objectives: Limited
|
Rotations: Limited
|
Jungling: Limited
|
|
Level: 10-15
| |||
|
Late game summary
| |||
|
Farming: Yes & No
|
Objectives: Yes
|
Rotations: Yes
|
Jungling: Yes
|
|
Level: 16-20+
| |||
|
// Pros & Cons \\ // Ability Description \\ // Combos \\ // Builds & Items \\ // Gameplay - Early, Mid, Late \\
// Summary \\ // Lore, Base stats, Changelog \\ |
![]() Summary
Summary
|
// Pros & Cons \\ // Ability Description \\ // Combos \\ // Builds & Items \\ // Gameplay - Early, Mid, Late \\
// Summary \\ // Lore, Base stats, Changelog \\ |
![]() Lore, Stats, Guide changelog
Lore, Stats, Guide changelog
|
Stats
| ||
|
Offensive
|
Defensive
|
Other
|
|
|
|
|
Note: Numbers in parentheses are the amount gained at each level.
| ||
February 3, 2021 [ Update 6 - V6.0 ]
|
 Older updates
|
// Pros & Cons \\ // Ability Description \\ // Combos \\ // Builds & Items \\ // Gameplay - Early, Mid, Late \\
// Summary \\ // Lore, Base stats, Changelog \\ |
SMITEFire is the place to find the perfect build guide to take your game to the next level. Learn how to play a new god, or fine tune your favorite SMITE gods’s build and strategy.
Copyright © 2019 SMITEFire | All Rights Reserved


"Since always, young Padawan, you're just blind."
And so it is. I never even noticed. Well thank you for notifying me. It has been removed.
Right there, as an option, in the "Offensive Items 1" box. It's also mentioned in the Items section of the guide, and in the notes on this specific section of items at the top of the guide (hover your cursor over the "Notes" button).
He mentioned it was better to go with one or the other.
Also, remember, she no longer has crit in her passive. Your last example build only has 40% crit chance. Is that reliable enough for you?
Therefore, I opted to have Qin's in the build as well to effectively deal with both.
If cost is an issue, there's a couple alternative items listed that you might opt to switch in in exchange for Deathbringer, or leave crit out altogether.
Price is less of a concern near the end game, though my preference would be to finish crits before picking up Qin's, just to make what I've already built efficient first. In a way, I see Qin's before 2nd crit as a similar concept to buying a T2 of one item, buying a T3 item, then going back and finishing that T2 off.
There isn't a "end all be all" build order for the two. Come to think of it, I'll add this to the notes.
Sorry, Zero, but I still don't think Hydra's is a viable option for her.
@Kriega1, I added your build in the guide, indicated as submitted by you.
Thank you both for your feedback!
Can be effective, though I do agree that for the Devo's build, O'bow or Qin's and for the Transcendence build WD may be more attractive choices, it still is capable of providing noticeable benefit and thus, listed as an optional. Personal preference here, I've had good success using it myself in the past, too.
If one feels they have enough attack speed from
Its viability increases in the
Note that a swap is not required, but optional.
Also, thanks for giving a critique on my guide, I"ll be implementing those changes shortly since I have time now.
However, on my PC, it looks like this:
@Branmuffin17, @Bernardozomer: Thank you for your input in regards to bringing this to my attention.
2. You're welcome. Looking forward to seeing your changes.
Is this inconsistency a BB-Code or SF problem?
So is Artemis your main bae?
Wow... so this is what a master BB coder's guide looks like. Impressive.
So is Artemis your main bae?
Of course it is. Everyone at least must have one to keep them at least sane in this insane game and world.
*EDIT*: I usually don't call them main bae most of the time now. I call them waifu now.
Yes, this is what a good BB-coder's guide looks like. I don't want to claim this master title because, well, you never know.
Also think the item adjustments overall are solid. Still not fully convinced with
Curious on your experience and feel of getting
Overall I'd say these items are interchangeable, and it mostly comes down to what you feel is most comfortable for you. If you prefer the early attack speed while sacrificing critical chance, you should get Exe, or if the attack speed doesn't bother you that much and you'd like some critical chance for some heavy hitters early on, Rage is your item of choice.
Personally, I usually take Rage third, as at this stage in the game, provided you don't get yourself in a bad position, enemies won't be able to kill you within seconds, allowing you to get out a good amount of hits regardless of attack speed, all the while the critical hits do large amounts of damage and can help you secure some early kills.
And of course, if they're a bit too tanky early on, Exe third.
PS: Glad you like the visual changes. Took a while getting the design to look good, and transfer all the information to their rightful places, and just typing the code in general. Also took some trying to get those quicktags ready (if you didn't know, the "Ability Description" and "Ability uses" is clickable. Primarily for lazy people.)
I finally updated this guide! Queue the party music!
I have a really great guide that a lot of users seem to use for reference, yet I've been procrastinating like a bear would be while he's hibernating. Do bears do that? I don't know, I'm not an animalologist. Yes, I just made that word up too.
Anyway, I'm a horrible human being for not updating this guide in so long, but I finally did it anyway. Yup-Yup!
Been thinking about Art lately myself. What do you think of, for a more traditional build,
Of course, with
Reason for this:
- If she has a Support with good wave clear, Ninja sets her AS up for the long haul, since that build doesn't get the 2nd AS item until last.
- Devo's got an early game buff.
- TB got a price decrease. This also makes her a pretty decent tower shredder early, if she finds the opportunity.
- I was going back and forth between a Shuriken tree item and
 Rage, but in the end, felt 55-70% crit chance was just too difficult to pass up over 40-55%, and I wouldn't want to have to commit to a 3x crit build.
 Odysseus' Bow is just the single best item for AS and will drastically increase her DPS once everything else is up.
Reason I didn't chooseAnyway, thoughts?
[*]I was going back and forth between a Shuriken tree item and
I personally like going with Wind Demon because it gives me the leeway to build
But if you haven't played with
I understand Warrior early for laning, but late, Ninja is usually just a bit better on overall DPS (as long as you're not blasting past the AS cap).
Anyway...try
I am working on updating the guide to represent the latest changes, but I'm also doing a visual overhaul of the guide, the abilities chapter mainly, which slurps up quite some time.
I personally never use
Edit: One thing I would change is getting
+1 from me.