|
|
- First, many conquest games don't last to the point where you can actually upgrade your starter item. In this scenario,
 Eye Of The Jungle is much more useful item via stats. Eye Of The Jungle is much more useful item via stats.
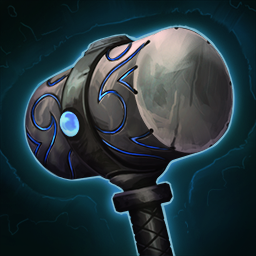
- Second, [Bumba's Hammer] provides no direct damage stats, only indirect damage output stats, those being 10% penetration and 20% cooldown, which in this meta can be easily acquired by other items. On the contrary,
 Protector Of The Jungle provides 65 physical power and a whopping 35% attack speed. The power is only increased by its passive, which when utilized by the Primary Build example given, totals 263, and that is without Protector Of The Jungle provides 65 physical power and a whopping 35% attack speed. The power is only increased by its passive, which when utilized by the Primary Build example given, totals 263, and that is without  Seething Howl active. (Side note: this passive is extremely beneficial in general, however, it is even more potent when it comes to securing jungle objectives, stealing jungle objectives, and engaging in combat in the jungle in general, whether it's a one on one duel or a team fight.) Seething Howl active. (Side note: this passive is extremely beneficial in general, however, it is even more potent when it comes to securing jungle objectives, stealing jungle objectives, and engaging in combat in the jungle in general, whether it's a one on one duel or a team fight.)
- Third,
 Bumba's Hammer's lack of protections make shaping a build around this item tricky. There's Bumba's Hammer's lack of protections make shaping a build around this item tricky. There's  Shifter's Shield, which was buffed recently as well, however, the lack of magical protections prior to being under 75% health is concerning. Shifter's Shield, which was buffed recently as well, however, the lack of magical protections prior to being under 75% health is concerning.  Void Shield shares the same problem. As for the magical/physical power items, they don't suite Void Shield shares the same problem. As for the magical/physical power items, they don't suite  Fenrir well, and the item slots are better filled by other items. Caduceus Shield is a strong item with killer stats, but it's utility on Fenrir isn't worth the purchase. As for Fenrir well, and the item slots are better filled by other items. Caduceus Shield is a strong item with killer stats, but it's utility on Fenrir isn't worth the purchase. As for  Ancile, it's passive is poked out of you too easily, and the defenses it provides (or lack there of), again hinder its defensive effectiveness. Ancile, it's passive is poked out of you too easily, and the defenses it provides (or lack there of), again hinder its defensive effectiveness.  Runic Shield just becomes overshadowed by other items with both higher physical power and penetration, despite it having solid defensive stats and a passive that can be beneficial to Fenrir as well. With Runic Shield just becomes overshadowed by other items with both higher physical power and penetration, despite it having solid defensive stats and a passive that can be beneficial to Fenrir as well. With  Hide of the Urchin built (at full stacks) in conjunction with Protector Of The Jungle and it's passive, provides you with a total of 179 physical armor and 111 magical armor, largely all within one item. As for integrating defenses into a Fenrir build, see the discussions below concerning Hide of the Urchin and the Bruiser Fenrir Build Path below as well. Hide of the Urchin built (at full stacks) in conjunction with Protector Of The Jungle and it's passive, provides you with a total of 179 physical armor and 111 magical armor, largely all within one item. As for integrating defenses into a Fenrir build, see the discussions below concerning Hide of the Urchin and the Bruiser Fenrir Build Path below as well.
- Fourth, overcapping on cooldowns is an issue as well when building this item. With
 Jotunn's Wrath and Jotunn's Wrath and  Soul Eater you'll be at 50% cooldown cap. This isn't an "end all be all" rule, however, wasting gold on stats that don't aide you isn't beneficial in most scenarios. Soul Eater you'll be at 50% cooldown cap. This isn't an "end all be all" rule, however, wasting gold on stats that don't aide you isn't beneficial in most scenarios.
- The 5% heal that is part of Bumba's Hammer's passive scales with health, which encourages you to build at least somewhat tanky in order to increase the utility of the heal. However, the lack of focus on damage has the potential to make you less useful in taking out the backline in late game fights. That, in conjunction with a starter that give no damage stat or flat penetration, your damge output will be severely lacking, and so will your sustain from Seething Howl and Soul Eater.
For the reasons discussed above, and in account of the discussion had later in the guide, concerning building Hide of the Urchin and the flaws I see in building Fenrir to bruiser like, Protector of the Jungle is a much stronger item on Fenrir.
Boots: Ninja TabiNinja Tabi
I prefer these boots over Warrior's Boots for four reasons: DPS, camp clearing,  Unbound Runes upkeep and sustain. While your abilities are on cooldown, the additional attack speed allows you to keep hitting hard, especially with your Seething Howl steroid active, increasing your DPS. Combined with Soul Eater and Seething Howl's lifesteal buff, you heal for 50% of the damage dealt via autos ( Soul Eater fully evolved, 45% while stack building). Your Unbound Runes will restore faster, allowing you to stun more, increase the damage output of Unbound Runes upkeep and sustain. While your abilities are on cooldown, the additional attack speed allows you to keep hitting hard, especially with your Seething Howl steroid active, increasing your DPS. Combined with Soul Eater and Seething Howl's lifesteal buff, you heal for 50% of the damage dealt via autos ( Soul Eater fully evolved, 45% while stack building). Your Unbound Runes will restore faster, allowing you to stun more, increase the damage output of  Brutalize, and double the protections of your Brutalize, and double the protections of your  Ragnarok if you need to escape or engage. Finally, the attack speed helps your camp clear speed, especially as you lack mana sustain early. Ragnarok if you need to escape or engage. Finally, the attack speed helps your camp clear speed, especially as you lack mana sustain early.
Second Full Item Built: Jotunn's WrathJotunn's Wrath
A classic, cream of the crop, keystone item on any Fenrir build. The definition of a core item. You build this second largely for the cooldown, mana, and penetration. On almost any damage character, especially mages and assassins, building flat pen early on is a must. Gives you such a power spike, and is stilll handy annihilating squishy prey in the late game. The 20% cooldown is amazing on Fenrir, further allowing you to more constantly keep your steroid up, stun, get that damage in via your brutalize, make you more mobile, and clear camps faster. Mana helps you sustain for longer, allowing you to fire off the abilities more often. Recently buffed to provide 50 power as well, no reason you don't build this second. None.
Third Full Item Built: Hide of the UrchinHide of the Urchin
An unconventional item on Fenrir, and especially unconventional on assassins as a whole. However, in a similar vein to Jotunn's Wrath, this item is a keystone build on Fenrir. Fenrir has a reputation for being compatible with bruiser based builds, and this is definitely true, but only to an extent. Especially in the current meta, with a focus on damage and penetration, building at least some beefiness is almost mandatory. Fenrir's Seething Howl steroid and damage output via his autos, Brutalize,  Unchained, and Ragnarok enable these build paths to be viable, but as mentioned before, only to an extent. Hide of the Urchin is the singular item needed to invest in Fenrir's beefiness. Hide of the Urchin in general is an amazing defensive item that is criminally underbuilt for how much stats are packed into an item that costs 2450 gold. Upon first purchasing, Hide of the Urchin provides 30 of both physical and magical protections, 250 health and 250 mana. Fully evolved, it then provides a total of both 51 physical and magical protections. Additionally, you generate a shield every 2 seconds when you haven't been in combat in the last 5 seconds. Every 2 seconds, you gain 10% of 100 health + 5 per level. At level 20, this equates to a 200 point shield at full stacks, again adding to your ability to last longer in fights. While this item provides no offensive component, the fact that it covers health and both types of protections, to a meaningful degree, allow the rest of the build to focus entirely on your offensive components (Side note: as for why you wouldn't opt for traditionally bruiser items, such as Ancile and Void Shield, see the discussion above concerning Protector of the Jungle and the discussion below concerning traditional bruiser builds on Fenrir). The physical protections provided by Protector Of The Jungle are just another cherry on top all of the stats mentioned prior. When paired with Fenrir's base stats and the Protector Of The Jungle's passive, your protections total at 179 physical armor and 111 magical armor. Being a melee assassin with no ranged abilities or poke, you're going to need the beefiness to get in and out of skirmishes, as your going to be right in the mix of things. Additionally, the extra sustain allows you to benefit more from Seething Howl's lifesteal, Soul Eater's auto-based lifesteal, and Soul Eater's ability based lifesteal, as you'll be alive longer to steal more health back to yourself. When it comes to obtaining these stacks, this is where the argument as for why you wouldn't want to build this item comes into play. This item requires 7 kills and/or assists to evolve, which can take time and potentially be difficult, especially if behind. However, as a jungler, you have access to ganking all three lanes, which in turn makes this process easier, as you aren’t confined to the one or two opponents in your lane. As for build order, you build this third, as the mana will help you sustain longer in the jungle and in combat, and most importantly, gives you more time to build the stacks for it. With Hide of the Urchin being a scaling item, it helps you scale into the late game, thus helping make up for Fenrir's potentially shaky late game presence. Before moving on to the next item, I'll discuss as to why protections are so beneficial, a solid investment, and how just one protections-based item can't vastly change the amount of damage you take: Unchained, and Ragnarok enable these build paths to be viable, but as mentioned before, only to an extent. Hide of the Urchin is the singular item needed to invest in Fenrir's beefiness. Hide of the Urchin in general is an amazing defensive item that is criminally underbuilt for how much stats are packed into an item that costs 2450 gold. Upon first purchasing, Hide of the Urchin provides 30 of both physical and magical protections, 250 health and 250 mana. Fully evolved, it then provides a total of both 51 physical and magical protections. Additionally, you generate a shield every 2 seconds when you haven't been in combat in the last 5 seconds. Every 2 seconds, you gain 10% of 100 health + 5 per level. At level 20, this equates to a 200 point shield at full stacks, again adding to your ability to last longer in fights. While this item provides no offensive component, the fact that it covers health and both types of protections, to a meaningful degree, allow the rest of the build to focus entirely on your offensive components (Side note: as for why you wouldn't opt for traditionally bruiser items, such as Ancile and Void Shield, see the discussion above concerning Protector of the Jungle and the discussion below concerning traditional bruiser builds on Fenrir). The physical protections provided by Protector Of The Jungle are just another cherry on top all of the stats mentioned prior. When paired with Fenrir's base stats and the Protector Of The Jungle's passive, your protections total at 179 physical armor and 111 magical armor. Being a melee assassin with no ranged abilities or poke, you're going to need the beefiness to get in and out of skirmishes, as your going to be right in the mix of things. Additionally, the extra sustain allows you to benefit more from Seething Howl's lifesteal, Soul Eater's auto-based lifesteal, and Soul Eater's ability based lifesteal, as you'll be alive longer to steal more health back to yourself. When it comes to obtaining these stacks, this is where the argument as for why you wouldn't want to build this item comes into play. This item requires 7 kills and/or assists to evolve, which can take time and potentially be difficult, especially if behind. However, as a jungler, you have access to ganking all three lanes, which in turn makes this process easier, as you aren’t confined to the one or two opponents in your lane. As for build order, you build this third, as the mana will help you sustain longer in the jungle and in combat, and most importantly, gives you more time to build the stacks for it. With Hide of the Urchin being a scaling item, it helps you scale into the late game, thus helping make up for Fenrir's potentially shaky late game presence. Before moving on to the next item, I'll discuss as to why protections are so beneficial, a solid investment, and how just one protections-based item can't vastly change the amount of damage you take:
|
|
- First, we must set up a baseline. The way Smite calculates damage taken is actually a fairly simple formula, which has been handily made available in the Word of Thoth Smite Guide, created by user Flareb00t (A guide I would highly recommend reading through, as it discusses how the math behind penetrations, CC reductions, etc., work within the game). The baseline formula is as follows:
- "Damage Taken" represents the true damage taken from an ability or auto, prior to protections or mitigations being applied. "Armor" represents the protetions applied to that specific damage type, physical protections for physical damage and magical protections for magical damage. Finally, the "Actual Damage Taken" is the damage applied to you or your target after all the damage, penetration, mitigations, and protections have been accounted for. For the equations that follow, primary build laid out will be utilized (Totaling 179 protections and 111 magical protections (assuming Protector Of The Jungle's passive is active and Hide of the Urchin is evolved)):
|
|
|
Protector of the Jungle |
|
Ninja Tabi |
|
Jotunn's Wrath |
|
Hide of the Urchin |
|
Soul Eater |
|

|
|
- This build will be compared with a fairly commonly seen build on assassins, including Fenrir, which is as follows (Totaling out at 104 physical protections and 77 physical protections, assuming all 3 stacks of
 The Sledge are active): The Sledge are active):
|
|
|
|
|
Warrior Tabi |
|
Jotunn's Wrath |
|
The Sledge |
|
|
|
|
|
- For the first examples, we will assume you are being hit with
 Neith's ultimate, Neith's ultimate,  World Weaver, fully leveled, without any items built on her. The first equation will result in the damage taken if you have built no additional protections. The second equation is the resulting damage received with the primary build of this guide in use, and the third equation the result of the damage received with the second build built: World Weaver, fully leveled, without any items built on her. The first equation will result in the damage taken if you have built no additional protections. The second equation is the resulting damage received with the primary build of this guide in use, and the third equation the result of the damage received with the second build built:
- As can be seen, protections is extremely useful, as just an item or two can drastically lower the incoming damage you'll be taking. With the Hide of the Urchin build, about 64%, essentailly 2/3's of all the damage was mitigated. As for the following build, about 49% of the damage was mitigated, roughly half. There's a 15% difference here, resulting in the Hide of the Urchin's build maintaing 64 more health points than the latter.
- The next set of examples will present the damage taken from
 Vulcan's ultimate, Vulcan's ultimate,  Earthshaker, fully maxed, with no items built on Vulcan. The first example will result in the damage taken if no additional protections are built, the second equation represents the build with Hide of the Urchin in it, and the third equation the build with The Sledge: Earthshaker, fully maxed, with no items built on Vulcan. The first example will result in the damage taken if no additional protections are built, the second equation represents the build with Hide of the Urchin in it, and the third equation the build with The Sledge:
- Same as before, it's clear that a lack of protections resulted in you receiving roughly 150 more health points worth of damage. The Hide of the Urchin build mitigates roughly 53% of the damage taken, where as the following build mitigates roughly 44% of the damage. A less drastic difference this time around, a least percentage wise, as the Hide of the Urchin build mitigates roughly 9% more of the damage delivered. However, the Hide of the Urchin build does maintain 80 more health points than the latter, which is substantial.
- The combination of Protector Of The Jungle's protections, Hide of the Urchin's protections, and Protector Of The Jungle's give additional survivability to get in engagements, rotate out, and rengage. The likelyhood of you being nuked into oblivion is drastically lowered as well. An item like Hide of the Urchin packs in health and protections into one package, allowing you to focus on your damage ouptut throughout the rest of your build path.
Fourth Full Item Built: Soul EaterSoul Eater
Like Hide of the Urchin, this is a largely unconventional item on Fenrir, but although intended for warriors like  King Arthur and King Arthur and  Sun Wukong, it is built on other assassins like Sun Wukong, it is built on other assassins like  Pele, in which it synergizes well with her passive Pele, in which it synergizes well with her passive  Everlasting Flame and her ability to poke with Everlasting Flame and her ability to poke with  Pyroclast. As with Pyroclast. As with  Tsukuyomi, who has a lot of ranged, poking options in order to receive sustain from Soul Eater. However, both Soul Eater's flat stats and passive synergize incredibly well with Fenrir's kit. Percent penetration is useful as any penetration helps break through enemy defenses, but in this case aides especially in the effort to bring down tankier prey. 20 physical power is of course a plus (35 when fully evolved), along with the 10% lifesteal (15% fully evolved), both of which, when combined with Seething Howl, allows you to heal for 50% of the damage done via autos. The 10% cooldown puts you at 30% total in conjunction with Jotunn's Wrath, allowing you to spam out your abilities even more so, which ties into this item's passive: healing for 5% of the damage done via abilities (20% when evolved). It's this passive that truly makes this item shine, especially with the recent buffs to Fenrir. You'll receive 20% healing when landing Unchained (which is an AOE remember, not just single target) and Brutalize, which will proc 4 times (and is also AOE, where the AOE damage is 60% of the single target damage to those in range). And as a cherry on top, the healing from Ragnarok is useful as well. Soul Eater's stacks are easily obtained as well, as it only requires an assist or kill on an enemy minion, god, or jungle camp. God and large jungle camp kills/assists will provide you with 5 stacks. Additionally, if killing or assisting on an enemy god, the kill will provide stacks to both Soul Eater and Hide of the Urchin simultaneously. Items like [Soul Eater] scale well into late game, helping keep Fenrir relevant in the later stages of the game. It's inexpensive base price makes this an even more attractive item as well. The stats and passive on this item synergize extremely well with Fenrir, resulting in it being core to this build. Tsukuyomi, who has a lot of ranged, poking options in order to receive sustain from Soul Eater. However, both Soul Eater's flat stats and passive synergize incredibly well with Fenrir's kit. Percent penetration is useful as any penetration helps break through enemy defenses, but in this case aides especially in the effort to bring down tankier prey. 20 physical power is of course a plus (35 when fully evolved), along with the 10% lifesteal (15% fully evolved), both of which, when combined with Seething Howl, allows you to heal for 50% of the damage done via autos. The 10% cooldown puts you at 30% total in conjunction with Jotunn's Wrath, allowing you to spam out your abilities even more so, which ties into this item's passive: healing for 5% of the damage done via abilities (20% when evolved). It's this passive that truly makes this item shine, especially with the recent buffs to Fenrir. You'll receive 20% healing when landing Unchained (which is an AOE remember, not just single target) and Brutalize, which will proc 4 times (and is also AOE, where the AOE damage is 60% of the single target damage to those in range). And as a cherry on top, the healing from Ragnarok is useful as well. Soul Eater's stacks are easily obtained as well, as it only requires an assist or kill on an enemy minion, god, or jungle camp. God and large jungle camp kills/assists will provide you with 5 stacks. Additionally, if killing or assisting on an enemy god, the kill will provide stacks to both Soul Eater and Hide of the Urchin simultaneously. Items like [Soul Eater] scale well into late game, helping keep Fenrir relevant in the later stages of the game. It's inexpensive base price makes this an even more attractive item as well. The stats and passive on this item synergize extremely well with Fenrir, resulting in it being core to this build.
Final Full Item Built: Offensive Options and Boot ReplacementHeartseeker
It's hard not to buy this item every single time. This item is beyond solid. The item's passive scales with physical damage power. If your total physical damage power would be 200 or above with this item built, almost definitely build this item ( Seething Howl will boost this by 80 at max levels as well, making it more potent.) Additonally, the mana sustain is beneficial as well, as you lack it prior, outside of the flat mana you've purchased. If a team is building less health/protections focused, such as an ADC in the solo lane, opt for flat penetration instead. However, you'll be building this item in your 6th slot almost every game. When it comes to determining whether  Titan's Bane or Titan's Bane or  Heartseeker is a better fit, see the discussion below about Titan's Bane. Heartseeker is a better fit, see the discussion below about Titan's Bane.
The Crusher
If not built in your optional item slot, it'll be your first option when it comes to subbing out your boots. Penetration and power to boost your ability damage and ability healing via Soul Eater. Attack Speed keeps your Unbound Runes up, increase auto-based lifesteal sustain and your DPS. An item that's been a solid pick up for a long time.
Titan's Bane
When facing a tankier team or a solo laner that is ahead, the decision really comes down to Titan's Bane or Heartseeker. Heartseeker is best suited for when you have 200+ ability damage ( Seething Howl steroid makes this even more potent) and when your opponents are largely building health over protections ( Stone of Gaia, any of the hammers ( The Sledge), any of the dagger/blade options ( Stone of Gaia, any of the hammers ( The Sledge), any of the dagger/blade options ( Relic Dagger), etc.), as the passive's damage scales with your opponent's max health. Titan's Bane is better suited for scenarios where protections are emphasized ( Void Shield, Shifter's Shield, Relic Dagger), etc.), as the passive's damage scales with your opponent's max health. Titan's Bane is better suited for scenarios where protections are emphasized ( Void Shield, Shifter's Shield,  Breastplate of Valor, etc.) Titan's Bane can be especially dangerous if you are able to time the additional 20% pen from it's passive with your abilities well (ex. Using Brutalize with Titan's Bane passive up, at full Unbound Runes, with the Seething Howl steroid at work). The cheaper price is worth considering as well (2550 < 2900). As stated before, a situational pick that requires awareness of your opponents' builds. Breastplate of Valor, etc.) Titan's Bane can be especially dangerous if you are able to time the additional 20% pen from it's passive with your abilities well (ex. Using Brutalize with Titan's Bane passive up, at full Unbound Runes, with the Seething Howl steroid at work). The cheaper price is worth considering as well (2550 < 2900). As stated before, a situational pick that requires awareness of your opponents' builds.
Bloodforge
An item that doesn't seem to be built among many gods anymore, and likely for two reasons: high cost and lack of penetration. Meta right now heavily favors damage and penetration, which has seen this item, as least from what I've seen, be built less and less. 75 physical damage is always solid, and the lifesteal boosts the potency of Soul Eater and Seething Howl. The shield and the boosted movement speed are handy, especially with the larger jungle this season. Shield scales with level, so you'd want to build this late in your optional spot. Additionally, if you aren't the one who has been securing the kills, the passive will be useless to you, so definitely avoid purchasing this if your teammates have largely been securing kills. Due to this item not being a meta based pick right now, I'd only recommend this pick up if you're way ahead.
The Executioner
An option to substitute your boots out with late game. A option better suited towards a tankier team, where as  The Crusher would be a better fit for targeting squishy prey. Getting your autos in throughout your combo, and if able to, prior to using your abilities will increase the potency of your damage. Maintaining attack speed also helps keep health sustain up and your Unbound Runes full. Would avoid building if you opted for Titan's Bane in your option slot, but at times may be necessary. The Crusher would be a better fit for targeting squishy prey. Getting your autos in throughout your combo, and if able to, prior to using your abilities will increase the potency of your damage. Maintaining attack speed also helps keep health sustain up and your Unbound Runes full. Would avoid building if you opted for Titan's Bane in your option slot, but at times may be necessary.
Brawler's Beat Stick
A much needed pickup if the enemy team is reliant on healing. If  Chang'e or Chang'e or  Aphrodite are against you, this is a must pick. It is definitely a solid pick when facing off against other gods like Aphrodite are against you, this is a must pick. It is definitely a solid pick when facing off against other gods like  Anubis, Anubis,  Guan Yu, Guan Yu,  Horus, etc. Additionally, if the enemy team is building items such as Stone of Gaia, Caduceus Shield, Soul Eater, Horus, etc. Additionally, if the enemy team is building items such as Stone of Gaia, Caduceus Shield, Soul Eater,  Rod of Asclepius, etc., this item may be considered as well. This item did receive a slight nerf in the 8.0 update, but is still your best anti-heal option by far. Rod of Asclepius, etc., this item may be considered as well. This item did receive a slight nerf in the 8.0 update, but is still your best anti-heal option by far.
Berserker's Shield
Another unconventional item on assassins, let alone Fenrir, yet one that does have potential in being able to sub out for your  Ninja Tabi Ninja Tabi boots. Surprisingly, this item synergizes very well with the rest of the build. 50 physical power on its own is huge, especially considering Ninja Tabi's mere 20 in comparison. 10% physical penetration is a great bonus, totaling out to 30% or 40% physical penetration. This would be including Soul Eater's 10%, and 10% from Heartseeker or 20% from Titan's Bane. While 5% less, this item still provides you with attack speed, synergyzing well with your lifesteal and Unbound Runes upkeep. The physical protection is an added bonus, and can be useful if an any ADC has been performing well. As for the item's passive, the increased physical power applies to both your autos and abilities, further increasing both the ferocity of your kit and the sustain received via Soul Eater and Seething Howl. This passive, along with it's base stats makes it a potential pickup if the enemy team has two or more auto-based assassins/warriors as well (  Erlang Shen Erlang Shen,  Arachne Arachne,  Mercury Mercury, Osirirs, etc.). Same goes for the increased attack speed. The passive helps you heal more when were cutting it close, and put out more damge to eliminate the threats around you. Definitely a solid option to replace your boots with.
Gladiator's Shield
An item occasionally seen on bruiser Fenrir builds, like Beserker's Shield, this is a potential boot replacement option that should only be used in niche scenarios, such as an enemy team consisting of a largely physical damage output or if extra health and physical protection would be better suited to deal with a late game assassin (  Kali Kali) or hunter (  Izanami Izanami,  Artemis Artemis, etc.). 200 health and 40 extra physical protections, on top of your Hide of the Urchin and Protector Of The Jungle, bolsters your beefiness. The additional 10% cooldown would put you at 40%, in which for a multitude of reasons, that have been belabored over prior, is beneficial to you. The passive is a great bonus when it comes to your damage output, as the 15% damage scaling accounts for the Hide of the Urchin's protections, Protector Of The Jungle's protections, and  Gladiator's Shield Gladiator's Shield's protections. Without accounting for Protector Of The Jungle's passive, and with Hide of the Urchin at full stacks, the damage dealt by this passive would total 60 damage, which for how focused this build is on damage, is quite impressive (Side note: the passive on this item will only trigger after landing Unchained, Brutalize, or Ragnarok on an enemy below 60%. Empowered autos via Seething Howl do not trigger this). The item's lack of substantial physical power and lack of any penetration do hurt it's effectiveness on you, thus, as mentioned before, making it a very niche and situational option on you, and solely as a replacement for your boots.
RelicsPurification Beads
Mandatory first relic pick up. Being an assassin, especially early on, and even with your tank items built late game, you're still prone to being bursted down after being hard CC'd. Rare, but at times can be used offensively, to help avoid CC's to secure a kill you're pursuing. Typically you will be using this as yet another escape option. When dueling against gods such as Arachne and  Awilix Awilix, try to time this relic in order to mitigate their combos  Cocoon Cocoon and  Feather Step Feather Step/  Gravity Surge Gravity Surge respectively.
(Side note: When it comes to dueling with gods like Awilix, who hard counters you, it is best to avoid these engagements. However, if you're willing to basically burn everything in your kit, from both relics to health pots to your Ragnarok, you'll need it to compete with her.)
Bracer of UndoingBracer of Undoing
Ironically almost a relic of the past,  Aegis Amulet Aegis Amulet and  Blink Rune Blink Rune have seen priority over this relic. I don't like Aegis Amulet on Fenrir, let alone in general, because while it is very likely to save you, when teamfights begin to occur, Aegis Amulet won't let you back into the fight, as you'll have to go back to fountain. On the contrary, a well-timed Bracer of Undoing will restore you enough mana and health to rotate out and reengage when given the oppurtunity, especially with all the healing via Soul Eater, Seething Howl, and [Chalice of Healing]] you'll be receiving. Sometimes all it take to win a team fight is not to kill their damage output, but to get them low enough to the point where they'll have to disengage. With Bracer of Undoing, you'll have a "second life", to unleash your kit and rotate in for teammates, where the enemy team will have to scramble to defend against a second onslaught from you. As for Blink Rune, there is almost no need to build this on Fenrir. Fenrir is already extremely mobile, with 2 leaps and an ultimate that grants movement speed. With your 30% cooldown, these should be up quite often as well. Blink Rune is needed on gods with hard CC initiations (  Cerberus Cerberus,  Ares Ares,  Ymir Ymir, etc., and on gods with low mobility (  Osiris Osiris). Bracer of Undoing provides more benefits to you. Of course, the trick with Bracer of Undoing is timing it correctly. Too late and you die, too premptively and you get virtually nothing. However, as a melee assassin who will be in the mix of things upon initiatiing, you're likely to take a chuck of damage, and you'll likely pop this as you rotate out, especially if you were hit by abilities such as  Kukulkan Kukulkan's  Spirit of the Nine Winds Spirit of the Nine Winds, Ymir's  Shards of Ice Shards of Ice, and Vulcan's Earthshaker, just to name a few.
|
|


 Boots
Boots
 Chalice of Healing
 Multi Potion
 Purification Beads
 Elixir of Speed
 Brawler's Beat Stick
 Warrior Tabi
 Caduceus Club
 Bloodforge
 The Executioner
 Berserker's Shield
 Bracer of Radiance
 Y
Y


You can replace
I have doubts about some of the items. For example:
1)
2) Why is
3) You mention
I also want to point out a few things regarding your threats. You mention
You definitely have more experience than I do, so let me know what you think.
1)
2) You're definitely right about
3) I do have
4) When it comes to the gods listed under "Easy Pickings", as you mentioned, there are gods listed there have have capabilities to interuppt your engage. What I was taking into account with that section too, however, is that you can either wait for those abilites to be used, then engage, thus giving them no counter otpions, or, if your damage output is high enough, you can quickly engage and take them out before they fully have the oppurtunity to utilize these abilites to fend you off (
Again, appreciate the input and recommendations.
Also a really nice in-depth guide for Fen. It's obvious you know him very well.
So the biggest issues here are
With this in mind I would suggest building him like this:
Try this or other builds, keep the itemisation in mind and see if you find an improvement.
If you need any help feel free to ask!
1) I honestly rarely ever build
2) I'd argue
3) The point of this guide is, from my experience with
Why void shield?
Why heart seeker?