
This guide has not yet been updated for the current season. Please keep this in mind while reading. You can see the most recently updated guides on the browse guides page
Vote received! Would you like to let the author know their guide helped you and leave them a message?


Alternatively, you can buy either ![]() Hand of the Gods or two
Hand of the Gods or two ![]() Wards, and 3
Wards, and 3 ![]() Multi Potions, just 5
Multi Potions, just 5 ![]() Multi Potions, or both
Multi Potions, or both ![]() Hand of the Gods and 2
Hand of the Gods and 2 ![]() Wards, leaving you with 50 gold when leaving the base.
Wards, leaving you with 50 gold when leaving the base.
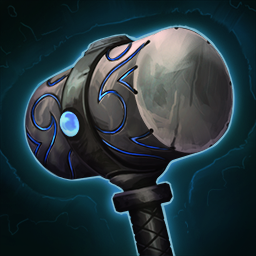
![]() Bumba's Hammer is the upgrade you will buy for
Bumba's Hammer is the upgrade you will buy for ![]() Bumba's Dagger in the late game.
Bumba's Dagger in the late game.
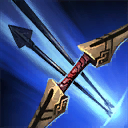
 Bumba's Dagger
 Mace
Mace
 Healing Potion
 Mana Potion
Instead of a ![]() Health Potion and a
Health Potion and a ![]() Mana Potion, you can buy 2
Mana Potion, you can buy 2 ![]() Health Potions, a
Health Potions, a ![]() Health Potion and a
Health Potion and a ![]() Multi Potion, or 2
Multi Potion, or 2 ![]() Multi Potions
Multi Potions
Alternatively, you can buy ![]() Hand of the Gods or two
Hand of the Gods or two ![]() Wards instead of potions. I do not advise this unless you are skilled with her, or are prepared to back and know how to catch up from being slightly behind.
Wards instead of potions. I do not advise this unless you are skilled with her, or are prepared to back and know how to catch up from being slightly behind.
![]() Manikin Hidden Blade is the upgrade you will buy for
Manikin Hidden Blade is the upgrade you will buy for ![]() Manikin Scepter in the late game.
Manikin Scepter in the late game.
 Manikin Scepter
Mace
Healing Potion
Mana Potion
Manikin Scepter
Mace
Healing Potion
Mana Potion
Instead of 2 ![]() Health Potions and 2
Health Potions and 2 ![]() Mana Potions, you can buy 2
Mana Potions, you can buy 2 ![]() Health Potions and 2
Health Potions and 2 ![]() Multi Potions, 3
Multi Potions, 3 ![]() Health Potions and a
Health Potions and a ![]() Mana Potion, or 4
Mana Potion, or 4 ![]() Multi Potions.
Multi Potions.
Alternatively, you can buy ![]() Hand of the Gods and two
Hand of the Gods and two ![]() Wards, or just one of the two, leaving you with 100 gold to use on either 2
Wards, or just one of the two, leaving you with 100 gold to use on either 2 ![]() Health Potions or 2
Health Potions or 2 ![]() Multi Potions.
Multi Potions.
![]() Protector Of The Jungle is the upgrade you will buy for
Protector Of The Jungle is the upgrade you will buy for ![]() Eye Of The Jungle in the late game.
Eye Of The Jungle in the late game.
 Eye Of The Jungle
Mace
Healing Potion
Mana Potion
Eye Of The Jungle
Mace
Healing Potion
Mana Potion
![]() Boots is a solid pickup that provides movement speed, allowing for faster rotations. While it may not give power, it will be the quickest to upgrade to a full item, giving you power faster than the enemy jungler if you are clearing effectively. If going the
Boots is a solid pickup that provides movement speed, allowing for faster rotations. While it may not give power, it will be the quickest to upgrade to a full item, giving you power faster than the enemy jungler if you are clearing effectively. If going the ![]() Bumba's Dagger start, you will have enough gold to buy
Bumba's Dagger start, you will have enough gold to buy ![]() Combat Boots, which is great, as the added power will help you clear quicker, making up for the lost sustain from potions.
Combat Boots, which is great, as the added power will help you clear quicker, making up for the lost sustain from potions.
Light Sword is also a good item to buy, as the attack speed it provides is utilized by all three starter options, and can give you the edge in boxing situations against the enemy jungler.
![]() Katana has a good blend of power and movement speed for the early game, and the upgrades are all very flexible, leaving you room to build many different ways moving into the mid and late game.
Katana has a good blend of power and movement speed for the early game, and the upgrades are all very flexible, leaving you room to build many different ways moving into the mid and late game.
![]() Morningstar is always a reliable item to start with, as the MP5 will more than assist you with clearing and sustain. Upgrading into any item in this tree early on will grant you a substantial power spike.
Morningstar is always a reliable item to start with, as the MP5 will more than assist you with clearing and sustain. Upgrading into any item in this tree early on will grant you a substantial power spike.
Buy consumables accordingly.
 Boots
Boots
 Katana
 Light Blade
 Morningstar
 Golden Blade
 The Executioner
 Dominance
 Warrior Tabi
 Ninja Tabi
 Jotunn's Wrath
 Arondight
 Heartseeker
 Bloodforge
 Stone Cutting Sword
 Hydra's Lament
 Qin's Sais
 Ichaival
 Berserker's Shield
 The Sledge
 Void Shield
 Toxic Blade
 Purification Beads
 Aegis Amulet
 Blink Rune
Sell ![]() Warrior Tabi late for
Warrior Tabi late for ![]() Elixir of Speed and buy an item of your choice.
Elixir of Speed and buy an item of your choice.
If you replaced ![]() Mace in the early game, buy the corresponding upgrade to replace
Mace in the early game, buy the corresponding upgrade to replace ![]() The Crusher. I suggest going the
The Crusher. I suggest going the ![]() Katana->
Katana->![]() Golden Blade route.
Golden Blade route.
 Bumba's Hammer
 The Crusher
Warrior Tabi
Jotunn's Wrath
Arondight
Heartseeker
Blink Rune
Purification Beads
The Crusher
Warrior Tabi
Jotunn's Wrath
Arondight
Heartseeker
Blink Rune
Purification Beads
Sell ![]() Ninja Tabi late for
Ninja Tabi late for ![]() Elixir of Speed and buy an item of your choice.
Elixir of Speed and buy an item of your choice.
If you replaced ![]() Mace in the early game, buy the corresponding upgrade to replace
Mace in the early game, buy the corresponding upgrade to replace ![]() The Crusher. I suggest going the Light Sword->
The Crusher. I suggest going the Light Sword->![]() The Executioner route.
The Executioner route.
 Manikin Hidden Blade
The Crusher
Ninja Tabi
Stone Cutting Sword
Dominance
Hydra's Lament
Purification Beads
Aegis Amulet
Manikin Hidden Blade
The Crusher
Ninja Tabi
Stone Cutting Sword
Dominance
Hydra's Lament
Purification Beads
Aegis Amulet
Sell ![]() Warrior Tabi late for
Warrior Tabi late for ![]() Elixir of Speed and buy an item of your choice.
Elixir of Speed and buy an item of your choice.
If you replaced ![]() Mace in the early game, buy the corresponding upgrade to replace
Mace in the early game, buy the corresponding upgrade to replace ![]() The Crusher. I suggest going the
The Crusher. I suggest going the ![]() Morningstar->
Morningstar->![]() Dominance route.
Dominance route.
 Protector Of The Jungle
The Crusher
Warrior Tabi
Berserker's Shield
Stone Cutting Sword
The Sledge
Purification Beads
Aegis Amulet
Protector Of The Jungle
The Crusher
Warrior Tabi
Berserker's Shield
Stone Cutting Sword
The Sledge
Purification Beads
Aegis Amulet
 Y
Y
 B
B
 A
A
 X
X

|
|
|
|
In SMITE, ![]() Nemesis is an Auto-Attacking (AA) assassin. Her goal is to come in through the back or side, shred key opponents down, and leave without a moment to spare. With quick basic attacks, easy to apply damage, and tools to help you escape, there's no reason to see why she has become especially favored in this new season.
Nemesis is an Auto-Attacking (AA) assassin. Her goal is to come in through the back or side, shred key opponents down, and leave without a moment to spare. With quick basic attacks, easy to apply damage, and tools to help you escape, there's no reason to see why she has become especially favored in this new season.
|
General Health: 470 (+76) Mana: 210 (+38) Speed: 375 (+0) Range: 12 (+0) Attack/Sec: 1 (+2.16%) |
Regen HP5: 8 (+0.7) MP5: 4.3 (+0.4) Protection Physical: 11 (+3) Magical: 30 (+0.9) |
. . Basic Attack Damage: 39 (+ 2.25) + 100% of Physical Power Progression: 1/1/.75/1.25x damage and swing time . . |
|
Pros:
|
Cons:
.
|
Initially, ![]() Nemesis was designed to be a warrior. Even though she is now an Auto Attacking monster, her kit still shows sign of her bruiser days. With this in mind, she can be utilized with glass cannon and tanky backlines builds alike.
Nemesis was designed to be a warrior. Even though she is now an Auto Attacking monster, her kit still shows sign of her bruiser days. With this in mind, she can be utilized with glass cannon and tanky backlines builds alike.
And as always, these are just suggestions, what you build is at your discretion.
Thank you all for reading my guide to ![]() Nemesis. It's been great coming back to the SmiteFire community, and I hope you can use this knowledge to the best of your ability. All feedback is appreciated.
Nemesis. It's been great coming back to the SmiteFire community, and I hope you can use this knowledge to the best of your ability. All feedback is appreciated.
As always, I'm IceColdPappsi, and man is this Hennessy fighting back hard.
SMITEFire is the place to find the perfect build guide to take your game to the next level. Learn how to play a new god, or fine tune your favorite SMITE gods’s build and strategy.
Copyright © 2019 SMITEFire | All Rights Reserved


Also, could someone help me out with the mobile format? It looks mobile friendly to me but won’t let me publish it as such a guide.
Responsive coding is going to be a key here.
For anything stretching x width, if you mean for it to range the entire width, change the code to width=100%. Anything else where you've defined a wide width, you'll want to use responsive coding.
The builds are subject to change in further patches.