Smitefire logo

Join the leading SMITE community.
Create and share God Guides and Builds.

Create an MFN Account


Or

Not Updated For Current Season

This guide has not yet been updated for the current season. Please keep this in mind while reading. You can see the most recently updated guides on the browse guides page

x

Vote received! Would you like to let the author know their guide helped you and leave them a message?

Banner for He Bo guides

Those who oppose me shall be swept aside! Year 10 - Season of Monsters - updated (Joust)

172 29 2,496,012
8.5
by TangoDownY3k updated March 7, 2023

Smite God: He Bo

Build Guide Discussion 84 More Guides
Tap Mouse over an item or ability icon for detailed info

He Bo Build

PENDULUM OF AGES START

Build Item Sands of Time Sands of Time
Build Item Spellbook Spellbook
Build Item Healing Potion Healing Potion
Build Item Mana Potion Mana Potion
2

CORE (CHOOSE BOOK OF THOTH + ONE OTHER)

Notes For more information on which item to choose, see Analysis section

Notes

For more information on which item to choose, see Analysis section

Build Item Book of Thoth Book of Thoth
Build Item Spear of Desolation Spear of Desolation
Build Item Divine Ruin Divine Ruin

WILD CARD - OFFENCE (SITUATIONAL) - CHOOSE 1

Notes If you are purchasing an offensive wild card item, DO NOT purchase a defensive wild card item

Notes

If you are purchasing an offensive wild card item, DO NOT purchase a defensive wild card item

Build Item Soul Gem Soul Gem
Build Item Chronos' Pendant Chronos' Pendant
Build Item Spear of the Magus Spear of the Magus
Build Item Bancroft's Talon Bancroft's Talon

WILD CARD - DEFENCE (SITUATIONAL) - CHOOSE 1

Notes If you are purchasing a defensive wild card item, DO NOT purchase an offensive wild card item

Notes

If you are purchasing a defensive wild card item, DO NOT purchase an offensive wild card item

Build Item Stone of Binding Stone of Binding
Build Item Magi's Cloak Magi's Cloak
Build Item Mantle of Discord Mantle of Discord
Build Item Breastplate of Valor Breastplate of Valor
Build Item Breastplate of Determination Breastplate of Determination

FINAL

Build Item Soul Reaver Soul Reaver
Build Item Obsidian Shard Obsidian Shard
Build Item Pendulum of Ages Pendulum of Ages

RELICS

Build Item Aegis of Acceleration Aegis of Acceleration
Build Item Chaotic Beads Chaotic Beads
Build Item Temporal Beads Temporal Beads
Build Item Corrupted Blink Rune Corrupted Blink Rune
Build Item Claw Shard Claw Shard
Build Item Horn Shard Horn Shard

ALTERNATE ITEMS

Build Item Staff of Myrddin Staff of Myrddin
Build Item Charon's Coin Charon's Coin
Build Item Doom Orb Doom Orb

CONSUMABLES (AFTER COMPLETED BUILD)

Build Item Potion of Power Potion of Power
Build Item Elixir of Power Elixir of Power

EXAMPLE BUILD - STANDARD

Build Item Pendulum of Ages Pendulum of Ages
Build Item Book of Thoth Book of Thoth
Build Item Divine Ruin Divine Ruin
Build Item Soul Gem Soul Gem
Build Item Soul Reaver Soul Reaver
Build Item Obsidian Shard Obsidian Shard
Build Item Aegis of Acceleration Aegis of Acceleration
Build Item Temporal Beads Temporal Beads

EXAMPLE BUILD - TANK SHRED RUSH

Build Item Pendulum of Ages Pendulum of Ages
Build Item Book of Thoth Book of Thoth
Build Item Divine Ruin Divine Ruin
Build Item Spear of the Magus Spear of the Magus
Build Item Obsidian Shard Obsidian Shard
Build Item Soul Reaver Soul Reaver
Build Item Aegis of Acceleration Aegis of Acceleration
Build Item Temporal Beads Temporal Beads

EXAMPLE BUILD - COOLDOWN + MP5

Build Item Pendulum of Ages Pendulum of Ages
Build Item Book of Thoth Book of Thoth
Build Item Divine Ruin Divine Ruin
Build Item Chronos' Pendant Chronos' Pendant
Build Item Soul Reaver Soul Reaver
Build Item Obsidian Shard Obsidian Shard
Build Item Aegis of Acceleration Aegis of Acceleration
Build Item Temporal Beads Temporal Beads

EXAMPLE BUILD - PROTECTIONS

Build Item Pendulum of Ages Pendulum of Ages
Build Item Book of Thoth Book of Thoth
Build Item Divine Ruin Divine Ruin
Build Item Breastplate of Valor Breastplate of Valor
Build Item Soul Reaver Soul Reaver
Build Item Obsidian Shard Obsidian Shard
Build Item Aegis of Acceleration Aegis of Acceleration
Build Item Temporal Beads Temporal Beads

He Bo Threats

Tap each threat level to view He Bo’s threats

Max
5
Major
22
Even
58
Minor
28
Tiny
10

He Bo Synergies

Tap each synergy level to view He Bo’s synergies

Ideal
15
Strong
11
OK
40
Low
22
None
0

Content Overview

Intro
x About me
x Brief Preface


Analysis
x In-depth Item Assessment
x Situational Item Choices


Game Stages
x Stages Throughout The Match
x Informational Heat Maps


Q&A
x FAQ
x Scenario Coverage


Match Ups
x Ally Synergies
x Best Matched Gods


Summary
x God Overview
x Pros/Cons


Skills
x God Skills/Abilities
x Combos


Macro Play
x Macro Mechanics
x Scroll + Ward Maps


Tips/Tricks
x Useful tricks
x Ability Information
x Rarely Known Tips


Conclusion
x Closing Statement
x Farewell
x Changes and Additions

Introduction

Hello and welcome to the ultimate He Bo guide!

My name is TangoDownY3k, aka TangoDownY2k. I have been playing Smite since its beta launch on Xbox, and have accumulated over 2000 hours to date. He Bo was the first God I ever purchased, and since then I have come to gain over 37000 worshipers with him.

Mages have always been my preferred class, with 9 God rank 10 mages to date and over 1000 hours played on that class alone.

Since its rework in season 3, joust has been my go to mode in both casual and ranked playlists. I look forward to sharing everything I know about He Bo and joust with you!


Summary Analysis Skills/Combos Game Stages Macro Gameplay Q&A Tips/Tricks Match Ups

Summary

Pros

+ Insane damage
+ Shreds tanks
+ Good zoning
+ Strong team presence
+ Good initiation
+ Good cool down times
He Bo is such a strong mage. He is capable of outputting massive amounts of damage in quick, successive bursts. His high damage and short cool down times always allow for offensive strikes and constant lane dominance. He Bo excels at providing deadly assistance in team fights, and can quickly clean up low health enemies in the aftermath. He is also a force to be reckoned with when alone; being able to hold his own majority of the time. He Bo is a strong addition to any team, and can play a vital role in turning the tides of a match.

Cons

- Bad mobility
- Squishy
- Close(ish) range
- Second-rate early game
Like any God, he has his downsides. Most of them revolving around his mobility issues. He Bo has been known to be very susceptible to ganking/surprise attacks. His low mobility and lack of escape moves make him an easy target for most assassins. Being squishy doesn't help either. He Bo is required to get in a little closer compared to most ranged mages, so this can make over extending an issue at times.


Phase:
Early
Late
Difficulty:
Easy
Hard
Type:
Burst
Poke
Style:
Engage
Follow


He Bo is a strong God who is capable of intense amounts of damage. He fits into the late game mage burst category and is often described as a "glass cannon". He fits a very "high risk high reward" playstyle, but is otherwise a very easy and simple God to pick up for new players. Where he lacks in defense and sustainability, he quickly picks up in high damage, penetration, AoE, and good amounts of Crowd Control. His lockdown potential is very high, and can bully enemies at a consistent rate with low cooldowns and low mana costs.

Build Stat Considerations

Build Stat Considerations


PRIMARY CONSIDERATION
MAGICAL POWER: Every mage requires magical power. He Bo is no exception to this, and requires large amounts of magical power to provide effective burst damage towards enemies. Maintaining oppressive lane control is essential for the typical late game God, and players should prioritize items with higher magical power, scaling as the game progresses in line with He Bo's abilities. More expensive items should (on average) be purchased during the later stages of the match.

PRIMARY CONSIDERATION
FLAT PENETRATION: Magical power alone will not win a game. Players should give near equal consideration to flat penetration. Flat penetration will grant He Bo the ability to circumvent large portions of base protections found on most squishies, allowing him to be more oppressive at all stages of a match.

SECONDARY CONSIDERATION
PERCENT PENETRATION: Percent pen will help players maintain their pressure on tanks. Getting around protections on a percentage basis is more effective than flat when enemies build protections in the larger numbers, typically seen on tanks and supports. Fitting percent penetration on He Bo will allow you to cut deeper, dealing more of the damage that you should be dealing on a much more consistent basis.

TERTIARY CONSIDERATION
COOLDOWN REDUCTION: While not as important as the aforementioned stats, cooldown reduction can help He Bo maintain consistent pokes and lane clearing during the early stages of the match. With cooldowns on the lower side to begin with, a small boost from items can give players a competitive edge and amplify He Bo's daunting team fight presence.

Analysis

Standard Build Item Analysis


Pendulum of Ages
cost: 2200


+90 Magical Power
+20 MP5
+20% Cooldown Reduction
PASSIVE - This item grants 4 MP5 per 10% of your missing Mana. This item grants 10 Magical Power per 10% of your available Mana.

Pendulum of Ages is the premier starter item for He Bo in joust moving into year 10. It provides necessary mana and mp5 for much needed sustain, along with high magical power and CDR for consistent damage dealing. What makes Pendulum of Ages the go to starter comes in it's unique synergetic interactions with He Bo's passive Steady Flow. Where other mages lose power from this item as fights continue, He Bo will actually gain power. More on this can be seen in the Full Build Analysis section.


Book of Thoth
cost: 2500


+80 magical power
+250 Mana
+20 Mp5

PASSIVE - You permanently gain 10 Mana per Stack, and receive 5 Stacks for a god kill and 1 Stack for a minion kill (max 75 Stacks). 7% of your Mana from items is converted to Magical Power. At 75 Stacks this item Evolves, gaining 10 Magical Penetration and 3% extra Mana to Power conversion.

Book of Thoth fits well into the integrity of this build with high magical power, and mp5 + mana that suits Pendulum of Ages well. With the nature of the passive of Pendulum of Ages, higher mana means He Bo can maintain the full effects of each 10% threshold for longer. For instance, without Book of Thoth, 10% of He Bo's mana is 171.8. With Book of Thoth, 10% is 271.8. With the mean average of He Bo's abilities being 86.25, this means that He Bo can make use of each 10% threshold for around 3x longer.


Divine ruin
cost: 2550


+100 magical power
+15 penetration

PASSIVE - Enemies hit by your abilities have 40% reduced healing for 5 seconds. Your next successful damaging ability on an enemy triggers a chain lightning, damaging the target and up to 4 nearby enemies for 40 damage + 20% of your Magical Power. This can only occur once every 20 seconds.

Divine Ruin is the staple anti heal item for mages. This item functions almost identically in terms of base stats to Spear of Desolation. It should be built in most situations regardless, but excels when enemy team comps have prominent healing, and inflicting meaningful damage is difficult. The additional chain lightning makes building Book of Thoth stacks much easier. In an average, evenly matched game, you should be able to afford Divine Ruin when Book of Thoth stacks are half built (35). After purchasing Divine Ruin, stacks should be on pace to be completed by the 9:35 mark.


soul gem
cost: 2300


+80 Magical Power
+150 Health
+12% Magical Lifesteal
+10% Cooldown Reduction

PASSIVE - On successful hit of an Ability you gain 1 stack. At 4 Stacks your next Ability that damages an enemy God will deal bonus damage equal to 25% of your Magical Power, and will heal yourself and allies within 20 units for 30% of your Magical Power and will consume the 4 stacks.

This is another amazing item that will greatly benefit your sustain and damage. It's health, lifesteal, and cooldown will extend your stay in lane and give you enough ammo to keep wave clear and pokes coming at a steady pace. it's passive loosely works with Steady Flow to release a devastating blast on your final ability at max stacks (preferably Crushing Wave). Stacks can also be gained from Atlas of the Yellow River.


Soul Reaver
cost: 2650


+95 Magical Power
+300 Mana
PASSIVE - Your abilities deal an additional 2% of the targets maximum Health as Magical Damage. If the target has over 2000 Health, your ability bonus damage scales up. This effect reaches a maximum of 9% Maximum Health damage at 2750 Health. Subsequent hits on the same target do half the bonus damage for the next 3s.

Soul Reaver will add a significant spike in power, contributing to the builds high damaging nature, as well as percentage health damage for tankier enemies building lots of health. This item works great if enemy supports are especially difficult to deal with, or if enemy teams are running dual tank comps. The mana from this item helps Pendulum of Ages in the same way Book of Thoth does, but also helps Book of Thoth directly by aiding in more mana for the power conversion.


obsidian shard
cost: 2550


+90 Magical Power
+20% Magical Penetration

PASSIVE - Your first ability cast gains 10% Magical Penetration. This can only occur once every 10 seconds.

Obsidian Shard is a fantastic item for tank shredding. He Bo will be able to use it to his advantage in order to avoid having his dominating presence drowned out by enemy supports. It provides 20% base pen (30% off cooldown), and will see to it that players are not investing too much into dealing with squishy gods. With that being said, the magical power will still keep you on the incline compared to other mages.


Wild card - Offense or Defence?


Offensive items


TLDR:
-Variety in build direction
-Maintains integrity
-Ability to target specific Gods


In most situations, players should always be looking to purchase from this list before looking to the defensive list unless necessary. He Bo is, by definition, a burst damage mage, and therefore should prioritize items which will give him the offensive advantage. Buying from this list ensures that players will not stray from that purpose, while still having a variety of options to choose from. Assuming the match does not require a defensive wild card item, players should choose their offensive item in this slot based on what the events of their current match requires. Offensive items can help with further tank shredding if the opposing team is more tanky in nature, lifesteal if more sustain is required, or even cooldown reduction if the enemy team has more consistent damage output/lane clear.


Defensive items


TLDR:
-Doesn't sacrifice offensive capabilities
-Discourages focusing
-Offers direct countering


As stated previously, defensive items should be seen as second to offensive items. They should only be purchased if absolutely necessary. The defensive items in this list are inherently detrimental to the damaging capabilities of the build compared to purchasing an offensive item in this slot. With that being said, however, even after the addition of a defensive item in place, it is rare that He Bo will fall behind in damage numbers and magical power to opposing mages. Players will not have to sacrifice their offensive pressure with this addition. He Bo should be equipped with a defensive item in situations where enemy oppression exceeds his own. Building sufficient protections will discourage enemies from focusing He Bo, or at the very least, make accomplishing this task more difficult. Certain items may provide direct counter measures to enemy strategies, i.e. CC protection and immunity will allow players to avoid being locked down long enough to either escape or turn the battle into more favorable conditions.


Wild Card - Offense - item analysis


Spear of the magus
cost: 2550


+110 Magical Power
+12% Magical Lifesteal
+10% Magical Penetration
PASSIVE - Any god you damage becomes marked and debuffed to take 7.5% increased damage from all sources for 7s. This effect can only affect one god at a time and can only occur once every 15s.

Spear of the Magus is a great alternative item to Soul Gem in the wildcard slot. It provides equal lifesteal, but trades out cooldown for more power and pen. The pen especially, along with this item's passive, provide huge benefits against double tank comps and synergize well with Soul Reaver.


Bancroft's talon
cost: 2500


+100 Magical Power
+15% Magical lifesteal
+150 Mana

PASSIVE - You gain additional Magical Power and Lifesteal scaled from missing Health. This caps at 100 power and 20% Lifesteal at 25% Health.

Bancroft's Talon is a great situational pickup offering lots of sustain in lane, while providing he Bo with offensive counter measures to highly combative enemies. Players can make use of this item's passive in high risk environments to create higher rewards in blow for blow situations. It may pick up where Pendulum of Ages starts to fall off in terms of bonus power, depending on how long fights last.


Chronos' pendant
cost: 2600


+100 magical power
+20 MP5
+20% Cooldown reduction

PASSIVE - Every 10s the Pendant activates, subtracting 1s from all of your abilities currently on cooldown. The initial countdown will not start until you leave the fountain.

Chronos' Pendant is the go-to item for significant cooldown reduction in a pinch. Luckily, with a high magical power stat, this item can fit rather seamlessly into the builds integrity and offers a fair amount of pushback to enemy Gods who are dominating lane and keeping He Bo on the back foot. Players should be mindful not to build any other CDR, as once Pendulum of Ages is completed, you will be at max CDR. This, however, is beneficial to He Bo, as it allows players to keep He Bo's high damaging abilities on extremely low cooldowns, maintaining considerable damage output at a high and consistent rate.


Wild Card - Defensive - item analysis


stone of binding
cost: 2300


+250 health
+40 Physical protection
+40 magical protection
+10 mp5

PASSIVE – Successfully hitting an enemy god with a Crowd Control ability will place a debuff on them, reducing their Physical and Magical Protections by 0 + 1 per level for 5s.

This is a fantastic item for providing blanket protections in applications where He Bo is being targeted by the enemy team, or is finding specific enemies difficult to deal with. The passive allows He Bo to counter harass enemies by using his crowd control to get the most out of Stone of Binding's passive. The protections + pen nature of this item means it can help with high damage enemies who are building some protections, such as warriors or tankier assassins.


Breastplate of valor
cost: 2300


+65 Physical protection
+300 Mana
+10 MP5
+20% Cooldown reduction


Breastplate of valor is the only completely one sided defensive item on this list, and so it should only be purchased against very physically dominant teams. This may come in the form of many physical Gods, or one very dangerous one who is targeting He Bo on a consistent basis. It's cooldown reduction means players can keep a max 40%. This gives a similar effect to Chronos' Pendant, but in a more defense oriented way. Not only will the protections allow He Bo to maintain his survivability in lane, but the CDR will allow He Bo to consistently use his CC abilities to break up and interrupt offensive pushes on him. The mana fits greatly into the Book of Thoth + Soul Reaver synergy, along with the mp5 fitting with the Book of Thoth + Pendulum of Ages synergy.


Breastplate of determination
cost: 2900


+65 Physical Protection
+300 Mana
+10 MP5
+20% Cooldown Reduction

GLYPH - Each time you are hit by an ability, gain a stack of 5 Protections that corresponds to the damage type you were hit with, up to a max of 4 of each type. Once you reach max stacks of both kinds, gain a burst of 20% Movement Speed and double your Protections gained by this effect for 8s, after which all stacks are removed.

This item has all the benefits of Breastplate of Valor. Due to the dynamic nature of the way this item grants protections, in matches with physically dominant teams He Bo will be able to hold on to the physical protection stacks for much longer. Once the buff reaches max stacks, He Bo is granted with double the protections and movement speed, often guaranteeing his survival. This item at full power provides 153 physical protection and 88 magical protection (base stats included) from one item.


Magi's Cloak
cost: 2150


+10% Cooldown Reduction
+30 Magical Protection
+30 Physical Protection

PASSIVE - Absorbs a single hard Crowd Control or Root effect once every 70 seconds. When this occurs, the owner also receives 1s of CC immunity.

Magi's Cloak is a great defensive choice for matches where players are being consistently targeted by CC heavy Gods. The protections give sustainability for He Bo to last slightly longer as players attempt to either get away, or use the CC immunity to turn a fight. The CDR from this item will not make you hit cap, so feel free to build another CDR item like Spear of Desolation if you so choose. Be mindful that any form of CC can trigger the passive, so attempt to coordinate with team mates to force enemies to use meaningful CC on you, effectively wasting an ability that could have been crucial to a team fight.


Mantle of discord
cost: 2900


+55 Physical Protection
+55 Magical Protection
+10% Cooldown Reduction

Passive – If you take damage below 30% health you unleash a shockwave that stuns all enemies within a range of 20 units for 1s and become immune to Crowd Control for 1s. This effect cannot trigger more than once every 90s.

*NOTE* The passive has a 0.4s cast time before the stun hits. CC immunity occurs instantly upon trigger of the passive.


This item is also helpful for combatting CC heavy Gods, with the added benefit of some significant protections and cooldown reduction. Although this item cannot absorb a crowd control effect, it will grant immunity, making this item slightly better than Magi's Cloak in situations where your team can provide heavy counter CC, playing off Mantle of Discord's stun. Be mindful that this item requires players to sustain significant damage before triggering, and so like usual, initiating with CC is best saved for the team support. However, this item is still very beneficial for turning the tides of otherwise grim situations.


Relic options


Aegis of Acceleration
cost: 800

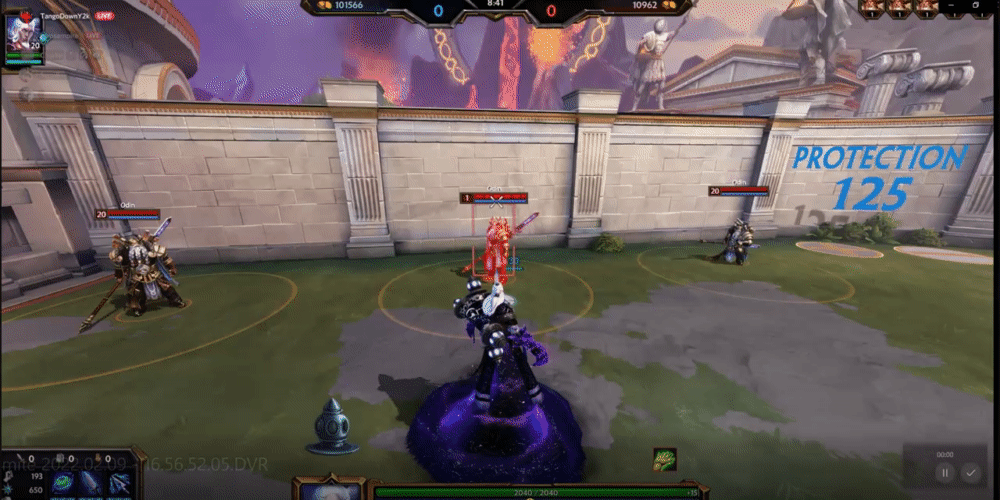
Using this item makes you invulnerable to damage and healing for 1.5s, and prevents you from taking any actions. You may still move. Each instance of damage prevented in this time provides you 7% Movement Speed for 4s, stacking up to 3 times.

Cooldown: 140s


This is a default option for most mages. As a mage in joust, you will often face abilities which will have you sustaining sometimes fatal amounts of damage. Anticipating enemy action and activating Aegis Amulet will prevent your death. The added movement speed burst grants a much needed boost to he Bo's mobility in times when it is of utmost importance, and will ensure your return to safety in most situations when used properly. As a burst mage, you may find yourself in dangerous situations with all abilities on cooldown. This item may buy you enough time for your abilities to come back online, or for an ally to come to your aid.


Chaotic Beads
cost: 800

Using this item removes Crowd Control Effects and makes you immune to new ones for 2s. Any hard Crowd Control or Root Effect that is cleansed during this time, including on activation, sends out a homing projectile to the enemy who applied it, dealing True Damage equal to 7% of their Maximum Health.

Cooldown: 140s


This is another must grab in most games. It cleanses CC and grants immunity to new CC. This will break you free from long CC chains, save you from early rushes that attempt to isolate you from your team and take advantage of your lack of mobility, and often save you from situations which would result in your death. It will allow you to continue your ability chain amidst CC heavy onslaughts or escape from danger. The added damage punishes CC attempts and may ward off enemy engage attempts. This should be picked up in most games. If absolutely necessary, fully upgrade this relic after your first three of four items have been purchased. Otherwise, wait until all items are online.


Temporal Beads
cost: 800

Using this item removes Crowd Control Effects and makes you immune to new ones for 2s. Reduces active cooldowns by 3s.

Cooldown: 140s


This is another must grab in most games, providing near equal value to Chaotic Beads. It cleanses CC and grants immunity to new CC. This will break you free from long CC chains, save you from early rushes that attempt to isolate you from your team and take advantage of your lack of mobility, and often save you from situations which would result in your death. It will allow you to continue your ability chain amidst CC heavy onslaughts or escape from danger. The added cooldown will likely reset all of He Bo's abilities (excluding Crushing Wave), allowing players to completely refresh their ability chain and potentially turning the tides of a team fight or focusing attempt. If absolutely necessary, fully upgrade this relic after your first three of four items have been purchased. Otherwise, wait until all items are online.


Scorching Blink Rune
cost: 800


Using this item will allow you to teleport up to 45 units away instantly, leaving behind a trail of wildfire that deals 20 (+4 per level) True Damage every 0.5s for the next 4s. Enemies are damaged for 1s after leaving the flames. This item cannot be used if you have taken or dealt damage in the last 3s.

Cooldown: 120s


This item is not advised on most mages, and should not be your priority pick for most games with He bo. It should only be purchased in games where the enemy team composition has low lockdown and peel capabilties, or in games where the first three relics are not necessary. It is best to ensure that all abilities including ult are online before engaging using this item. When possible, ult your way back to safety, attempting to land killing blows on you enemies in the process. The fire effect will help greatly in this process. It is not advised to use this item as a means to engage enemies whose full team is present in lane, unless they are all at considerably low health. Wait until the all other items are online before purchasing this full upgrade.


Claw shard
cost: 0


Upon using this relic, you gain 15 + 1.5 Magical Power, 10 + 1.5 Physical Power per level, 20% Magical Lifesteal and 10% Physical Ability Lifesteal for the next 3s.

Cooldown: 120s


Claw Shard is the go-to shard option on He Bo. When timed correctly, this item allows He Bo to be more aggressive in the earlier stages of a match and help secure kills with ease. Players can use this item in conjunction with max Steady Flow stacks in order to gain the most benefits out of it. It is not recommended that players activate this item unless doing so will result in a kill, or otherwise meaningful result such as peeling an enemy off of you or your teammates, saving them from death.


horn shard
cost: 0


Your non-ultimate ability cooldowns are reduced by 0.5s every 0.5s for the next 3s.

Cooldown: 120s


This item, while being beneficial, should still come second to Claw Shard. This item provides similar kill securing potential, but in a slightly different way. Often times in the early stages of a match, He Bo can struggle to be useful due to abilities being down at inconvenient times. This may come in the form of missing a kill opportunity, or dying as a result of having to wait for cooldowns. Horn Shard can help in these regards.


Alternate item analysis


Staff of myrddin
cost: 2650


+10% Cooldown Reduction
+105 Magical Power
+10% Magical Penetration
PASSIVE – When your ultimate ability has finished casting you gain Myrddin’s Rage which provides 20% Increased Damage Dealt, decaying to 2.5% Increased Damage Dealt over 8s. At the end of the 8s you lose Myrddin’s Rage. This can only occur once every 45s.

This item is a great alternate item that can be built in place of Soul Reaver. In most situations this would not be recommended, however certain applications can benefit from this. In losing the mana synergy from Soul Reaver + Book of Thoth, you instead gain significant damage bursts when combined with Spear of the Magus. Comparing Soul Reaver and Staff of Myrddin, the breakdown is as follows: The first hit from Soul Reaver (assuming 805 base power, and all hits from Waterspout) deals 1,000.5 damage. This is higher than Staff of Myrddin's first hit at 910.8. However, the first and second hit from Staff of Myrddin (910.8, 891.8 respectively) deal more than all subsequent hits of Soul Reaver (876.75). The third hit of Staff of Myrddin being at 872.85 is lower, but still comparable.


Doom Orb
cost: 2850


+145 Magical Power
+200 Mana
+25 MP5
+4% Movement Speed

PASSIVE – Killing or assisting an enemy minion provides you with 1 stack, granting you 1% Movement Speed and 4 Magical Power per stack. Stacks last for 15s and stack up to 5 times. Enemy gods provide 5 stacks.

This item works very well if you find yourself jungling frequently, running from enemies, or having a hard time catching up to enemies. Alternatively, this is a great pick if you notice that a significant amount of team fights are happening in lane. You will benefit from this item more during the later stages in the game when your wave clear is better. Having very high magical power, high mana, good mp5, this item should take the place of Soul Reaver once again as it fills the void that Soul Reaver leaves almost perfectly.


Charon's Coin
cost: 2400


+90 Magical Power
+20% Magical Penetration
+7 HP5
+20 MP5

EVOLVED CHARON'S COIN:
+80 Magical Power
+20% Magical Penetration
+35 HP5
+35 MP5
8% Movement Speed

PASSIVE - On god kill or assist a coin is flipped. If heads, you gain a stack of 7 HP5. If tails, you gain a stack of 2% Movement Speed. Each effect can stack up to 4 times and at 8 stacks this item evolves. You also gain 1 gold every time the coin is flipped.

EVOLVED PASSIVE - On god kill or assist a coin is flipped. If heads, you gain 150 Health over 6 seconds. If tails, you gain 5% Movement Speed for 6 seconds. You also gain 1 gold every time the coin is flipped.


Charon's Coin is a fantastic substitute for Obsidian Shard. The addition of this item will provide a steep increase in penetration, and an appropriate amount of power. It also provides high utility, with it's stacking movement speed and evolved movement speed buff. This is a great way to get around He Bo's low mobility. Substituting for both this item and Doom Orb will make for quite the mobile He Bo. The mp5 + hp5 bonuses also help his sustain greatly.


Full Build Breakdowns


Standard build
  • |Magical Power: 769|Pen: 25|% Pen: 20|Lifesteal: 12|CDR: 30|Mana: 2718|
  • |Overview| This is the premier build for He Bo in Joust. The main concept this build is centered around is the synergetic and unique principle interactions between Pendulum of Ages, Book of Thoth, and Steady Flow. With the nature of Pendulum of Ages passive, players lose magical power as they waste mana. With He Bo, however, the opposite is true. Per the item's passive, 100 magical power is given at max mana, and decays by 10 for every 10% mana the player uses. However, Steady Flow grants 92.28 magical power at max stacks. This means that where another mage with equal base power (769) would begin to decay, He Bo is given a 92.28 magical power buffer. In fact, if that same mage were to use 90% of their mana, they would now be at 679 power, down from 769. If He Bo were to use the same 90%, he would be at 771.28 power; not only higher than the other mage, but higher than what he started with.


Tank Shred Rush Build
  • |Magical Power: 799|Pen: 25|% Pen: 30|Lifesteal: 12|CDR: 20|Mana: 2718|
  • |Overview| This build doesn't differ too greatly from the base build. The big difference comes more in the purchase order. The addition of Spear of the Magus allows for earlier tank shredding capabilities, and because of this, should be immediately followed up by Obsidian Shard when dealing with very tanky teams. The % pen from these items will deal with them well, and the passives from Spear of the Magus + Soul Reaver will work well together into the final stages of the match.


Cooldown + mp5 Build
  • |Magical Power: 789|Pen: 25|% Pen: 20|Lifesteal: 0|CDR: 40|Mana: 2718|
  • |Overview| This build prioritizes high damage and max cooldowns to ensure a safe and effective way to maintain highly consistent damage output. Having low base cooldowns already, He Bo can use this build to set the tone of the match; dominating the lane by breaking down tanks defenses and keeping squishy Gods at bay.


Protections + Cooldown Build
  • |Magical Power: 713|Pen: 25|% Pen: 20|Physical protection: 134|CDR: 40|Mana: 3018|
  • |Overview| Much like the last build, the protections + cooldown build prioritizes max cooldowns, but in a defense oriented way. The protections from this item will provide you with sustainability against targeting attempts and high physically damaging Gods, while the max CDR allows He Bo to cast his CC abilities very frequently, allowing him to break up and interrupt offensive pushes on him. The mp5 and mana from this item fits right into the synergy of Pendulum of Ages + Book of Thoth + Soul Reaver.


X item - Why not?


Often I receive questions about why certain items are or are not included in this build. While the item analysis section explains why items are included, there is no section in that chapter to explain why certain items are not. In this section, I will attempt to target the specific items that are most commonly asked about, and explain why they are not best suited for this build/guide. With every item change in the patch notes, there also comes new potential for the build. It is my intention to frequently update this section to reflect new changes, and offer advice about those items.


Rod of tahuti
cost: 2850


+120 Magical Power
+30 MP5
+10% Magical Penetration

PASSIVE - Basic Attacks and Abilities gain 25% additional Magical Power against targets below 50% Health.

Rod of Tahuti has dominated the last item slot of mage builds as the clear go-to for years. And while still holding up today, I believe it's place in this build would be too forced. The price of the item would require that it be built last (or near last) in most games. However, the issue with this is that the final items of the existing build are too valuable to replace. So, naturally, people's first instinct is to push the purchase order of Soul Reaver and Obsidian Shard up a slot, while removing the mid game wild card slot. This would allow them to keep the late game synergy while still slotting in Rod of Tahuti. The issue with doing this is that the wild card item slot is where most of this build's counter building comes from. The wild card slot allows this build to be diverse in nature, adapting to a variety of circumstances with ease. The first thought now would be to add Rod of Tahuti as an alternate item in the wild card slot. However, I do not believe there are enough situations, if any at all, which would require this item to be purchased over any of the other wild card items. I have heard of a lot of people say that Rod of Tahuti is comparable to Spear of the Magus, as they have similar stats and passives that work in slightly similar ways. In a team based competitive environment, I believe it is always better to go with the item who's passive can be taken advantage of by everyone on the team. And in this case, that item would be Spear of the Magus.


Archmage's gem
cost: 2200


+120 Magical Power
+200 Mana
+25 MP5

PASSIVE - Every 1s you gain a stack of Demise, causing your next damaging ability to deal an additional 1.5% of your Magical Power in damage and remove all stacks. This effect stacks up to 20 times.

Archmage's gem is the worse option between the 2 upgrades of Conduit Gem on He Bo. While very powerful on Gods with hard-hitting single abilities, He Bo is a God who thrives when all of his abilities are used in succession (this is highlighted by Steady Flow), and will not gain any benefits from his other abilities when the stacks on Archmage's Gem are consumed.


Gem of focus
cost: 2200


+100 Magical Power
+150 Health
+15 MP5

PASSIVE - Every time you cast an ability that costs mana you gain a stack of Focus for 10s, providing 5% Movement Speed and 5% Damage Increase, stacking up to 3 times.

Gem of Focus, while being the better of the two Conduit Gem upgrades, still is not recommended in this build. This starter item is actually very effective, and synergizes with He Bo's passive Steady Flow quite nicely. The issue is that every item in this build has been carefully chosen to specifically tailor to and center around Pendulum of Ages. Therefore, Gem of Focus would not be able to benefit from these items as well. With another build, this starter can be a very good choice on He Bo.


Warlock's staff
cost: 2500


+95 Magical Power
+150 Health
+200 Mana


EVOLVED WARLOCK'S STAFF:
+155 Magical Power
+225 Health
+200 Mana
+10% Magical penetration

PASSIVE - You permanently gain +1 Health and +0.8 Magical Power per Stack, and receive 5 Stacks for a god kill and 1 Stack per minion kill. (Max. 75 Stacks)


This item seems great on the surface. It provides great magical power, good percent pen, and high amounts of defensive/utility stats like health and mana. Where this item becomes a cause for concern is in it's nature as a stacking item. It requires an investment for your late game at the cost of your early/mid game. He Bo naturally does not fare well with this style of building, as he is seen as a very late game leaning God. However, certain changes to items and stats means that He Bo can begin to come out of his comfort zone in this regard, but only slightly. The early/mid stages of the match are still crucial for He Bo, and could be a deciding factor in the way the rest of the game is played. Players will need any amount of support they can get until they start to snowball, and cannot afford to make any sacrifices. With Book of Thoth already being a risk factor in this regard, He Bo should pick up items that provide immediate benefits rather than double stacking, as too much of an early game investment/sacrifice may tilt the balance too far. If defense/sustain is a concern, there are more effective items in the form of defense.


Skills and Combos


PASSIVE
ABILITY
STEADY FLOW (Passive): Every time He Bo uses an ability, he gains a 4% magical power buff that can stack 3 times. The passive has a duration of 5 seconds, but refreshes whenever an ability is used. Make use of this in any situation you can. (refer to combos section).

1
WATER CANNON (1): This is a close range cone attack that deals 60/110/160/210/260 damage +80% of your magical power. This requires you to get a little closer than usual, but pairs very well with Waterspout for a devastating combo. Also helpful in lane clearing.

Click to View Water Cannon Demo + pros and cons

2
ATLAS OF THE YELLOW RIVER (2):This is a line/zoning ability that slows enemies by 20/25/30/35/40% and increases the speed of allies by the same amount. it has a duration of 7 seconds. This can be a very important ability for zoning objectives and confirming kills, along with getting you and your team mates out of trouble.

Click to View atlas of the yellow river Demo + pros and cons

3
WATERSPOUT (3): This is a ranged ground target knock up ability. It deals 70/120/170/220/270 +60% of your magical power. This and Water Cannon will form the core of majority of your combos. This move acts as an excellent poke, a good lane clear, and a great initiator for combos/kill confirms.

Click to View Waterspout Demo + pros and cons

4
CRUSHING WAVE (4): This is a line ability that deals 350/430/510/590/670 +105% of your magical power. This move can either initiate or finish a combo, or even be used on its own. This ability is amazing for hitting multiple Gods bunched together in a team fight, turning the tides and either killing everyone or rendering them easy kill confirms for your team mates.

Click to View Crushing wave Demo + pros and cons


Skill Leveling priority


|TOP PRIORITY| Crushing Wave|
  • | Crushing Wave is a devastating ultimate capable of hitting multiple Gods, engaging team fights, confirming kills, and getting to safety. This ability should be prioritized when available, as it He Bo's most powerful asset. Due to it's nature as an ultimate, upgrades for this ability will only come around once in a while, so don't miss a chance to level it up when you can.

|2ND PRIORITY| Waterspout|
  • | Waterspout is He Bo's primary source of damage when poking enemies in lane and clearing minions from a safe distance in the early game. This ability allows players to keep pressure on enemies and establish their role in lane without having to make plays that are too risky. He Bo can take advantage of high reward without as high of a risk, and so this ability should be prioritized behind his ultimate.

|3RD PRIORITY| Water cannon|
  • | Water Cannon is the second half of He Bo's devastating bread and butter combo. It provides very high damage with an extremely low cooldown, allowing players to maintain pressure on enemies at a constant rate. It's very close range, however, require He Bo to take bigger risks to reap the benefits. Because of this, players should expect to gain more out of this ability at higher levels when He Bo can hold his own, and should be prioritized after Waterspout.

|LAST PRIORITY| Atlas of the yellow river|
  • | While a great ability for zoning, mobility, and CC, this item provides no real benefit to He Bo in the beginning stages of a match. The abilities that will help keep players relevant throughout the game are the ones that deal the most amounts of damage, and so this ability should be an after thought once the others have solidified He Bo's place.

Combos

Bread and Butter
Just as the title suggests, this is your bread and butter. You should use this as your basic form of attack. The knock up will make (most) Gods unable to move until they land, resulting in a perfect opportunity for Water Cannon to be waiting for them on the ground. This is a basic combo but can be quite deadly.

Click to View Bread and Butter Demo


Advanced Bread and Butter
This combo simply acts as an extension of the last. The only difference here is that Atlas of the Yellow River will keep your enemies in place while you attack, as well as adding a stack to Steady Flow, increasing your bread and butter damage.

Click to View Advanced Bread and Butter Demo


Swift Submerge
Upon completing the build, this combo should be enough to kill most non tanks. Atlas of the Yellow River and Waterspout add 2 stacks (10% magical power), making Crushing Wave even more lethal. Use Crushing Wave while the enemy is still airborne from the knock up to ensure they can't escape. If the enemy happens to still be alive, quickly whip around and use Water Cannon once more.

Click to View Swift Submerge Demo

Masterful Monsoon
Masterful Monsoon makes use of every ability, maxing out Steady Flow stacks. The order of the abilities is important, due to the fact that in this order, the damage for each ability scales from weakest to highest, meaning Steady Flow will scale to its max damage right in time for your most damaging move.

Click to View Masterful Monsoon Demo

Tyrannical Torrent
Tyrannical Torrent is only achievable by using Staff of Myrddin. This devastating 7-hit combo will be initiated with a quick Water Cannon and Crushing Wave, which will activate Staff of Myrddin's passive. Starting the second half of the combo will be Waterspout. As it is on cooldown, you will have enough time for 2 Water Cannons in a row, utilizing it's already low cooldown reduction with Staff of Myrddins passive. Once this is complete, you can use the last of the uncapped cooldown for another Waterspout and Water Cannon. This tank-leveling combo deals 5,887.75 damage (before protections, item passives, and Atlas of the Yellow River).

Click to View Tyrannical Torrent Demo

Stages of the Match


Early game


Poke often
Prioritize farming
Don't overextend
Ward often
Stay with team
keep pressure + contest buffs
Early game is not always He Bo's strong suit. Get around this by clearing wave as often as you can, and frequently poking the enemy with Waterspout's decent range. Keeping your enemies at bay while you farm gold and experience is your fastest method of reaching late game.

Make sure you stay with your team at almost every moment during the early game as a means to keep heavy lane pressure, minimize enemy breathing room, and to eliminate the chances of you getting caught alone. If this happens, you will likely not escape. With this in mind, you and your team should be warding areas such as gank points and buff camps, whilst trying to avoid being overextended.

On the note of buff camps, you should always try to contest buff camps to deter the enemy from gaining leverage over you; but know when to pick your fights. Not all battles are winning battles, and a lost buff camp is favorable compared to a team mate's potential death.

In the event you are able to walk away with one or more kills, focus on things such as recalling and purchasing items, or clearing xp camps. Tower pokes aren't very important at this stage, and the short respawn timers won't give you much time to work with. Clear the lane and let your minions push as you perform other tasks.

You will want to stick with grabbing the mana buff for most of the early game. When choosing to engage an enemy or leave lane for a buff camp, ensure that you always clear the lane before hand. Lane clearing should take first priority.

click to view early game heat map (S7, 10)

click to view early game heat map (S3, 9)


Mid game


Focus primary objectives
Coordinate rotations
Provide team fight presence
Target enemies
Extend when safe
He Bo's wave clear will likely become more efficient with the steady increase in power. At this stage of the game, you may stop relying so heavily on your support and begin to coordinate rotations with your team. Splitting up to control more camps will cut the enemies resources and allow your team to become more aggressive in lane and around the map.

At this point in the match, your abilities will start to become lethal, and your pokes will turn to full combos. With some assistance, you will be able to target the teams most valuable players and eliminate them with relative safety. Extending will start becoming less dangerous, and the focus should shift to taking objectives like towers and phoenixes.

In team fight scenarios, do not leave yourself exposed to the enemy. You are an asset to the team at this point, so staying further back and casting your abilities from a safe distance is essential. Learn more in the Macro Gameplay section.

click to view mid game heat map (S7, 10)

click to view mid game heat map (S3, 9)


Late game


Focus objectives
Traverse with caution
Utilize your abilities
Heavy team fight presence
Ward often
Utilize fire minions
At this stage in the game, most of your items will be online. For the most part, late game will play out similarly to mid game, just more devastating. Primary objectives such as towers and phoenixes along with other objectives such as demon king should take priority. You should also be switching to primarily getting the damage buff.

Most fights you engage in should be team fights, but you are very capable of solo killing enemies if you are sure the area is clear. Very few things can stand in your way, yet for this very reason it becomes crucial that you are not targeted. Your abilities are extremely lethal and can turn the tides of any battle, so use them wisely and proceed through the map with caution. If enemy locations are unknown, travel with your team.

You and your team should be placing wards at more crucial areas such as demon king, and new gank points that may open up as objective structures are destroyed. Make sure to keep up with clearing buff camps, and stealing any enemy buff and xp camps that you are able to.

At max level and full build, you don't have much else to gain, so your one and only goal should be doing whatever is necessary to end the game. Most times, this means getting rid of any threats that may stand in your way and attacking objective. If the game has come to a stalemate, begin attempting to bait enemies, force team fights, etc. Draw out your enemies in any way possible to open up opportunities for objective play.

click to view late game heat map (S7, 10)

click to view late game heat map (S3, 9)

Macro Gameplay

  • Laning
    The most critical part of any game is the laning phase. The matches outcome is most often determined by how well you utilize your farming capabilities. For He Bo, it is important to stay in lane as long as you can, and put highest priority on farming minions. Getting gold and experience will be the first step to your snowball. Avoid being overextended and/or trapped in your tower. Focus on applying pressure while also maintaining distance; getting in frequent pokes and clearing wave. Dying will be your biggest set back, as you must be gaining a near constant flow of exp and gold throughout the early game.
  • Positioning/Pathing
    Life or death may depend on where you have placed yourself, so it is important to be positioned in areas of safety. Throughout the early game, your safest position will be in lane, just before the half way line. When team fighting, your safest bet will be to attack from a distance, preferably behind your tank. When alone, areas that would otherwise seem safe (tower edge, mana buff, etc.) may not be. With no real form of back up, enemies may be inclined to make an aggressive push for you, so always make a note of ally locations and escape routes before moving anywhere.
  • Zoning
    While Atlas of the Yellow River isn't able to zone enemies with the consequence of damage, a significant movement speed debuff is enough to make enemies rethink their movement routes. Placing Atlas of the Yellow River horizontally across the middle of the lane will deter enemies from crossing, allowing you to farm safely. When attempting to secure an objective such as demon king, place your scroll vertically down the pass. This will allow you more time to secure the objective. If enemies dash or leap over the scroll, take advantage of their now lack of getaway. See more in scrolls map.
  • Team fighting
    When teamfighting, place yourself behind your tank and cast your abilities from safety. When needing to get close for Water Cannon, make sure you are doing so without making yourself totally vulnerable. Your high burst damage is what will keep the fight in your team's favor, so do not put yourself in dangerous positions. You may choose to either initiate the team fight using your ult, or save it to secure the kills at the end.
  • Contesting
    When the enemy team is attempting to secure an objective such as demon king, do not attempt to rush in alone. Much like team fighting, approach the objective and prepare to contest with team mates. If the objective is low, consider waiting for the steal. If not, attempt to burst the opposing team down from safety and secure the kills. Once the enemies are down, secure the objective. If you were the one to begin securing and got contested, do not waste your abilities on the objective, as you will have no way to put up a fight.
  • Ganking
    If attempting to gank the enemy in lane, do not use Atlas of the Yellow River to get behind them faster. The enemy will most likely hear the ability being used, and you will have no way of keeping them there or escaping. Approach silently from behind, then use Atlas of the Yellow River horizontally across the lane to keep the enemy in place. Burst them down, then ult back to your side of the map, securing a kill (or multiple) in the process. NEVER ult away from your team/tower and into the opposing sides direction, as you will have no way of getting back. If the enemy team has placed wards and detects your gank, either turn back the way you came, or ult back to your side immediately to avoid being CC'd.
  • Recalling
    Knowing where and when to recall is an important skill to have, however minor it may seem. Players should look to recall in areas that have proven throughout the course of the match to be safe. While there are areas on the map that remain consistent safe spaces, others may shift from game to game depending on the team comp/trends that fall into place. Pay attention to these trends, and the overall pathing of your enemies to determine where they are least likely to be at any given moment, so you may recall safely. As for when, players should only recall when the situation either demands it, or allows for it. If your health is too low to engage, or too low to survive any potential surprise engages by the opposing team, you should recall as soon as possible. Always attempt to avoid recalling prior to clearing wave. You will miss out on value xp and gold. Players should attempt to avoid recalling at the same time as their team mates to avoid bad rotations. Conversely, when your team mates do recall, make yourself as inaccessible to the enemies as possible to discourage engages, as you will most likely be outnumbered until your team mates return. If you have excess gold but are otherwise healthy, do what you can to force the enemy mage to recall first. Once they are gone, clear one more wave and recall. Below is a map of areas that players should avoid getting caught in. Whether you are recalling there or even simply passing through, these areas could leave you stuck in vulnerable positions.

    click to view Hazard map


Scroll maps


click to view scroll map (S7, 10)

click to view scroll map (S3, 9)


Ward maps


click to view ward map (S7, 10)

click to view ward map (S3, 9)

Q&A

|Q:| What do I do if I'm being targeted?|
  • |A:| If you find that you are being targeted by a specific member of the opposing team, pay extra attention to their location on the map, and keep your distance if they have the range on you. Coordinate with your team members to counter focus, and be there for you when the enemy strikes. In the late stages of the game, with proper attention to counter building, you will most likely be able to take them.


|Q:| Why do I run out of mana so quick?|
  • |A:| Running out of mana is a common frustration. The easiest way to combat this is by analyzing where you may be using an excess amount, and attempting to restrict your mana usage to only situations that call for it. For instance, if a buff camp has low hp but your Water Cannon just got off cooldown, save it and finish the camp with auto attacks. Your mana is better spent poking the enemy or clearing wave. On that note, don't be afraid to let your team mates assist with wave. As long as you are grabbing mana buff through the early game, you should be okay.


|Q:| How liberal should I be with my abilities?|
  • |A:| It is important to poke your enemies frequently during the laning phase. However, if an enemy is recalling in their tower with majority of their hp still remaining, poking them may not be worth it. Only poke enemies with the intention of: deterring them from pursuing you, forcing them to recall/interrupting their wave clear, or setting up a kill. As for the late game, you should mostly only be using your abilities with the intention to kill.

Tips and Tricks

  • AERIAL ATTACKS
  • He Bo's Waterspout has the ability to interrupt non CC immune aerial attacks such as Xing Tian's Hook Slam, preventing damage from occurring. You can save a team mates life with this!
  • MOMENTUM PUSH
  • All knock up abilities will preserve the momentum/direction of an enemy. This means that if an enemy is traveling towards you, hitting them with Waterspout will force them further into your direction. Use this to pull unsuspecting victims into the tower/phoenix for a little extra damage, or even a kill set up.
  • DAMAGING ABILITIES
  • In the early game, your Waterspout will do more damage than your Water Cannon. However, after these abilities start to level up, the opposite slowly becomes true. Keep this in mind when
    choosing which ability to use when confirming a kill.
  • LANE MINIONS
  • Before clearing lane minions, wait to see what your enemies will do. It isn't out of the ordinary for the enemy to wait until your poke is wasted on minions, and then attack. Give it a couple seconds before you decide where your move should be placed.
  • ATLAS
  • A simple yet effective one; always remember that your Atlas of the Yellow River can reach from the fountain to the phoenix, and from the phoenix to the tower. This is illustrated on the map below. This can be effective in quickly returning to battle and salvaging a tower/phoenix after a deicide.
  • HELPLESS HE BO
  • You can fake recall by use normal casting on Waterspout and hovering the ability in front of you as you pretend to back. You do not need to have low health to get enemies to come to you, as most will engage you in an attempt to poke you out of your recall animation. When they draw near, activate your swift submerge combo to eliminate them.

Match Ups

GUARDIAN SYNERGY
Kumbhakarna: Use Throw Back and Waterspout as often as possible during the laning phase. These moves help clear wave and can also be used as pokes to help maintain distance. Initiate fights with Groggy Strike, then use Waterspout Mighty Yawn then choose either Water Cannon or Crushing Wave. After Epic Uppercut, be ready to use any of your damaging moves at the landing location of an enemy.
Sobek: Sobek is a good guardian capable of outputting sufficient amounts of CC. Pairing Charge Prey with Waterspout is a sure-fire way to carry enemies assembly-line-style into allied objectives or to isolate them from their teammates.
Sylvanus: Sylvanus is an S+ tier pair for He Bo. Verdant Growth mixed with He Bo's Bancroft's Talon allows for an unmatched level of sustain. Nature's Grasp is another fantastic initiator for He Bo's combos, potentially isolating enemies. Other abilities such as Wisps and Wrath of Terra do an amazing job at keeping He Bo safe while he outputs his damage.


WARRIOR SYNERGY
Guan Yu: Guan Yu's Conviction makes for quick and rapid sustain, especially with He Bo's Bancroft's Talon. Warrior's Will and Cavalry Charge work effectively as both initiators and kill confirms for run away targets, with the added bonus of some effective CC. Use Waterspout to stop enemies from interrupting or silencing Taolu Assault, forcing them to take full damage while knocked in the air.
Hercules: Use Earthbreaker into Driving Strike (or just Driving Strike if ganking from behind) to isolate enemies or push them into allied objectives. Add Atlas of the Yellow River to eliminate any chance of escape. From there, decide who should confirm the kill. Combine Atlas of the Yellow River with Excavate for a near guaranteed hit.
Tyr: This combo relies heavily on CC much like the Hercules and Sobek entries. Use assault stance Fearless into assault stance Power Cleave, immediately followed by Waterspout to achieve a multiple hit assembly line push.


HUNTER SYNERGY
Artemis: Artemis is a deadly hunter who pairs remarkably well with He Bo. Try Atlas of the Yellow River into Vengeful Assault with some help from the Still Target passive to output amazing damage at the cost of virtually no mana. This is a small combo that goes a long way. Feel free to add Suppress The Insolent for a little more devastation, but be advised that this addition is subject to diminishing returns.
Cupid: Use Atlas of the Yellow River on enemies to assist Lovestruck in maxing stacks, gaining the advantage of the Heart Bomb stun to initiate kill confirms. Share The Love will also assist both Gods in sustain. Flutter can be used to initiate, while Atlas of the Yellow River is used to flee. (Or vise versa).
Neith: A straight forward one; utilize Atlas of the Yellow River and Spirit Arrow as often as possible for quick kill set ups. Waterspout can also occasionally be used to carry enemies within range of Broken Weaves.


ASSASSIN SYNERGY
Awilix: When Moonlight Charge isn't able to initiate a knock up, use Waterspout instead. Switching between these two will help reduce predictability and open more opportunities when isolating enemies with Gravity Surge. Consider placing Atlas of the Yellow River at the destination the enemy will be pulled to in order to reduce chances of escaping.
Fenrir: The complete combo here is Unchained (with full runes, to gain the stun) into Waterspout, with Brutalize immediately following. Fenrir may use Ragnarok instead of Brutalize to isolate enemies if the area is unsafe. Feel free to add Atlas of the Yellow River at any point during the combo.
Ne Zha: Coordinate Waterspout with Universe Ring Toss to gain range and distance advantages. Armillary Sash can be used to engage fights or finish low health targets. When catching a God in Wind Fire Wheels, use Atlas of the Yellow River at the landing location and be ready to use any of your damaging abilities to confirm kills.


Accolades Showcase


S9 Guide Contest - Category: Mage - Winner!


S7 Guide Contest - Category: Revival - Winner!


S6 Guide Contest - Category: Mage - Honorable mention!


Conclusion


Thank you very much for sitting through this guide. I truly hope you have learned something here; He Bo player or not. The intention of this guide has always been for old and new smite players alike to gather and share what they know. I am learning new things about smite, and even He Bo, every single day and that is my hope for everyone else as well. Please feel free to comment or critique, as I am always updating. This guide and this build will forever remain a work in progress, and it is thanks to this wonderful community that I have been able to grow and adapt as this game adapts.

Thank you very much- TangoDownY3k


Changes and Additions

October 27, 2015- Huge thank you to xXbeardAngelsXx for suggesting Obsidian shard as an effective penetration item. An even bigger thank you for stating a reason why.
October 28, 2015- Switched P.O. Of Gem of isolation and Book of thoth.
April 4, 2016- Added Pure Power build!!!
April 4, 2016- Added Match-Ups chapter!!!
April 4, 2016- Got rid of Warlock's sash
April 4, 2016- Got rid of Gem of Isolation
April 4, 2016- Added Spear of Desolation
April 4, 2016- Added Obsidian Shard
April 4, 2016- Switched P.O. of Book of Thoth
April 4, 2016- Switched P.O. of Ethereal Staff
April 4, 2016- Switched P.O. of Rod of Tahuti
April 4, 2016- Switched Wards for Mana Pots
April 4, 2016- Switched Magic Shoes to Shoes
May 12, 2016- Thank you Technotoad64 for helping me with the complete color change!!!
May 12, 2016- Changed all font sizes
May 16, 2016- Changed title (was "he bo s3 updated build/guide all around + pure power")
June 22, 2016- Switched mana cost for waterspout
February 14, 2017- Prepared the way for Season 4!!
June 26, 2017- Removed Rallying ritual and Revealing ritual
March 1, 2018- Switched out Soul stone for Mage's blessing
March 1, 2018- First step into Season 5 transition. Stay tuned!
March 1, 2018- Replaced Pros/Cons with Build Stats
March 1, 2018- Complete transition into Season 5!!
May 10, 2018- Switched P.O. of Rod of Tahuti and Rod of Desolation
December 14, 2018- Complete revision of Pure Power build
December 14, 2018- eliminated All Around build
December 14, 2018- added Updates, Thoughts, and Plans for the Future chapter
December 14, 2018- Changed title (was "Swift and sure, we must flow to victory! S5 updated (all modes))
April 8, 2019- Complete UI overhaul
May 27, 2019- Build re-examination
May 30, 2019- Corrected some minor mistakes in guide
August 28, 2019- Added Synergy section
september 11, 2019- Switched P.O. of shamans ring and shoes of the magi
october 19, 2019- updated skill order
February 26, 2019- Those who oppose me shall be swept aside! S7 updated (Joust): Guide overhaul for season 7
June 19, 2020- changed P.O of Obsidian shard and charon's coin
December 3, 2020- Updated item and ability stats

Leave a Comment

You need to log in before commenting.

Collapse All Comments

1
TangoDownY3k (2) | September 16, 2021 6:42pm
IMPORTANT UPDATE: 2021/09/16:

The builds in this guide are representative of the current joust meta. HOWEVER, ALL information present in the written guide section are not.

Once the guide has been sufficiently updated to correspond with the new builds and current joust map, this comment will be deleted and replaced with a new one. until then, PLEASE DISREGARD THE GUIDE INFORMATION.
0
Jpittman04 | June 2, 2021 3:41am
best guide ive seen for this game wow
1
The6thEspada | April 1, 2021 7:24am
Do you use instant cast?
1
TangoDownY3k (2) | April 1, 2021 12:46pm
I do not. But it does have its benefits.
1
the big bruh | March 11, 2021 6:34am
This is a really good in-depth guide, and I hope that I can learn to make guides like you someday.
1
TangoDownY3k (2) | March 12, 2021 9:12pm
Thank you! All it takes is a little patience :)
1
Deathknight5405 | February 8, 2021 1:42pm
AMAZING, love it so much!
2
TangoDownY3k (2) | February 8, 2021 3:24pm
Thank you! Stay tuned for some serious season 8 updates coming shortly!
1
TangoDownY3k (2) | January 2, 2021 7:12pm
IMPORTANT UPDATE

The Smite fire UI overhaul/mobile update, while fantastic in many many ways, has severely interfered with this guide's BB code and overall design. I am working to find ways around this, including experimenting with other design options. Please excuse the horribly designed guide for the time being!
1
boogiebass (46) | January 4, 2021 12:05pm
@Bran made a announcement. He suggested not messing with any BBCoding for now.

Can't remember if the announcement was made public on SmiteFire or not. If it hasn't, Bran will likely do a public announcement soon.

As far as I know, a fix is in the works to take care of this BBCoding problem.
1
TangoDownY3k (2) | January 4, 2021 1:04pm
Awesome news. Thanks a lot!
Load more comments (2 more replies) →
2
Jackalope_T_S_M | November 12, 2020 11:52am
Thank you kanye! Very big guide!
1
boogiebass (46) | April 19, 2020 9:02pm
Found the match.
I'm muffinboy and bremz is draisaitl
https://smite.guru/match/1026949480
1
TangoDownY3k (2) | April 20, 2020 9:41am
I was waiting for this comment!
1
Revenant7755 (1) | March 30, 2020 1:56pm
This is too well made to be just for joust lol. You have Really deep explanations for a simple game mode. A small question I have: What would the build look like for conquest, specially for the Mid role? I looked on here to see if there are any builds for him but this is the only updated guide for him ATM. Other than that, definitely worth an upvote.
1
Kriega1 (143) | April 6, 2020 4:46am
Start Tier 2 bancrofts OR Magi shoes rush (look it up) OR Mage's Blessing, tier 1 bancrofts, 2 health and 2 mana pots.

Bancrofts > Magi Shoes > Typhon's Fang > Divine Ruin > Soul Reaver > Obsidian Shard (or get Charon's earlier in the build and delay Reaver and/or typhons). If you want defense get Breastplate of Valor (pretty common pickup on him from what i've seen).

Also He Bo can be flexed in Mid, Jungle or ADC (ADC if you have a hunter in Mid).
1
TangoDownY3k (2) | April 5, 2020 6:27pm
First of all, thank you! Unfortunately, I am currently unaware of the season 7 conquest meta, especially surrounding mages and the mid lane. From my little experience with He Bo in the mid lane, I found myself putting higher priority on cooldown reduction, as well items such as Doom Orb. That is all the information I'm able to give at the moment, as I don't want to mislead you. I do feel that with some minor adjustments, this build as it currently stands will suffice in most circumstances. I do urge you to disregard most of the information contained in the guide portion if your main focus is conquest.
1
Devampi (105) | April 6, 2020 12:11am
looking at the spl game I saw last night it kidna uses the same 3 items, doing the T3 boots from fountain start. and they used divine instead of deso (divine on mids is a common thing) then itemized into cdr (the game I saw they used BoV cause of the 4 physical comp of obey) and soul reaver before the game ended, probably ending on ob shard as 6th item
1
Kriega1 (143) | February 28, 2020 2:00am
How is Charon's a Deso subtitute when your build already has reaver and obs shard? If anything it's a obs shard substitute.
1
Branmuffin17 (394) | February 27, 2020 8:12pm
Damn Tango, this guide is looking great, and your explanations are increasingly solid.

One thing that I think is slightly weird/misplaced is usage of Charon's, which you say in the writeup is a good potential substitute for Spear of Desolation. I've always considered Charon's more of an Ob Shard alternative due to the same base % pen stat. That said, in S7 so far, I also consider it to often be superior in an overall sense to Ob Shard due to the utility it provides, especially for gods like He Bo who have limited mobility in a general sense.

Another reason I don't think it's quite an alternative to Deso is that in your main build, your first CDR item is Deso, as you're not picking up Shoes of Focus...and I think that should be at least mentioned or listed as an option, especially if you're facing a healing heavy comp and you plan to get Divine in place of Deso.

Thoughts?
1
TangoDownY3k (2) | March 3, 2020 8:47pm
The Charon's issue has been resolved! If you notice any other oversights on my part, or have any other suggestions, please do let me know.
1
TangoDownY3k (2) | February 28, 2020 10:12am
Hmm.. I think you're exactly right. In fact, the only reason I have it as a substitute for deso is due to it's high hp5/health bonuses which I believed would add a high amount of sustain when added with bancrofts. But I suppose there's nothing wrong with having that later in the game, especially if it means keeping your cdr.

To be honest, of all the situational items listed, I had the least time to experiment with charon's, so i find this input very useful. Also, I had strongly considered listing shoes of focus as a situational, so hearing it from an outside source practically confirms it.

As for charon's replacing obsidian shard in the primary build, I'll need to experiment a little more before committing to anything, but I will keep it in mind.

Thanks!
Loading Comments...
Load More Comments

SMITEFire is the place to find the perfect build guide to take your game to the next level. Learn how to play a new god, or fine tune your favorite SMITE gods’s build and strategy.

Copyright © 2019 SMITEFire | All Rights Reserved