Smitefire logo

Join the leading SMITE community.
Create and share God Guides and Builds.

Create an MFN Account


Or

Not Updated For Current Season

This guide has not yet been updated for the current season. Please keep this in mind while reading. You can see the most recently updated guides on the browse guides page

x

Vote received! Would you like to let the author know their guide helped you and leave them a message?

Banner for Ah Muzen Cab guides

Let Madness Consume You

4 1 13,756
by TheOSC updated June 15, 2014

Smite God: Ah Muzen Cab

Build Guide Discussion 5 More Guides
Tap Mouse over an item or ability icon for detailed info

Ah Muzen Cab Build

Starter Items

Build Item Death's Toll Death's Toll
Build Item Boots Boots
Build Item Ward Ward
Build Item Mana Potion Mana Potion
Build Item Heavenly Wings Heavenly Wings

Laning Phase

Build Item Combat Boots Combat Boots
Build Item Improved Sprint Improved Sprint
Build Item Warrior Tabi Warrior Tabi
Build Item Creeping Curse Creeping Curse

Laning Phase: Alternatives

Build Item Heartseeker Heartseeker
Build Item Devourer's Gauntlet Devourer's Gauntlet
Build Item Purification Beads (Old) Purification Beads (Old)
Build Item Aegis Amulet (Old) Aegis Amulet (Old)

Mid-game

Build Item Qin's Sais Qin's Sais
Build Item Rage Rage
Build Item Greater Sprint Greater Sprint
Build Item Enfeebling Curse Enfeebling Curse

Mid-game: Alternatives

Build Item Void Shield Void Shield
Build Item Hide of the Urchin Hide of the Urchin
Build Item Hastened Fatalis Hastened Fatalis
Build Item Asi Asi
Build Item Weakening Curse Weakening Curse
Build Item Aegis Pendant Aegis Pendant
Build Item Greater Purification Greater Purification

End-game: Final Items

Build Item Asi Asi
Build Item Titan's Bane Titan's Bane
Build Item Deathbringer Deathbringer

End-game: Alternatives

Build Item Hydra's Lament Hydra's Lament
Build Item Void Shield Void Shield
Build Item Rage Rage
Build Item Hide of the Urchin Hide of the Urchin

Ah Muzen Cab's Skill Order

Hive

1 X Y
Hive
1 4 6 8 11

Swarm

2 A B
Swarm
14 15 16 18 19

Honey

3 B A
Honey
2 3 7 10 12

Stinger

4 Y X
Stinger
5 9 13 17 20
Hive
1 4 6 8 11

Hive

1 X
Bees swarm at the ground target location, creating a new hive that provides Movement Speed, Attack Speed, and HP5 buffs to Ah Muzen Cab. Hives reveal enemies within 20 units of them. The hives can only be destroyed by basic attacks (Max 7 hives).

Ability Type: Circle, Buff
HP5: 20 / 25 / 30 / 35 / 40
Movement Speed: 10 / 15 / 20 / 25 / 30%
Attack Speed: 10 / 20 / 30 / 40 / 50%
Radius: 90
Cost: 40
Cooldown: 12s
Swarm
14 15 16 18 19

Swarm

2 A
Ah Muzen Cab summons a large swarm of bees that fly forward in a path in front of him, dealing damage to all enemies hit and applying Bees! to them.

Ability Type: Line, Damage
Damage: 50 / 90 / 130 / 170 / 210 (+70% of your Physical Power)
Range: 70
Cost: 65 / 70 / 75 / 80 / 85
Cooldown: 15 / 14 / 13 / 12 / 11s
Honey
2 3 7 10 12

Honey

3 B
Ah Muzen Cab sprays honey that lasts for 4s at a moveable ground target location, Slowing all enemies in the area. Bees from Hives within 90 units and Swarm will fly over to protect the honey, dealing damage every 0.5 seconds and applying Bees! to all enemies as they leave the honey.

Ability Type: Area, Slow, Damage
Damage (per Tick): 13 / 25 / 37 / 49 / 61 (+15% of your Physical Power)
Slow: 20%
Cost: 60
Cooldown: 10s
Stinger
5 9 13 17 20

Stinger

4 Y
Ah Muzen Cab fires off an enormous stinger that deals damage to all enemies in a line, sticking into the first god that is hit, applying Bees!, Slowing, Crippling, and decreasing their Physical Protections for 3 seconds. If the target dies or after 3 seconds, the stinger falls onto the ground for 4 seconds. If Ah Muzen Cab picks up his stinger, he gains a significant reduction to Stinger's cooldown.

Ability Type: Line, Cripple, Damage
Damage: 275 / 355 / 435 / 515 / 595 (+100% of your Physical Power)
Slow: 20%
Physical Protection Reduction: 10%
Retrieval Cooldown Reduction: 60%
Range: 70
Cost: 100
Cooldown: 100s

Introduction

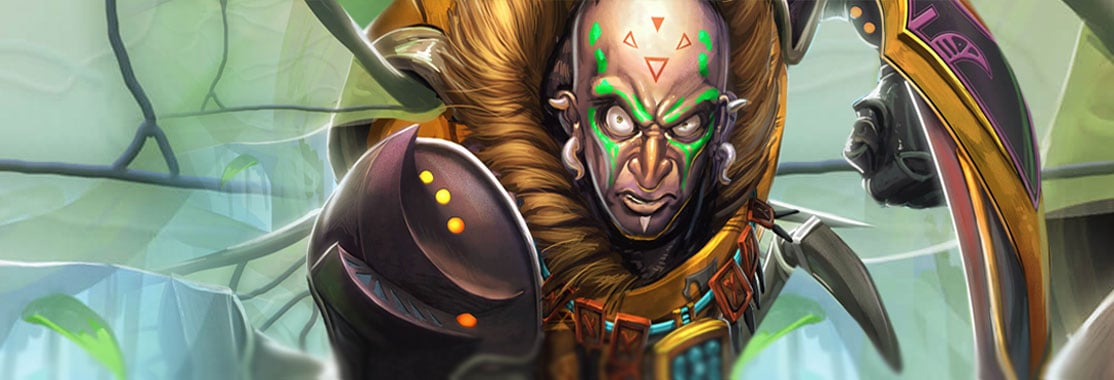
Thanks for taking a look at my Ah Muzen Cab build. This guide aims to break down my play style with the god of bees, and present a different approach to some of the current standard builds circulating around the battlefield of the Gods.

Abbreviation List

AA: Auto Attack
ADC: Attack Damage Carry (Sometimes referred to as Hunters)
AMC: Ah Muzen Cab
AOE: Area of Effect
CC: Crowd Control
Crit: Critical Strike
DOT: Damage over Time
EXP: Experience
OOM: Out of Mana
Ult: Skill 4 or Ultimate Skill (Stinger)
1: Hive
2: Swarm
3: Honey
4: Stinger

Without further Adieu Lets get to the guide.

Stats Breakout

Details


Health: 450(+73)
Mana: 230(+40)
Speed: 350
asdf
asdf

Basic Attack


Range: 55
Attack Speed: 0.92 (+0.012)
Damage: 38 + 2.2 (+100% of Physical Power)
Progression: N/A

Defenses


Physical: 12 (+3)
Magical: 30 (+0.9)
HP5: 7 (+0.71)
MP5: 4.4 (+0.38)
asdf
asdf
asdf
*Numbers in parentheses are the amount gained each time you level

Pros and Cons

Pros

High AA Damage
High Mobility
AOE DOT
AOE Slow
Versatile Laning Phase
(Can either Solo, Duo, or Jungle effectively)
Cons

Reliant on Hive Placements
Low Health
High Mana Costs
No Escape
asdf
asdf

Skill Logic and Usage

Skill Logic


The way that I play AMC there are a variety of ways to level up his skills but, the standard I have adopted is Stinger > Hive = Honey > Swarm. This is the build I have listed as the standard in the beginning of the guide.

My logic behind this progression is that Attack speed, movement speed, lane clear, and DOT application are all equally important. This combined with the high mana cost of his 2 make it ideal to skip the ability almost completely.

However, it is worth mention that his 2 can apply Bees! to a Honey patch. Swarm is worth leveling once if you notice your Hives are too hard to defend or are being removed quickly in team fights, if you decide to put a point into Swarm I would recommend leveling as follows.
asdf
asdf
asdf
Hive > Honey > Honey > Hive > Stinger > Swarm > Hive > Honey > Stinger > Hive > Honey > Hive > Stinger > Honey > Swarm > Swarm > Stinger > Swarm > Swarm > Stinger
asdf
asdf
asdf
This will allow you to get your Hive and Honey leveled for the laning phase where wave clear is most important, and at level six you can pick up Swarm in time for early ganks. It is also worth noting that at levels seven and eight you may want to level Honey then Hive instead if you are not ready to roam and are still trying to farm the lane a little longer.
asdf

Skill Usage


Skills


Acts as an attack speed/move speed steroid as well as a hub for Bees! to swarm Honey patches.
A secondary way to apply Bees! to Honey patches, as well as a long ranged poke for fleeing enemies during early game ganks.
AMC's primary method of clearing the lane. Swarming the puddles of Honey with Bees! from his Hives.
AMC's largest single shot damage, this attack can take out anywhere from 1/4 - 1/2 of an enemy god's health, and upon retrieval the CD is reduced 80%.
asdf

The Lane


If you are in a lane during the laning phase you will have three main goals. Keeping Hives up, reducing mana usage to a minimum, and clearing creeps. The hardest part of this is managing Hives. Your opposition will take every opportunity they have to kill off any Hives you have left exposed, and this makes tasks two and three infinitely harder. Thankfully there are a few tricks you can employ, but you will have to balance aggression and safety.

The first trick is placing a Hive behind the creep camp closest to your lane. This will allow you a very small area where you can cast Honey and have Bees! hop through the wall from the Hive. As long as you are managing the blue buff near your lane and utilizing Wards this Hive should stay up almost indefinitely.

The second trick is being aggressive enough that your other Hives are hard to approach, however, don't let aggression get you killed; you still need to know when its time to pull back from dangerous situations. The placement for the second and third Hives are just a little further up in lane toward the entrances to the jungle. If your lane is managing creeps well enough that you don't have to fall back to your tower these Hives should remain intact. The third Hive will be an easy target for the enemy jungler and any roamers; to minimize the chance it will be eliminated keep Wards up to watch the jungle.
asdf
Hive placement is shown below.
asdf
asdf

As previously mentioned the blue buff is important for you to manage. you will want to grab this every time it is up for both the bonus experience and the more obvious boost to your MP5. As long as you have this buff you can mostly spam Honey on creep waves with impunity. When the buff runs out you need to be much more conservative or keep a potion handy. AMC's skills are notoriously expensive and his manapool is very small.
asdf

Avoiding and Dealing with Gankers


After a few minutes in lane the enemy jungler or roaming support will be looking for easy kills, the best thing you can do to avoid being their target is have Wards up and an eye on your minimap. AMC has no real escape since his kit doesn't include a leap or any form of hard CC; because of this you should always be aware of where the enemys are located, who is missing, and how far forward you have pushed.

In the unfortunate situation that you have been jumped by someone you have a very limited number of options available to you.
asdf
asdf
1. Dive, Duck, and Dodge. If you can see the enemy coming in from the jungle you might be able to avoid the setup, and pull back behind your creeps/tower. This is the main reason you should always be warding.

2. Use your Hive + Sprint for a speed boost and drop Honey to slow the enemy. If you haven't been caught in a Hard CC you are probably going to outrun them. Keep in mind that they most likely have a leap of some sort and that they can still catch you if this is the case.

3. Use Purification Beads or Aegis Amulet to avoid the initial burst of the enemy damage.

4. Fight Back. This is the worst option most of the time but some times you can turn the tides of battle and turn the gank against them.
asdf

Mid-game


Roaming and Ganks


During this phase you are finally able to break away from managing Hives. It's now time to head into the jungle and surprise the enemies in other lanes. When approaching a lane watch the target's movement and keep vision of the surrounding jungle. If your opponent is smart they will have Wards; take note of if or how they shift position when you come close to a lane's jungle entrance. If the opponent starts heading back to the safety of their tower you need to make a quick decision; engage and try to kill them before they reach safety (risking a counter gank from their jungler/roamers), or moving through to the next lane. This is one of the highest risk:reward phases in the game (even more so if you chose to rush Heartseeker), and for an ADC it determines the tempo for the rest of the match; a good call will give you a massive gold advantage. However, a bad call will be much harder to recover from.

If the opponent consistently acts like they have Wards up it is always worth investing in Sentry Wards

When you do decide to commit to a lane start by dropping a Hive, always make sure wherever you place it that the placement meets a few requirements.

asdf
asdf
1. It can be utilized as a steroid in the majority of the lane
2. It is out of the way enough that the enemy won't destroy it
3. it can apply Bees! both when you engage and if the opponent tries to escape
asdf
asdf

If these three requirements are met drop the Hive, make sure your teammate in lane knows your going in, move into the lane, Spew Honey all over your enemy and their escape path, then spam them with AA's. You should be able to pull them down to a very low threshold of health and finally secure the kill with your Stinger.

(Bonus points if you kill them before they reach the tower and you can re-obtain your Stinger)

While you are in the jungle make sure to keep up either the blue buff or the orange buff. You should be pumping out good damage already and the blue will give you more sustain while the orange will let you jump lanes faster and gank more often. If neither of these buffs are available it is okay to grab red buff but blue and orange are preferred. Also take out any EXP camps you may run across so as to keep your farm up during lane transitions.
asdf

End-game


Team Fights


The final phase of the game is at hand, assuming you did well in the roaming/ganking portion of the match this should be a victory lap for the most part. Don't get cocky and keep your whits about you though because a rebound for the enemy team could always be one bad team fight away.

When you engage in team fights you will usually want to hang back for a few seconds so you don't take unnecessary AOE damage. The beginning of team fights are filled with big AOE slows, stuns, and ultimates that you don't want to find your self in the middle of. When you do jump in start with a Hive that will give you a good range of mobility then douse the entire enemy team in Honey. With your DOT ticking on them they should be taking some pretty substantial damage, using AA's help your team focus down one target at a time until the enemy team is whittled down to just a few stragglers. Finaly, secure any kills necessary with your Stinger. Throughout the fight if your Bees! fall off re-apply them with either Swarm, if your hive was killed, or Honey if it remains in tact.

Item Logic

Starting Items


asdf
Early game sustain item that pairs nicely with your regeneration from Hives.
I always like to have at least a pair of rank 1 Boots on any character I play when entering lane; movement speed wins games.
Sprint AMC has no escape of his own, sprint is a cheap solution that gives you a very powerful chasing tool later in the game, and when upgraded to rank two allows you to break slows ( Improved Sprint). Once again movement speed wins games.
If there is one thing more important in this game than movement speed it is map awareness. Effective wards will prevent unnecessary deaths, and lead to successful ganks. I have this listed as a starter item, but in truth, you should be warding throughout the entire match.
AMC is mana hungry and the blue buff doesn't have 100% up time, you need these to sustain you through the time that it is down. Once again AMC requires a fine balance of aggression and defense, if you are OOM you can't protect your Hives; this leads to you having to place more Hives and running out of mana even faster.

Laning Items


This is a natural progression from Boots and gives you more movement speed.
I always say that rank two on sprint is mandatory for just about every character. For AMC it is especially true early on. Improved Sprint grants you a slow immunity and allows you to escape many deadly situations.
Finishing your boots is important, AMC focuses on his AA damage for the most part; so the penetration Warrior Tabi gives you a much better bonus than the CDR from Ninja Tabi
I like to take this item when the enemy team isn't very CC heavy. It makes chasing and securing kills easier in the late game. It also acts as a great item for team support during big team fights. If you are finding CC to be a problem I would instead go with Aegis Amulet or Purification Beads.

Alternative Laning Items


This item has a stacking bonus, it is risky if you are having a hard time in lane, and only gets riskier as the game goes on. However, the risk reward bonus for this item is great if you can prevent yourself from dying, and it is very cost effective at only 1950 gold. If you decide to build this rush it before finishing boots.
This is an excellent item to build if you want the benefits of Heartseeker and Asi, but don't want to risk dropping stacks on death. It also has the added benefit of taking one slot as opposed to two. However, you will be loosing Attack Speed and Movement Speed so those need to be found in another item elsewhere.

As previously mentioned if you are being inundated with heavy CC grab one of these two items to prevent it.

Mid-game Items


This is one of your Core items and needs to be purchased as soon as you are ready to start roaming. +30 Physical Power and +25% Attack Speed with the added bonus of 6% additional damage based on missing health will let you tear down even high base health enemies pretty quickly.
This item will let you crit more frequently meaning that enemies who might otherwise escape will die too fast to make it back to towers. However, you can wait to build this item till later in the game if you feel more protection is more beneficial.
This item is mandatory for chasing. It removes the movement penalty for attacking and lets you stick to enemies trying to flee.
Assuming you chose to buy Creeping Curse It is time to max it out. Enfeebling Curse is more versatile since reducing the enemy team attack speed will hurt more players, but if they have a powerful healer you should always take Weakening Curse instead.

Mid-game: Alternate Items


If the enemy team has a few heavy hitters of their own and you feel the defensive boost will do more good than the crit bonus from Rage then build this item instead. It still gives +25 physical power and reduces enemy protection by 15, so it is a DPS gain, but it will also provide you +50 physical protection.

*It is worth noting that Aura's apply before item effects so this item does make the returns from Titan's Bane a little less effective.
Similar to the Void Shield but for when the enemy has strong magical damage from a bursty mage like Scylla. It will also give you +250 mana which is a good boost for AMC's lack luster manapool and costly skills.
I wouldn't normally recommend this item but if you are just starting out with hunters the removal of the attack movement penalty can be a big boost to your ability to kill secure. However, this is a crutch that will hurt your damage in the long run.
This is a great item to take over Rage earlier in the mid game. If you decide to build this I would build it before Qin's Sais since it is much cheaper to build and you will get the bonus sooner. It also gives you more sustain in lane and lets you box against enemies more effectively.


Whatever active you chose in the laning phase, make sure it gets to rank three.

End-game Items


If you chose to rush Rage earlier, go ahead and build out your Asi now, as mentioned previously it gives great sustain and allows for good boxing capability.
Penetration. By this point in the game a lot of the enemy team has probably started trying to build defensive items to counter you. With Titan's Bane you will tear through their defense with ease. It also pairs nicely with Qin's Sais.
The ultimate damage item, after building Rage this item shines to it's fullest allowing you to crit for anywhere between 600-800 damage. However, if you chose not to purchase Rage earlier I would probably build it in to this slot over Deathbringer.

End-game: Alternative Items


Instead of Death Bringer this item can bring some more burst into your build. If you notice that kills are getting away with two hits left frequently this is a good alternative.
If the enemy team is mostly physical damage based build this instead of Hide of the Urchin, If you feel you need both build it instead of Deathbringer. You will do less damage but survival is more important.
If you haven't built this already you need to, the bonus crit chance is mandatory for AMC. I would build this instead of Deathbringer but before Titan's Bane.
If you are going to pick this item up don't wait past the fourth item slot. Damage is inevitable in this game, and Hide of the Urchin covers both ends of the spectrum. Since it does need to stack to ten to be at its full effectiveness building it much later than item slot four is risky.

Conclusion

In conclusion,
AMC is a very fun character to play, he has a lot going for him and can dish out some very admirable damage. However, he requires a lot of maintenance early game and will OOM if you don't pace your self. Be aggressive but don't over commit, keep your awareness, and most importantly have fun.

VVGL VVGF
-TheOSC

asdf

Quoted:
That is not dead which can eternal lie,
And with strange aeons even death may die.
-H.P.Lovecraft

Leave a Comment

You need to log in before commenting.

Collapse All Comments

1
SoulSpam | January 21, 2015 6:22pm
I have a question. This guide may be dead but why do you leave your 2 unmaxed when thats your clear?
1
BoboBananafish | June 5, 2014 10:13pm
Very nice guide. I've been playing AMC a lot in Siege, I'll definitely refer to this guide when I bring my game to Conquest. I like your sneaky hive placements, particularly the blue buff one. Never would have thought of that, what a nasty surprise for a lane harasser.

Thank you for the time and effort you put into this!
1
poldiac | May 21, 2014 10:57am
Great guide, your effort is appreciated!
1
Greenevers (105) | May 17, 2014 11:06am
Nice changes, think this should be seen by more people
1
Greenevers (105) | May 16, 2014 11:03am
This is an example of a guide that is well written without much usage of BB Coding. Your build seems spot on, I can't review the skill ordering since I'm not too much of an AMC player.

I can tell you the gameplay/skill usage and item explanations are terrific. Very useful things I didn't know about this god and great descriptions.

My only suggestions are for the aesthetic appeal for the guide: Leave some spacing between images and texts and headings, try to include icons to get rid of wall of texts, try using columns for a better looking organization within each section. This guide is deserving of an upvote :) /\

A useful link: BB Coding Guide
Loading Comments...
Load More Comments

SMITEFire is the place to find the perfect build guide to take your game to the next level. Learn how to play a new god, or fine tune your favorite SMITE gods’s build and strategy.

Copyright © 2019 SMITEFire | All Rights Reserved