
This guide has not yet been updated for the current season. Please keep this in mind while reading. You can see the most recently updated guides on the browse guides page
Vote received! Would you like to let the author know their guide helped you and leave them a message?

 Cloak
Cloak
 Boots
Boots
 Healing Potion
 Mana Potion
 Vampiric Shroud
Boots
Healing Potion
Mana Potion
Vampiric Shroud
Boots
Healing Potion
Mana Potion
 Shoes of Focus
 Hide of the Urchin
 Breastplate of Valor
 Stone of Gaia
 Bancroft's Talon
 Ethereal Staff (Deleted)
 Aegis Pendant
 Greater Blink
 Greater Purification
 Shell of Absorption
 Y
Y
 B
B
 A
A
 X
X

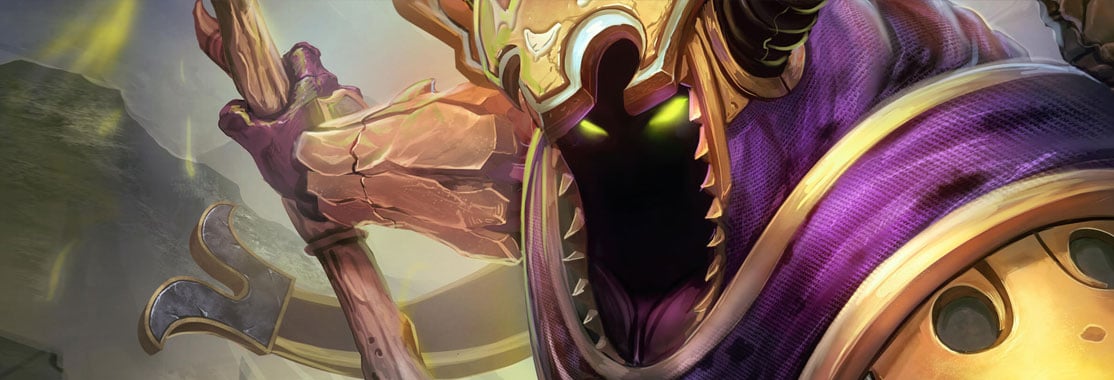
And here we are for a new Hades' guide !
I am quite a new player in SMITE. I started in September 2014 and yet I might be still a noob for most of you.
I mastered a dozen gods in the game but my favourite god of the whole game is Hades. At the time where you are reading my guide, I should be M 10 with him (and I'll be glad to play with or against you to show you all the potential of this amazing character).
First things first, I have to say I'm not satisfied by the mention "very easy to play" given by Hi-Rez in the game. In no way Hades is an easy god to play, and I hope I will give you the proof throughout this (very?) long post.
I made this guide to show you all the possibilities I found with Hades, with my advices and my notes but in any ways I am telling you to play Hades this way. You need to forge your own experience with this amazing and underrated god.
Please rate and comment my guide.
Any remark will help me to enhance it !
![]()
Blight
Official description :
Hades' normal staff attacks apply a debuff to the enemy, called Blight. This debuff stays on the target and can be refreshed. If an enemy is afflicted by Blight, each of Hades' other powers have an additional effect.
Ability: Debuff
Affects: Enemy
Duration: 5s
Note :
This passive is the core of Hades' gameplay. The debuff itself does nothing on your opponent but it grants you additional effects on every active skill you have.
You have three ways to apply blight : normal attacks, your first (![]() Death From Below) and second skills (
Death From Below) and second skills (![]() Shroud of Darkness).
Shroud of Darkness).
In the case where ![]() Blight is already applied,
Blight is already applied, ![]() Death From Below and
Death From Below and ![]() Shroud of Darkness will have their additional effect activated and the duration of Blight will be reset.
Shroud of Darkness will have their additional effect activated and the duration of Blight will be reset.
![]()
Death from Below
Official description :
Hades descends into the ground and erupts from below at his ground location, doing damage to all enemies in the area. If the enemy is Blighted, they are also slowed. Applies Blight.
Ability: Ground Target
Affects: Enemy
Damage: Magical
Radius: 20
Damage: 50 / 90 / 130 / 170 / 210 (+70% of your magical power)
Slow: 20 / 25 / 30 / 35 / 40 %
Slow Duration: 2s
Cost: 50 / 55 / 60 / 65 / 70
Cooldown: 12s
Notes :
This is Hades' movement skill. It has many purposes :
- It is a perfect skill to engage. You may jump on your opponent or behind him.
- It can be used to escape a difficult situation.
- If you are chasing an opponent blighted, you can jump on him and apply a speed debuff so your teammate (or you) can take him down easily.
You should reach the 40% cooldown reduction for a 7s cooldown which gives you an high movement potential.
You can escape any barrier skills (like Odin's ultimate) and go through walls.
![]()
Shroud of Darkness
Official description :
Hades silences all enemies in a cone in front of him. If the enemy is Blighted, they are also feared. Consumes Blight.
Ability: Cone
Affects: Enemy
Silence: 1 / 1.25 / 1.5 / 1.75 / 2 s
Cost: 80
Cooldown: 15 / 14 / 13 / 12 / 11 s
Notes :
Very easy to hit but hard to know when to use it. Most of the players find it useless but my thoughts are this is one of the most useful crowd control skill.
- It prevents your opponent from using any ability or active item for 1 to 2s.
- It can interrupt every channeled skills (which doesn't grant immunity) like ![]() Rama's
Rama's ![]() Rolling Assault or
Rolling Assault or ![]() Ares'
Ares' ![]() Searing Flesh. But in most case, it requires a good tempo.
Searing Flesh. But in most case, it requires a good tempo.
- It will apply Blight to anyone hit by the skill.
- If your opponent is debuffed, he will be feared.
The regular or unhanced skill will help you to prevent your enemy from fleeing a fight !
![]()
Devour Souls
Official description :
Hades devours the souls of his enemies, dealing damage in a radius around him. If the enemy is Blighted, the enemy explodes dealing damage to nearby enemies and healing your allies. Enemy gods take 50% of the detonate damage. Consumes Blight.
Ability: Area
Affects: Enemy
Damage: Magical
Radius: 20
Damage: 75 / 110 / 145 / 180 / 215 (+60% of your magical power)
Detonated Damage: 20 / 27 / 34 / 41 / 48 (+50% of your magical power)
Detonated Healing: 30 / 40 / 50 / 60 / 70 (+15% of your magical power)
Detonation Radius: 20
Cost: 65 / 75 / 85 / 95 / 105
Cooldown: 15 / 14 / 13 / 12 / 11 s
Notes :
This is your main skill to damage your opponent. Very easy to use, just stay nearby your target !
Never use this skill first when starting a fight, you will lose all the additional effects : more damages and healing.
You definitly want the 40% cooldown reduction with it, so you can maximize your sustainability.
This skill is very important :
You will hit everyone in the radius effect.
Each people debuffed in the radius effect will provoke an explosion for additionnal damage for them and anyone in a small radius. For instance : 3 nearby creeps marked with Blight are hit with Devour Soul. They will receive 75 + 3*20 = 135 damages at level 1 without magic power (80% increased damage compared to the situation where you use the ability without Blight)
Each people Blighted hit by the skill will heal you and your friends in the radius effect. The amount healed can be insanely high depending on how many people blighted you hit. You can easily reach 20 to 40% of your health bar recovered when correcly used.
You can take down easily anyone low in health (and steal a kill or two thought).
![]()
Pillar of Agony
Official description :
Hades calls to all enemy souls nearby, pulling them closer to him over time, doing damage every .5s for 4s. If the enemy is Blighted, their protections are reduced.
Ability: Area
Affects: Enemy
Damage: Magical
Radius: 30
Damage per Tick: 45 / 60 / 75 / 90 / 105 (+30% of your magical power)
Damage (Total): 360 / 480 / 600 / 720 / 840 (+240% of your magical power)
Protections: 40 / 50 / 60 / 70 / 80
Protections Debuff: 10 / 15 / 20 / 25 / 30
Protections Debuff Lifetime: 4s
Cost: 100
Cooldown: 90s
Notes :
This ultimate is a powerful damage and crowd control skill. You deal an high amount of damage to your opponent and your allies can take them down easily.
You can be damaged during your ultimate (and hell you will be), but hopefully, you have your protection raised for the whole duration.
If Blighted, the enemies taken in the radius have a protection debuff effect, useful for you and your partners.
The ultimate can be countered easily by the Fighting Blink, Purification and any jumping ability. So choose wisely when to use it or it will be useless.
You can stop the cast with a right click which can save you sometimes.
![]()
Hide of the Urchin
Description :
Cost: 785 (2500)![]()
+45 Physical Protection
+45 Magical Protection
+250 Health
+250 Mana
PASSIVE - You gain +2 protections for each god kill or assist (max 10 stacks).
Notes :
You must rush for this item, thus you can stack the passive quickly for a 65 Physical/Magical protection. This is your main tank item. The sooner you get it, the more resistant you will be in early game and you will be resilient to damages while using Pillar of Agony at low level.
You should avoid to engage until you have it in early game or you will be easily taken down, even with the protection bonus given by your Ultimate.
![]()
Shoes of Focus
Description :
Cost: 875 (1875)![]()
+50 Magical Power
+250 Mana
UNIQUE - +18% Movement Speed.
PASSIVE - You gain +15% Cooldown Reduction.
Notes :
Movement speed is a must have for a tank. I think the protection given by the Reinforced Greaves is worthless at higher level (+25 physical and magical protection). I prefer the cooldown reduction given by this one. You will be able to engage slighly more than usual and save some precious time on forward/backward harrassing.
![]()
Stone of Gaia
Description :
Cost: 770 (2250)![]()
+100 Health
+70 Magical Protection
+25 HP5
+10 MP5
PASSIVE - Regenerate 2% of your maximum health every 5 seconds.
Notes :
Very cheap but powerful item. It grants you an important amount of Magical Protection, HP5 and MP5, and gives you back 2% of maximum health every 5 seconds. With this item you will increase your sustainability and allow you to stay a little longer on your lane.
You may prefer the Bulwark of Hope but its passive is not that interresting (50% damage reduction for only 1 second).
![]()
Breastplate of valor
Description :
Cost: 1150 (2300)![]()
+75 Physical Protection
+550 Mana
PASSIVE - Your ability cooldowns are reduced by 25%.
Notes :
I usually aim this item in third place in my regular build, so I have the maximum cooldown reduction quickly. With the Shoes of Focus, your utlimate's cooldown fall under 1m instead of 90s, and your other skills to a 5 to 7s cooldown.
Once you have those items, you become a serious threat for your enemy when with teammate : you can engage/heal/shout/mind/save/escape quickly.
![]()
Bancroft's Talon
Description :
Cost: 1030 (2400)![]()
+100 Magical Power
+12% Magical Lifesteal
PASSIVE - You gain 1 additional magical power per 1% of your missing health.
Notes :
I usually take it in fifth, but you can take it in third or forth, depending on how confident you are in your resistances. Bancroft grants you 100 Magic Power plus 1 point for every percent of your life missing. With this one, you will expect to be attacked with ![]() Pillar of Agony : the more you are damaged, the more you ultimate will be painful for your opponent.
Pillar of Agony : the more you are damaged, the more you ultimate will be painful for your opponent.
The lifesteal is a small bonus for your healing combo, still good.
With this item, you will have to play between been seriously wounded and been in good shape with your ![]() Devour Souls. In any way, you will be a pain for your enemy.
Devour Souls. In any way, you will be a pain for your enemy.
![]()
Etheral Staff
Description :
Cost: 1250 (2700)![]()
+600 Health
+300 Mana
+30 Magical Power
PASSIVE - 2% of your maximum health is converted into magical power.
Notes :
I always take this one last, cause you are already resilient to damages. This item grants you an high amount of life for ever more sustainability, a fair amount of mana, you ever need some, and a few magical power.
What is making it interresting for you is its passive : 2% of your maximum health is converted into power. In late game, fully built, Hades reachs 3000 HP, thus you will get 60 Magical Power in bonus for a total of 90.
![]()
Mystical Mail
Description :
Cost: 1450 (2850)![]()
+300 Health
+60 Physical Protection
AURA - Deals 40 Magical damage per second to enemies within 25 units.
Notes :
This item is a possibility if you estimate you don't need Breastplate of Valor or if you don't need the Stone of Gaia (like there is 4/5 physical in the other team). What interrest us with it is his passive : 40 magical damages in 25 units radius. You will inflict a few damages as soon as you engage and it will make you Ultimate even more powerful.
![]()
Chronos' Pendant
Description :
Cost: 500 (2400)![]()
+75 Magical Power
+25 MP5
PASSIVE - Your ability cooldowns are reduced by 25%.
Notes :
I only recommend this item when Breastplate of Valor is useless (when you have 4/5 Magic user in opponent team). You will sacrifice your health bonus for magical power, good amount of MP5 but you have still your cooldown redution, which is primary.
![]()
Bulwark of Hope
Description :
Cost: 1105 (2525)![]()
+60 Magical Protection
+450 Health
PASSIVE - If you are below 25% Health, you gain a shield that reduces damage by 50% for 1 seconds. Can only occur once every 60 seconds.
Notes :
It is a good alternative to Stone of Gaia which grants you even more health and though more Magical Power in my regular template (with Ethereal Staff).
In the case where you are facing 4 or more magic users, it replaces Etheral Staff. You still have a good amount of health and its passive can save your life (sometimes...).
![]()
Greater Blink
Description :
Cost: 300 (900)![]()
Using this item will allow you to teleport short distances instantly. You must have not dealt or taken damage for 3s before it can be used. Also, you gain 40% movement speed for 1s after blinking. Cooldown - 45s.
Notes :
This item is recommended for mind game. Hades already have a blinky skill, but ![]() Death From Below works like a signal for "Hades will launch his ultimate ! Dispatch !" You can use the Greater Blink to engage very quickly and use your Ultimate while the opponent team as not reacted.
Death From Below works like a signal for "Hades will launch his ultimate ! Dispatch !" You can use the Greater Blink to engage very quickly and use your Ultimate while the opponent team as not reacted.
![]()
Aegis Pendant
Description :
Cost: 300 (900)![]()
Using this item makes you invulnerable to damage for 2s, preventing you from attacking but allowing you to move. Crowd control effects will still apply. After the invulnerability fades, you gain a 20% damage reduction buff for 4s. Cooldown - 120s.
Notes :
I only recommend this item when you are facing a Nu Wa like : any characher that can take you down from a far distance. You are not invincible and you will be often low in health at the end of an encounter. This will save you from death when well used and gives you the opportunity to teleport to your fountain or heal you with ![]() Devour Souls.
Devour Souls.
![]()
Greater Purification
Description :
Cost: 300 (900)![]()
Removes crowd control effects and makes you immune for 3s. This also reduces all god cooldowns by 5 seconds. Cooldown - 90s.
Notes :
A must have against any crowd control's ultimate like Ares' or Fenrir's. You can combine it with Aegis Pendant if necessary as Ares is always played in CDR. The two combined, he will never be a threat.
![]()
Shell of Absorption
Description :
Cost: 300 (900)![]()
Using this item gives the owner and his allies a protection buff and some damage mitigation.
Using this item gives the owner and his allies a +45 protections buff for 5 seconds. Also, all damage taken is reduced by 15%. Cooldown - 90s.
Notes :
For the best chances to survive when chaneling ![]() Pillar of Agony on a lot of opponent, use this one to get an additional protection and damage reduction. Trigger it right before jumping so your allies get the bonuses too for an certain rampage.
Pillar of Agony on a lot of opponent, use this one to get an additional protection and damage reduction. Trigger it right before jumping so your allies get the bonuses too for an certain rampage.
![]()
Pros
+ Can assume a wide display of roles : support, tank, damage mage (when built as a mage), crowd control mage.
+ High natural resistance to physical damages
+ Have a great heal for himself and allies
+ Have many and powerful crowd control possibilities
+ Hard to predict
+ Skills are easy to use with a large radius
+ Can easily mind its opponents
+ Strong against gods without jumping skill
+ High movement capacity
+ Easy to play
![]()
Cons
- Depends a lot on Death from Below
- High cooldowns on abitities
- Requires a good teamplay to be efficient
- Has some difficulties to heal other
- The amount healed by ![]() Devour Souls depends on the situation
Devour Souls depends on the situation
- Vulnerable during ![]() Pillar of Agony
Pillar of Agony
- Ultimate easily countered
- Useless against jumping gods
- Bad jungler
- Hard to be well played
Until now I only gave you the basics : a description of Hades' Skills, the useful items and the Pros/Cons when playing Hades.
Now we are going deeper in the capacities of the character.
First, I'd like to remind you that Hades requires a good teamplay to be efficient. I recommend to have a vocal contact with your mates to optimize your efficiency and because some of your tricks (like healing) often requires to be explained since Hades is not well known by the average player.
Avoid being alone on a lane. As you are a tank with this build, you must be with someone to take damages at his place. And most of the time, you won't be able to take anyone down by yourself (unless you have a mage template). If it is the case, stay outranged, and clean waves while going back to your tower.
Another reminder, in any combo you perform with Hades, ever use ![]() Devour Souls last for a maximum effect and additionnal healing.
Devour Souls last for a maximum effect and additionnal healing.
Ready to go ?
Variant 1 :
![]() >>
>>
![]()
Variant 2 :
![]() >>
>>
![]()
Hades is very useful when on a lane, because he can clean a wave of creeps and heal himself (and others occasionally).
Your aim is to apply Blight on every creeps with ![]() Death From Below or
Death From Below or ![]() Shroud of Darkness before exploding them with
Shroud of Darkness before exploding them with ![]() Devour Souls.
Devour Souls.
Try to pack the wave to hit the most creeps with ![]() Devour Souls. Often you will have to be very precise because it has a small radius effect. Also please keep in mind that the explosion damages are stackable : the more packed is the wave, the more the creeps will get damages.
Devour Souls. Often you will have to be very precise because it has a small radius effect. Also please keep in mind that the explosion damages are stackable : the more packed is the wave, the more the creeps will get damages.
By devouring the soul of all the wave at once, you will easily heal 20% of your health.
If a partner needs healing, tell him by anyway to stick to the creeps but not attacking them until you use![]() Devour Souls. If you are healed by 20% of your health, think that you have a greater life bar that any other character. They might be healed for 30 to 40% of their health when well performed.
Devour Souls. If you are healed by 20% of your health, think that you have a greater life bar that any other character. They might be healed for 30 to 40% of their health when well performed.
It is one of the best instant heal of the game. That is why must explain it to your teammate, otherwise it will lose its efficiency.
Of course, this combo has no limit to the number of target hit. Just make the calculus and think about it.
Also I recommend you to use the Variant 2 instead of 1 at least in end game, you will avoid to kill the creeps with ![]() Death From Below.
Death From Below.
This phase of the game is the only one where you might be solo.
In the case where you have or want to face an enemy alone, never ingage without a wave of creeps or far from a jungle buff. The combo to use is the same as for harassing, but you have to perform it more wisely to increase greatly your damages.
When using a mage build, you will probably deal enough damages to kill him, but when using a tank build, you will have to use your environment and be intelligent.
Tip 1:
On a lane, try to keep your opponent near a pack of creeps. He will feel safe but it is the opposite. Cast ![]() Shroud of Darkness and
Shroud of Darkness and ![]() Devour Souls, each hitting the creeps and the opponent. If well performed, you will be amazed by the damages inflicted.
Devour Souls, each hitting the creeps and the opponent. If well performed, you will be amazed by the damages inflicted.
For instance : I did it once on a He Bo in siege with 6 creeps. I was level 15 with ![]() Devour Souls maxed and Shoes of Focus and Bancroft in my inventory.
Devour Souls maxed and Shoes of Focus and Bancroft in my inventory.
Roughly, he received :
215 + (0.60*150 Magic Power) + 6 * (48 + (0.5 * 150 Magical Power)
= 215 + 90 + 6* (48+75)
= 215 + 90 + 6 * 123
= 215 + 90 + 738
= 1 043 damages.
Yup, you corretly read it. In a single spell. Don't even talk about his magical protection. Precisely, he received a few more than 900 damages, which is still amazing.
You do not underestimate Hades !
Tip 2:
When you are in jungle, hide behind a jungle group of creeps. Your opponent will attack them automatically. You just have to perform quickly a ![]() Shroud of Darkness /
Shroud of Darkness / ![]() Devour Souls combo and you will perform a few less devastating attack (with only 3 creeps) but still painfull.
Devour Souls combo and you will perform a few less devastating attack (with only 3 creeps) but still painfull.
Tip 3:
After you damaged your opponent, he will try to escape from you. He will jump away from you if he has such an ability for. Chase him with ![]() Death From Below if available or shout him with
Death From Below if available or shout him with ![]() Shroud of Darkness if its cooldown is over to interrupt him. In any way, stay nearby him and apply Blight on him. Then cast
Shroud of Darkness if its cooldown is over to interrupt him. In any way, stay nearby him and apply Blight on him. Then cast ![]() Pillar of Agony take him down.
Pillar of Agony take him down.
Tip 4 :
If he is still alive after ![]() Pillar of Agony, finish him with an another
Pillar of Agony, finish him with an another ![]() Devour Souls. If you have maxed your cooldown reduction, Devour Soul will have a 5 seconds cooldown duration. As
Devour Souls. If you have maxed your cooldown reduction, Devour Soul will have a 5 seconds cooldown duration. As ![]() Pillar of Agony chanels for 4 seconds, at the end of it Devour Soul will be available again.
Pillar of Agony chanels for 4 seconds, at the end of it Devour Soul will be available again.
To summarize :
Variant 1 (on lane)
WAIT FOR CREEPS >> PUSH YOUR OPPONEN TO THEM >>
![]() >>
>>
![]() >>
>>
![]() OR
OR
![]() >>
>>
![]() >>
>>
![]()
Variant 2 (in jungle)
HIDE BEHIND JUNGLE CREEPS >> WAIT FOR HIS ENGAGING >>
![]() >>
>>
![]() >>
>>
![]() OR
OR
![]() >>
>>
![]() >>
>>
![]() >> GET THE JUNGLE BUFF
>> GET THE JUNGLE BUFF
Bonus tip :
If you are under your tower and harassed by a raging enemy, try to catch him under the tower's radius effect with ![]() Pillar of Agony. While their is any enemy's creeps near the tower, approach like you are engaging a fight, but stay under the tower. If your opponent enter your
Pillar of Agony. While their is any enemy's creeps near the tower, approach like you are engaging a fight, but stay under the tower. If your opponent enter your ![]() Pillar of Agony's radius or if he's diving, catch him. You and your tower will seriously wound him if he don't get out of your ultimate.
Pillar of Agony's radius or if he's diving, catch him. You and your tower will seriously wound him if he don't get out of your ultimate.
I will now focus a bit more on ![]() Pillar of Agony which is a powerful ultimate but easy to counter. In a fight where all or most of your opponents can jump out of your ultimate, do not use it to engage (it will be useless), but rather to mind your opponent and force them to use their ultimate to save themselves.
Pillar of Agony which is a powerful ultimate but easy to counter. In a fight where all or most of your opponents can jump out of your ultimate, do not use it to engage (it will be useless), but rather to mind your opponent and force them to use their ultimate to save themselves.
For instance, you can mind Nu Wa and force her to use her hassle ultimate (which can kill anyone low on health anywere on th map) while everybody is at full health bar. You can also force Loki to teleport away from you with his dreadful ultimate. Become an easy target for Odin's Cage, they escape with ![]() Death From Below.
Death From Below.
![]() Shroud of Darkness is also a good skill in your mind game, but it needs to be very well timed to interrupt any skill (which doesn't grant any kind of immunity) and trigger their cooldown. That way you can save a life or transform a fierce opponent into an easy target (like shouting Rama during his roll).
Shroud of Darkness is also a good skill in your mind game, but it needs to be very well timed to interrupt any skill (which doesn't grant any kind of immunity) and trigger their cooldown. That way you can save a life or transform a fierce opponent into an easy target (like shouting Rama during his roll).
This time you have to find out by yourself, be imaginative !
Hades can be dreadful but he has some nemesis that you must avoid if you don't want to be easily killed.
Gods you have to avoid :
- Anubis : you are an easy target for him and his ultimate
- Ao Kuang : same reason, when you cast ![]() Pillar of Agony he can execute you easily
Pillar of Agony he can execute you easily
- Aphrodite : she will cast her ultimate to save her and her soulmate from your ultimate
- Freya : Because Freya
- Hun Batz : His ultimate is overpowered and you can't use your actives while in it.
- Loki : Because Loki
- Nemesis : a well played Nemesis will apply his ultimate on you which annihilate your defenses
- Nox : you highly depend on your skills so be careful nearby her
- Poseidon : not really, but his third skill prevent you from using ![]() Death From Below and he can chain with his deadly ultimate.
Death From Below and he can chain with his deadly ultimate.
- Serquet : don't try to catch her, she has 2 jumping skills and her poisons kill you easily
- Zeus : He has a very painful ultimate and you are an easy target for him.
Gods you must target (easily taken into your ultimate):
Roughly any gods without a jumping ability.
- Ab Muzen Cab
- Ares
- Artemis
- Cabrakan
- Chronos
- Geb
- Hel
- Isis
- Janus
- Kukulkan
- Ra
- Sylvanus
- Vulcan (even if he is able to escape, but he has to be reactive)
- Ymir
- Zhong Kui
The other not mentioned can be targeted or they have to be minded to force them to waste their ultimate. You can target Poseidon and Anubis if you are sure their ultimate is under cooldown. Zeus must be avoided in any case.
Shall I say that I love this God ?
Very well balanced, and a wide range of possibilities.
Do not trust Hi-Rez, Hades is not very easy to play because it is so hard to understand him.
When I bought him, I hated him. I didn't understand how he could be useful. I only appreciated him after I got my Master II with him and I consider I played him correctly after I had the Master V/VI.
Even after reading my guide you might find him hard to play and useless. That is normal. It is a god you have to play with your brain, not your mouse (I'm thinking of you Loki !).
I hope you enjoyed my guide.
Please rate and comment !
SMITEFire is the place to find the perfect build guide to take your game to the next level. Learn how to play a new god, or fine tune your favorite SMITE gods’s build and strategy.
Copyright © 2019 SMITEFire | All Rights Reserved


I didn't know the commands. Now it's done :)
Please vote for my guide (up or down, your choice ;))
Like I said in the guide, the damages you deal to your ennemies depend highly on the number of creeps around them and how you play your Hades.
This build/guide rely on a harassing gameplay. Personally, that's what I do most of the time. Then your ratio is based on your luck. Most of the time I end a match with 2/3 kills for the same amount of time being killed, and on 25% of my match I end up with whether an high or very low ratio. (Best is 12/2 and worst is 1/10 with this build).
Just remember that what is amazing with Hades is he's like a drood in WoW : not the best but really good in any kind of gameplay.
Maybe it's just my team, but I'm getting some games where I destroy my team by doing the most damage and other games I do the least damage. I know this build isn't really for damage, but it's odd that I get a variety of games.
Overall, really good build!