Smitefire logo

Join the leading SMITE community.
Create and share God Guides and Builds.

Create an MFN Account


Or

Not Updated For Current Season

This guide has not yet been updated for the current season. Please keep this in mind while reading. You can see the most recently updated guides on the browse guides page

x

Vote received! Would you like to let the author know their guide helped you and leave them a message?

Banner for Ah Muzen Cab guides

Flight of the Bumblebee

13 2 36,883
by ShadedEve updated December 8, 2013

Smite God: Ah Muzen Cab

Build Guide Discussion 8 More Guides
Choose a Build: Standard/Solo
Standard/Solo More Power & Mana, Less Lifesteal The Golden Touch
Tap Mouse over an item or ability icon for detailed info

Ah Muzen Cab Build

Starting Purchase Order

Build Item Tabi Tabi
2
Build Item Devourer's Gauntlet Devourer's Gauntlet
3
Build Item Healing Potion Healing Potion
2
Build Item Mana Potion Mana Potion
Build Item Warrior Tabi Warrior Tabi

Alt Starting Purchase

Build Item Tabi Tabi
2
Build Item Heartseeker Heartseeker
3
Build Item Healing Potion Healing Potion
2
Build Item Mana Potion Mana Potion
Build Item Warrior Tabi Warrior Tabi

Mid/Late Game

Build Item Asi Asi
Build Item Rage Rage
Build Item Deathbringer Deathbringer

Choose one

Build Item Shifter's Shield Shifter's Shield
Build Item Fatalis Fatalis
Build Item Void Shield Void Shield

Actives

Build Item Purification Beads (Old) Purification Beads (Old)
Build Item Aegis Amulet (Old) Aegis Amulet (Old)
Build Item Cloak of Meditation Cloak of Meditation

Example of a finished build

Build Item Warrior Tabi Warrior Tabi
Build Item Devourer's Gauntlet Devourer's Gauntlet
Build Item Asi Asi
Build Item Rage Rage
Build Item Deathbringer Deathbringer
Build Item Shifter's Shield Shifter's Shield

Ah Muzen Cab's Skill Order

Hive

1 X Y
Hive
2 8 12 14 15

Swarm

2 A B
Swarm
1 4 6 7 10

Honey

3 B A
Honey
3 11 16 18 19

Stinger

4 Y X
Stinger
5 9 13 17 20
Hive
2 8 12 14 15

Hive

1 X
Bees swarm at the ground target location, creating a new hive that provides Movement Speed, Attack Speed, and HP5 buffs to Ah Muzen Cab. Hives reveal enemies within 20 units of them. The hives can only be destroyed by basic attacks (Max 7 hives).

Ability Type: Circle, Buff
HP5: 20 / 25 / 30 / 35 / 40
Movement Speed: 10 / 15 / 20 / 25 / 30%
Attack Speed: 10 / 20 / 30 / 40 / 50%
Radius: 90
Cost: 40
Cooldown: 12s
Swarm
1 4 6 7 10

Swarm

2 A
Ah Muzen Cab summons a large swarm of bees that fly forward in a path in front of him, dealing damage to all enemies hit and applying Bees! to them.

Ability Type: Line, Damage
Damage: 50 / 90 / 130 / 170 / 210 (+70% of your Physical Power)
Range: 70
Cost: 65 / 70 / 75 / 80 / 85
Cooldown: 15 / 14 / 13 / 12 / 11s
Honey
3 11 16 18 19

Honey

3 B
Ah Muzen Cab sprays honey that lasts for 4s at a moveable ground target location, Slowing all enemies in the area. Bees from Hives within 90 units and Swarm will fly over to protect the honey, dealing damage every 0.5 seconds and applying Bees! to all enemies as they leave the honey.

Ability Type: Area, Slow, Damage
Damage (per Tick): 13 / 25 / 37 / 49 / 61 (+15% of your Physical Power)
Slow: 20%
Cost: 60
Cooldown: 10s
Stinger
5 9 13 17 20

Stinger

4 Y
Ah Muzen Cab fires off an enormous stinger that deals damage to all enemies in a line, sticking into the first god that is hit, applying Bees!, Slowing, Crippling, and decreasing their Physical Protections for 3 seconds. If the target dies or after 3 seconds, the stinger falls onto the ground for 4 seconds. If Ah Muzen Cab picks up his stinger, he gains a significant reduction to Stinger's cooldown.

Ability Type: Line, Cripple, Damage
Damage: 275 / 355 / 435 / 515 / 595 (+100% of your Physical Power)
Slow: 20%
Physical Protection Reduction: 10%
Retrieval Cooldown Reduction: 60%
Range: 70
Cost: 100
Cooldown: 100s

Introduction

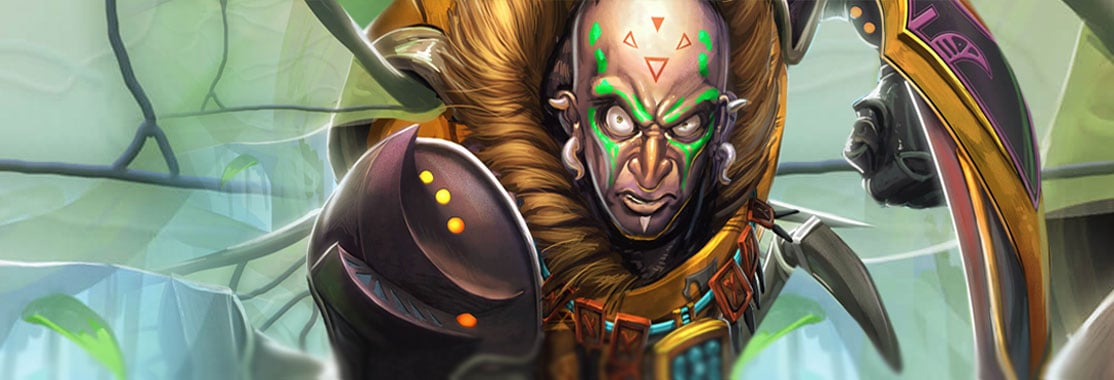
I have wanted to make a guide for a while, so I decided to make my first one on a god that I enjoy playing. Luckily for me, Ah Muzen Cab is one such god, and he doesn't have many guides to boot, so I decided to try my hand at him.

I would like to point out right now that I am not experienced at this, and I would LOVE any criticism, advice, comments, questions, ideas, suggestions, compliments, and yes, even insults.

This guide WILL be updated regularly and any advice given will be taken into account and tested. If anyone wishes to test something themselves, and would like to share it, I would be more than willing to use the information given to me to help better this guide. Also, please tell me if I go overboard on the BBcode, or if I should add more, and if so where. Like I said, every little thing helps.

NOTE: THIS IS A GUIDE, MEANING IT IS ONLY HERE TO HELP GUIDE YOU! FEEL FREE TO DEVIATE ANYWAY YOU WANT AND TO YOUR PLAYING PREFERENCE!

On that final note, please have a pleasant read.

Update Log

Log:
12/08/13: Added a third build, with item descriptions. Also added the build description section.
12/03/13: Added a new build, and item descriptions.
11/30/13: Posted the guide.

Pros / Cons

Pros:


Good Movement Speed
Fast Minion Clear
High Jungle Potential
High Burst Damage


Cons:


Extremely mana hungry, especially at the beginning
Very squishy
Nothing to defend against CC
No escaping abilities
Ult is a bit of a skill shot

Items and their reasons

Warrior Tabi:


I grab the Tabi in general over the Boots/greaves because of the Power and Attack Speed, as opposed to the extra Health/Physical Protection and Mana/Magical Protection, as well as Health regen in the greaves case. Moreover, I get the Warrior Tabi over the Ninja Tabi because of the added Penetration that you get, instead of the Cooldown Reduction, which, while nice and all, doesnt work as well with Ah Muzen Cab.

devourer's gloves:


Now, some of the people that Ive shared this build with have suggested other items instead of the devourers gloves. While I DO admit that there might be some better suited items instead of these, I like them because of the added Power and Lifesteal you get from at full stacks.

Heartseeker:


This is what I use when I don't want to use the devourer's gloves. I choose this specifically due to higher Physical Power you get at full stack. Even though you do lose half of the stacks on death, Ah Muzen Cab can easily regain them due to his extremely fast minion clear. To top that off, the added Movement Speed is just an added bonus that works well with your Hive when you are trying to get away.

Asi:


Even though we get Lifesteal with the devourer's gloves, I like to use Asi in conjunction with them because of the Attack Speed and Penetration. That, along with its passive, can be an immense lifesaver when you are in a bind.

Rage:


This is pretty self-explanatory in my eyes. Crits, with a nice bit of Physical Power and Attack Speed. There is, of course, its use with the Deathbringer that really makes me use it in this build.

Deathbringer:


One again, this is put in here for one major reason. Crits. That, along with the Physical Power that you get, and its passive make this an all around go to item for anyone that wants to dish out some pain.

eye of retaliation:


This is a good item depending on your situation. You are doing well, and want to do even better? Get this. Your team is losing and you need to make a quick comeback? DONT get this. While the added Physical Power is nice, and the Lifesteal might help you out too, it really shines with its passive, which, if used properly, can bring you right back up from the brink of death. However, if you are losing like I said before, you wouldnt want to risk dying for the added power.

focused voidblade:


I usually get this for when Im facing someone who does a little too much damage to me for my liking, or a tank that I just cant seem to kill, all the while still getting some nice attack stats. While the Physical Defence that you get is nice, I really prefer it for its added Physical Power and Penetration.

Fatalis:


This is the one I use the least, though it still as its strong points. Mainly the use of the increased Attack Speed can really help depending on who you are laning against, as well as personal preference. The Movement Speed also is quite nice with boost you get from your Hives, and can help you escape some, pardon the pun, sticky situations.

Jotunn's Wrath:


Now, this is an item that had only one rival when I was looking through possible choices for making the second build, the other being Transcendence. I decided to use both of them, because frankly, they are both good. The advantages of Jotunn's Wrath are its Penetration, and Cooldown Reduction when it is fully upgraded. The Penetration is fairly obvious, but the Cooldown Redution is nice due to the way that, with the added power of the build, you can use your skills more often, thus doing more damage consistently.

Transcendence:


I chose Transcendence as an item for the second build because of two thing. One, it was the only other item with mana and power. Two, it is just good. At full stacks it gives you another 50.4 Physical Power and a 750 mana boost, which from it at full stacks alone, gives you a total of 85.4 Physical Power and 1050 mana. To top it off, you get some mana regen just to sweeten the deal. There really isn't much more to say about this item, just that it MUST be bought early to use it for maximum effectiveness.

Qin's Sais:


Now, I substitute Asi for Qin's Sais for a few reasons. One, more power and attack speed, which is what this build is truly aiming towards. Two, they have the same Lifesteal, which is a nice bonus in my eyes. Three, Qin's Sais passive is truly amazing if used correctly, as if you consistently poke at a god, you will do more and more damage, which is something we all love. Though the main problem is if a god has lost little to no health, which render it's passive null for a bit, or if you are up against a healer, which can be annoying with this item. However, you naturally do more damage, so soon enough, the passive will start kicking in in full force if you manage to poke them enough.

Bloodforge:


Physical Power and Lifesteal. This is what this item was built to do, and it does it wonderfully. At full stack it gives you 40 Physical Power and 20% Lifesteal, which with this build that has been made for more damage, is a true gift from the gods. Then, with the passive added into the mix, you get another 20 Physical Power, and 10% Lifesteal for 4 seconds. Truly, this item is a great option to consider for your final item, and can be a huge tide pusher if used correctly.

Malice:


Now usually I use Rage instead of Malice because I like the passive and attack speed. However, if properly built, the Malice CAN be a viable option as well, and gives a nice crit and power increase. While I don't suggest using it for any of the builds except the third one, it is still an option that is open, and can be used depending on the preference of the player.

Golden Bow:


This item is one of my favorites, though I don't use it as much. It gives you more Physical Power, Crit %, AND a bit more Movement Speed. While all that is nice, what I really like about it, and why I put it in a build, is it's passive, which damages enemies in a 15ft range for 50% of your damage on basic attacks. This makes it great for clearing minion waves, especially with your attack speed, and gives it good potential for teamfights, even more so if you have a teammate like Ares or Hades that can bring all the enemies into a close proximity of each other.

Actives

Now I personally DON'T use actives much, if at all. However, for the sake of the guide, I will add a few actives that should be taken into account when playing as Ah Muzen Cab. This section will be updated later as I try out some of the other actives.

meditation:


This is pretty obvious for why you should get it if you are looking to get an active. Since Ah Muzen Cab is VERY mana hungry, more so at the beginning of the match, getting Mediate is a good way to keep your mana up.

Purification Beads:


This is also fairly obvious as well. Since Ah Muzen Cab doesn't have anything to escape CC, this should be taken into account if you are facing someone like Ares, Ymir, or Hades.

Aegis Amulet:


Basically the same thing as the beads, as you should use this if you are facing someone with high CC.

Build Description

Build 1 - Standard/Solo


This is basically an overall, Jack of All Trades, Master of None kind of build. It is fairly spread out in the terms of different stats, and the situations where you can and would want to use it. This is my go to build, and the one I prefer to use the most, though others could easily pick any of the build builds for their standard/go to build, and that is the reason I have multiple builds.

Build 2 - More Power & Mana, Less Lifesteal:


This is the build for people who want more mana so they don't have to leave lane as much, as well as adding more power to put that mana to good use. However, it's downside is that it has less lifesteal, which means it has less sustain, which means you have a higher chance of death.

Build 3 - The Golden Touch:


This build is somewhat similar to the second one, though it is leaning towards the pushing side. Overall, it has more power than the "standard" build, and a greater speed as well. Along with the Golden Bow it has a faster minion clear, and has the nice advantage of poking multiple enemy gods if they are clustered together in one place. A note for this build is that if you want to switch out the devourer's gloves with either the eye of retaliation or the Bloodforge do it when you are sure you can sell the gloves and buy the other item at tier 3 in one go, else it will do more harm than good.

Skills: What they do and when/how to use them

Ah Muzen Cab has an interesting skill set that might take some time to get used to for some people due to how unique they are compared to some of the other gods. Below is a (hopefully) in-depth description of the skills, what they do, and when and how you should use them.

Bees!:


This is his passive, which does 5 damage plus 5% of your Physical Power every .5 seconds and lasts for 3 seconds. It also spreads to other minions and gods that are nearby anyone that is affected by Bees! during that time period. Another nice thing about it is that it reveals where gods are if they are affected by Bees!.

Hive:


This is an ability that you want to make good use of due to the buffs and slight sustain it gives you. With an escalation of 4/6/8/10/12 Health Regen plus 3% of your Physical Power, it is a good way to heal up fairly quickly while staying out of harms way. Along with that it also has an escalation of 20/25/30/35/40% added Movement Speed while within its range, it is a good way to escape unsavory situations if you are able to chain them together. The final boost it gives you is another escalation, this one going 10/20/30/40/50% added Attack Speed. This alone can be a tiebreaker if used correctly, whether that being clearing a minion wave, destroying a tower, or killing a god.

As seen, Hive is a multi-purpose skill, and thus should be used depending on what situation you are in. If you need to hang back and regen some health, use Hive. Need to make a quick highway to go to and fro between your lane and your base? Set up a chain of Hives to maximize your Movement Speed for when you are returning to lane after a recall, or trying to escape an enemy god. Need that little boost to be able to push your lane, destroy the tower, or just kill that one god? Use the added Attack Speed to do just that.

NOTE: YOU CAN ONLY SET UP 4 HIVES AT ONE TIME, SO BE AWARE OF WHERE YOUR HIVES ARE!

Swarm:


This is your main damaging ability, and will mostly be used to initiate or end fights. It has a scaling damage of 60/115/170/225/280 plus 80% of your Physical Power. On top of that, it applies your passive, Bees!, on hit. This is also what you will be using to clear minion waves quickly. It can also be used in conjunction with Honey if you are out of your Hive range when you apply Honey.

As stated above, Swarm is used to clear minion waves, initiate or end fights, allow Honey to deal damage while out of Hive range, as well as being your main damaging ability. It will also mainly be used in teamfights, and has potential for chasing due to the Bees! DoT effect.

Honey:


Now this is an interesting ability. When out of range of your Hives and without you using Swarm on it, Honey simply has a slow effect that scales 10/15/20/25/30%. However, if you use it when in range of a Hive, or use Swarm after you place down Honey, it does damage every .5 seconds with a scale of 20/30/40/50/60 plus 20% of your Physical Power.

This ability will mainly be used to stop an enemy god from escaping by use of the Bees! damaging effect, or a way to escape quickly by slowing down enemy gods while, hopefully, using the Hives speed boost to get away.

Stinger:

This is your ult, and a skill shot. What it does is shoot out in a line and stick to the first god it hits. For the next three seconds they take damage from Bees! and are crippled. After those three seconds end, the stinger is dropped to the ground and stays there for 4 seconds, where if you pick it up in time, your cooldown is reduced by 80%. The damage itself scales 275/355/435/515/595 plus 100% of your Physical power.

This ability will mainly be used if you are trying to end a fight, gank, and it has possibilities in teamfights if you have a chance to properly aim to hit an enemy god. Though mainly, it will be used for gangs due to the high burst damage it does, as well as the Bees! DoT effect. I suggest using this with Honey's slow for an easier time hitting an enemy god.

Game Phases

Here I will describe what you should do through the various phases of the match. This information is pretty standard, though I thought it would be nice to have it up anyway.

Early Game:


At this point you should start setting up your network of Hives for easy travel to and from your lane. During this time you should also help your jungler, if you have one that is, with their first camp if you are in mid, or ask said jungler, once again if you have one, if you can take their first blue buff due to the fact that you need mana like no one's business. If you don't happen to have a jungler, then wait till around level 3 then go for blue buff if you must. This isn't mandatory, though it is extremely helpful.

Mid Game:


At this point you should have either started on your mid/late game set, or finished it, depending on how well you've done so far. Also, you should have been able to push your lane fairly well at this point in time. If that is it, it is time for you to start ganking. If there was a jungler and you weren't mid, look over at mid too see if your help is needed. If it is, go there and try getting a successful gank. If you were mid, and there was a jungler, check over at the solo lane first and see if your teammate needs any help.

Late Game:


This is where things should get interesting. Depending on how well you have been doing throughout the match, you should have started on your final item(s) for your build, or finished your build. At this point, you are mainly going to be ganking and pushing. Due to your high movement speed, you will be able to move from lane to lane, and secure a few kills, and, if the towers are still up, destroy them. You should try participating in teamfights if/when they occur, but try to keep near the back and use your Honey + Swarm combo when you see an opening. This should continue up until the point where you either win via enemy team surrendering or you defeating their Minotaur, or you losing via surrendering or your Minotaur being defeated.


And that is basically it. This section, as well as every other section, will be updated consistently as I continue to play with Ah Muzen Cab, and try out new/more things.

Your Best Friends and Worst Enemies

Ah Muzen Cab is a god with simple needs. These simple needs can be satisfied easily, or they can be destroyed easily. The deciding factor is his friends and enemies. This section will be updated consistently as I play with more of the gods, and see how they work with/against Ah Muzen Cab.

Friends:


:
Ymir can be one of your best friends, as well as one of your worst enemies, but we will get to that second part later. If you happen to be laning with Ymir, or go to gank for Ymir, be sure to never pass up an opportunity to use his skills to your advantage. An extremely good combo to use with Ymir is Frost Breath + Honey + Swarm. Just as well you can go straight to Frost Breath + Swarm if the enemy god is at low health or if they are extremely squishy like you. Along with his Frost Breath, Ymir's Ice Wall can also be used with your Honey and/or Swarm for a relatively easy kill or good poke.

Maximizing efficiency: To use this pairing to it's maximum potential, you should always alert your Ymir that you are coming, and share with them your plan before you jump in. Something as simple as " Frost Breath them" can make all the difference. This will be stressed with all the gods. Communication is the key to success.

:
Ares too can be one of your best friends and worst enemies at the same time. With his Shackles you can easily put Honey in front of the enemy god, then kill them with Swarm and Searing Flesh. Along with that, you can use his ult No Escape and it's stun to land a Stinger on an enemy god that is low on health. You could also alternatively use Honey + Swarm on the enemy gods if they are a bit high in the health department.

Maximizing efficiency: This is similar to Ymir's in the manner in which you should talk to your teammates about using their skills at opportune times. However, for Ares, remind your teammate to tell you when his ult is ready using the VVVR chat command. Also remember to politely tell your Ares that it is a good time to ult.

:
Artemis too can be one of your best friends, though for her it is slightly different. You see, if she is able to place her transgressors fates in strategic positions, you can come in for an easy gank with Stinger or your Honey + Swarm combo. Along with that, her ult, Calydonian Boar is another skill you can use to your advantage. If the boar manages to hit an enemy god near you, be ready to Honey and Swarm them. Alternatively, you can use Honey to corral gods into the Calydonian Boar so you can then Swarm or Stinger them.

Maximizing efficiency: For Artemis you must have a truly good communication flow, else most of this pairing is simply up to chance. Suggest for them to put their transgressors fates near jungle exits or other such places, so, if you or another teammate is coming for a gank, the enemy is just a sitting duck. Her ult however is less up to chance, and more to skill and timing. When she uses Calydonian Boar, keep an eye on where the enemy gods are, and try to position yourself in an area where you can reach them with your abilities if/when they get hit by the boar and become stunned.

:
Compared to some of the others Neith doesn't give as much help. However, do to the fact that she does have a few skills that can work well with yours, I feel inclined to add her. First off, she has her Spirit Arrow which roots the enemy in place. By now you have understood that whenever an enemy cannot do anything you Honey and Swarm them, or you Stinger them. Along with her Spirit Arrow, Neith's ult, World Weaver can also be used in conjunction with your Honey + Swarm combo, or can give you an opportunity to ult the enemy.

Maximizing efficiency: For Neith things are a bit simpler. Since she uses her spirit arrowss often, you will simply have to be around for when she uses them to get anything out of that particular pairing. Her ult, however, is much more promising. Since World Weaver can reach anywhere on the map as long as the enemy is visible, wearing down an enemy's health, and then telling Neith to go for the kill is a good strategy. Just as well, if an enemy is trying to escape, and they have fairly low health, point that out to Neith, and try to keep the enemy in sight and within your range so you can let Neith do her thing. If the enemy is still alive after being hit by her ult, they are stunned and are most likely at low health. Go in the for kill if you can.


Enemies:


:
For the same reasons that he can be your best friend, Ymir can also be your worst enemy. If he ever happens to get close enough to you, he WILL Frost Breath you, and then Glacial Strike you. He can also block your escape route with Ice Wall and then proceed to do the aforementioned combo, or even use Frost Breath then his ult, Shards of Ice.

Solution: Stay far away. Try poking him till he gets low enough for you to ult him, or use Swarm to finish him off. Try to get him to use up his Frost Breath and then go in for the kill during its cooldown.

:
Same as Ymir, Ares can be one of your worst enemies as well as your best friends due to his skills. If he ever manages to get close enough to you to use Shackles, expect him to soon after use Searing Flesh and prepare to find yourself looking at a giant skull if you don't manage to get away fast enough. What you really have to look out for though, is his ult No Escape, since that is the major thing you will have trouble escaping. If you get caught in it, and you are still alive, be ready to be hit by a Shackles and Searing Flesh combo.

Solution: Watch out for the Shackles and you should be fine. Since Shackles goes in a straight line, and it is fairly easy to predict when he will use it, just try to keep moving around, and staying out of his range. Though if he keeps catching you in his ult, it means it is time for you to buy Purification Beads or Aegis Amulet.

Summary

Ah Muzen Cab is a god with high Attack Speed and Movement Speed, and his strengths should be played towards that. Ways to do so would be to give him some Penetration, or some Lifesteal for sustain. His skills also go along that path, his passive Bees! giving him a small DoT effect, Hive giving him sustain, as well as an Attack/Movement Speed boost, Swarm being his main damaging move, Honey having the multipurpose of allowing him to chase down a god, or run away from a god, and Stinger being his fight finisher or go to ganking move. He also works best with gods that have a high CC, such as Ares or Ymir. He can also work well with gods that have a stun, such as Neith or Artemis.

Final Notes

Well, this is first try at a guide, and as stated in the introduction, any feedback, both positive and negative, would be greatly appreciated. Based off one of the other guides I have seen, I am planning on adding a little section in the end here mentioning the names of those that have contributed for this guide. With that, I bid you all a good morning/afternoon/evening/night.


CONTRIBUTORS:


None yet.

Leave a Comment

You need to log in before commenting.

Collapse All Comments

1
MagicalFart | December 11, 2013 7:03am
Really nice build , but i have a question . why u dont start with Death Stoll?


+1
1
Subzero008 (112) | December 8, 2013 9:01pm
Okay.

1. Highlight. In the enemies and friends section, make the "Enemies" and "Friends" part at the top of each section bigger and easier to see.

2. Separate the items section into one for each build. So one subsection could say, "Core Items," while the other might say, "Golden Bow." As one long list, it is annoying to read.

3. Use multiple colors to draw the eye. Since everything is in the same grey text, it gets repetitive to read.

I used this post as an example.
1
ShadedEve | December 8, 2013 8:47pm
Subzero008 wrote:

I personally disagree with the Golden Bow, which I believe to be a terrible item. Also, try splitting the item explanations into different groups with [h1][/h1]. One section would have the items that are common to all the builds, and the rest would delve into specifics.

Also, this guide is rather bothersome to read, but not terribly so.

I like the matchups section.

Gameplay needs expansion. I've seen your Nu Wa guide, and it has the same faults. You need to stop saying, "at this point, you should have" and start actually guiding.

I would also put down that AMC's damage is very lacking compared to other ADCs like Anhur or Apollo or Artemis, so say that if fighting one of them mid-late game, absolutely put down a hive ASAP (somewhere out of reach), or they will destroy you 100% of the time. (unless someone is fed/underleveled).

I am impressed with the level of detail. You have an upvote.


Thanks for the comment. I will be sure to add in your suggestions when I update next. However, if you could happen to elaborate a bit more on how the guide is bothersome to read, I will be more than happy to fix it so it is a more pleasant read. Also, on the note of the gameplay section, I know they are quite awful, and I am planning on changing them to something that, well, actually helps the players play. It will take time, however, as I will need to write it up before.
1
Subzero008 (112) | December 8, 2013 8:10pm
I personally disagree with the Golden Bow, which I believe to be a terrible item. Also, try splitting the item explanations into different groups with [h1][/h1]. One section would have the items that are common to all the builds, and the rest would delve into specifics.

Also, this guide is rather bothersome to read, but not terribly so.

I like the matchups section.

Gameplay needs expansion. I've seen your Nu Wa guide, and it has the same faults. You need to stop saying, "at this point, you should have" and start actually guiding.

I would also put down that AMC's damage is very lacking compared to other ADCs like Anhur or Apollo or Artemis, so say that if fighting one of them mid-late game, absolutely put down a hive ASAP (somewhere out of reach), or they will destroy you 100% of the time. (unless someone is fed/underleveled).

I am impressed with the level of detail. You have an upvote.
1
ShadedEve | December 8, 2013 10:42am
yoavsnake wrote:


Thanks for actually checking the comments. And I'll add some other things that I haven't really looked into, but they seem to be working well for him.

- Titan's Bane: If I heard correctly, it makes buildings Swiss cheese. Combined with Ah Muzen Cab's high attack speed, you could add 'pusher' to his role. It isn't good for Jungling, though.

- Golden Bow: It's AoE can make him more pushery too, but doesn't hurt Jungling.

And some encounters:

Fenrir: That guy is your one of your worst enemies - his first ability ignores your range, his third damages you a lot, and his ultimate is an instakill against you.
Ne Zha: He's easily defeated, beware of his ultimate though.

Neith: Can easily destroy your hives, but usually played by inexperienced players, so it won't happen often.

Sun Wukong: A 40/60 fight, with Wukong on the top. He deals more damage to you, he can stun you, and can easily escape from you.

Loki: That guy's ultimate can almost instakill you, but there's an easy solution to that: Aegis Amulet.

Thanatos: Similarly to how you escape from Loki, you use Aegis Amulet.

Ah Muzen Cab: Since the fight is 50/50, you'll need to jungle a lot and surprise him to change the odds. Destroy his hives!


I agree with both your items, and believe me, I have a whole build lined up just for the Golden Bow. On the gods though, I agree with quite a few of your statements, though I would like to point out that inherently, Fenrir's ult doesn't actually do as much damage as the amount you take from their teammates and towers, and it can be stopped with Purification Beads, or at least I think it can. But, either way, I will be taking this into account as I update the guide again, which should be later today, or tomorrow.
1
yoavsnake (5) | December 3, 2013 11:02pm
ShadedEve wrote:


Thanks for the first comment. On the note of the mana items, I will take a look at that, and make another build for it. That should be coming soon, as there are a few builds that I have in mind for him, and each WILL be explained. And yeah, that was something that had me a bit troubled, because you are indeed fairly dependent on Hive. I'll change that up either today or tomorrow.

Thanks for actually checking the comments. And I'll add some other things that I haven't really looked into, but they seem to be working well for him.

- Titan's Bane: If I heard correctly, it makes buildings Swiss cheese. Combined with Ah Muzen Cab's high attack speed, you could add 'pusher' to his role. It isn't good for Jungling, though.

- Golden Bow: It's AoE can make him more pushery too, but doesn't hurt Jungling.

And some encounters:

Fenrir: That guy is your one of your worst enemies - his first ability ignores your range, his third damages you a lot, and his ultimate is an instakill against you.
Ne Zha: He's easily defeated, beware of his ultimate though.

Neith: Can easily destroy your hives, but usually played by inexperienced players, so it won't happen often.

Sun Wukong: A 40/60 fight, with Wukong on the top. He deals more damage to you, he can stun you, and can easily escape from you.

Loki: That guy's ultimate can almost instakill you, but there's an easy solution to that: Aegis Amulet.

Thanatos: Similarly to how you escape from Loki, you use Aegis Amulet.

Ah Muzen Cab: Since the fight is 50/50, you'll need to jungle a lot and surprise him to change the odds. Destroy his hives!
1
ShadedEve | December 3, 2013 5:12pm
yoavsnake wrote:

This is great, more detailed than most guides. I think there needs to be a mana item instead of devourers, because he loses mana like crazy. Transendance is nice.

Also, Hive needs a higher priority.


Thanks for the first comment. On the note of the mana items, I will take a look at that, and make another build for it. That should be coming soon, as there are a few builds that I have in mind for him, and each WILL be explained. And yeah, that was something that had me a bit troubled, because you are indeed fairly dependent on Hive. I'll change that up either today or tomorrow.
1
yoavsnake (5) | December 3, 2013 10:28am
This is great, more detailed than most guides. I think there needs to be a mana item instead of devourers, because he loses mana like crazy. Transendance is nice.

Also, Hive needs a higher priority.
Loading Comments...
Load More Comments

SMITEFire is the place to find the perfect build guide to take your game to the next level. Learn how to play a new god, or fine tune your favorite SMITE gods’s build and strategy.

Copyright © 2019 SMITEFire | All Rights Reserved