
This guide has not yet been updated for the current season. Please keep this in mind while reading. You can see the most recently updated guides on the browse guides page
Vote received! Would you like to let the author know their guide helped you and leave them a message?

 Emerald Mail
 Mana Potion
 Healing Potion
 Breastplate of Regrowth
 Warrior Tabi
 Jotunn's Wrath
 Breastplate of Valor
 Shogun's Kusari
 Genji's Guard
 Heartward Amulet
 Sovereignty
Shogun's Kusari
Sovereignty
Shogun's Kusari
 Jade Emperor's Crown
 Bulwark of Hope
 Spirit Robe
 Hide of the Urchin
 Runeforged Hammer
 Blackthorn Hammer
 Frostbound Hammer
 Titan's Bane
 Aegis Amulet
 Purification Beads
 Cloak of Meditation
 Heavenly Wings
 Y
Y
 B
B
 A
A
 X
X

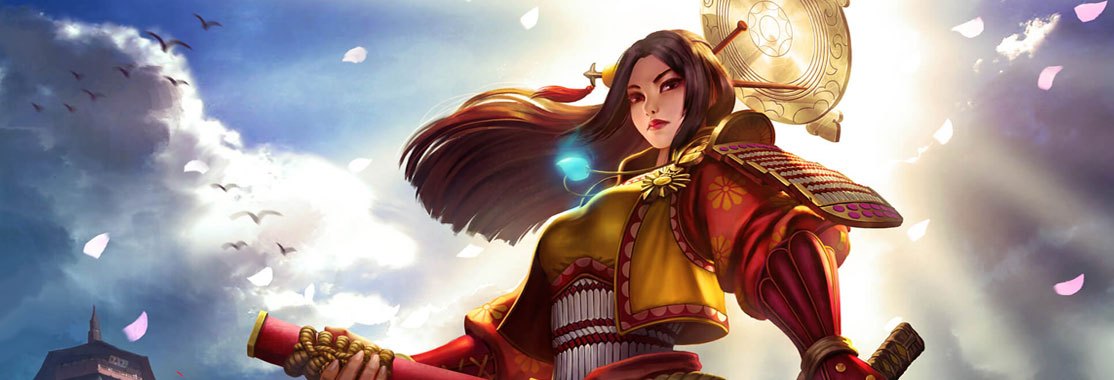
Where to start... Well, this is my first guide/build, so yeah. This guide's main purpose is to bring the newer items and changed items into play and not to rely on the "old meta" of item-building. I really enjoy just testing out a bunch of different items and seeing how they work, so here's my little tidbit on ![]() Amaterasu, the Shining Light, and her item-jumps in Season 4.
Amaterasu, the Shining Light, and her item-jumps in Season 4.
Quick disclaimer: I don't really play Conquest, but I feel like I know enough about it to give a bit of info on it. This guide is mainly geared toward the other game modes; keep that in mind when reading.
Pros:
- Great sustain
- Amazing utility
- Decent CC in her Dash and Ultimate
- Huge mobility in her 1 and 3
- Great team-fighter
Cons:
- Weak wave-clear early-game
- Dash is stopped by enemy gods
- Quite mana-hungry
- Wrong stance at the wrong time can spell disaster
- Aura is relatively small, meaning you're risking AoE nukes if utilizing it
![]() Amaterasu has a pretty diverse kit with decent wave clear, a dash, a silence, an aura, a self-heal, and a fantastic CC ultimate.
Amaterasu has a pretty diverse kit with decent wave clear, a dash, a silence, an aura, a self-heal, and a fantastic CC ultimate.
Her passive ![]() Illuminating Strike makes team-fights amazing with that aura 10% damage boost. Generally try to put this on a guardian in team fights as they're going to take more damage, letting your team deal with them easier as well as having the debuff last a bit longer. If you're ganking, just go ahead and triple-hit the ADC instead of the support as the battle generally won't last as long.
Illuminating Strike makes team-fights amazing with that aura 10% damage boost. Generally try to put this on a guardian in team fights as they're going to take more damage, letting your team deal with them easier as well as having the debuff last a bit longer. If you're ganking, just go ahead and triple-hit the ADC instead of the support as the battle generally won't last as long.
Her ![]() Divine Presence is both a support aura as well as a self-heal. With Shield of Regrowth, you can escape almost all situations when switching to speed aura and can even escape quite well when switching to damage aura. Don't be afraid to swap to run, but try to keep it on the right buff to benefit your team in a team fight: speed to help chase or aid in an escape, and power in a big team fight or ultimate wombo-combo.
Divine Presence is both a support aura as well as a self-heal. With Shield of Regrowth, you can escape almost all situations when switching to speed aura and can even escape quite well when switching to damage aura. Don't be afraid to swap to run, but try to keep it on the right buff to benefit your team in a team fight: speed to help chase or aid in an escape, and power in a big team fight or ultimate wombo-combo.
![]() Heavenly Reflection is, IMO, the most fun part of her kit. Damage mitigation is always a good thing, but getting decent ranged damage on top of that is great. It's her primary wave clear tool, but she can also utilize this in a lot of her combos. Level this first, since it's your main source of damage and wave clear.
Heavenly Reflection is, IMO, the most fun part of her kit. Damage mitigation is always a good thing, but getting decent ranged damage on top of that is great. It's her primary wave clear tool, but she can also utilize this in a lot of her combos. Level this first, since it's your main source of damage and wave clear.
![]() Glorious Charge is both a blessing and a curse. You get a silence and an escape in one ability, which is nice, but they're both on one ability, meaning you need to decide whether or not it's worth getting out of position to deny a channeled ability, or even whether to turn around when escaping and silence their chase and use your 1 to escape instead of your dash. It also stops at the first god hit, meaning combos are easier but escape is harder.
Glorious Charge is both a blessing and a curse. You get a silence and an escape in one ability, which is nice, but they're both on one ability, meaning you need to decide whether or not it's worth getting out of position to deny a channeled ability, or even whether to turn around when escaping and silence their chase and use your 1 to escape instead of your dash. It also stops at the first god hit, meaning combos are easier but escape is harder.
Her ultimate, ![]() Dazzling Offensive, is an amazing damage-dealer as well as a CC-inducer. Basically just hit as many gods with this as you can, as the area of effect is pretty big. First strike deals normal damage, second strike slows and deals more damage than the first, and the third strike stuns and deals the most damage. Keep in mind that the additional effects are the only things that are stopped if you "break the combo"; your ultimate always hits three times.
Dazzling Offensive, is an amazing damage-dealer as well as a CC-inducer. Basically just hit as many gods with this as you can, as the area of effect is pretty big. First strike deals normal damage, second strike slows and deals more damage than the first, and the third strike stuns and deals the most damage. Keep in mind that the additional effects are the only things that are stopped if you "break the combo"; your ultimate always hits three times.
All of your combos should start in power stance and end with a possible escape with either your speed aura or a dash.
Your basic combo would be 2 > 3 through the wave > three AA's > Activate 2. Hitting minions with your 3 can almost fully charge your mirror, and three AA's to add your passive can make the burst damage scary. Great wave clear combo, and perfect if the enemy god is trying to hide behind minions, as you turned their strategy against them.
Your ultimate combo is 2 > (3 if you're a distance away) > 4 (Activate 2 during ultimate if/when fully charged) > (3 if it's off cd and they're running) > (1 for speed on chasing or escaping). A cool little trick is that you can charge your 2 while ult'ing, so it's a surprise burst of damage. Great in team fights, especially combo'd with another god's CC.
You can weave in some 1's in these combos for a bit of extra speed combo'd with Shield of Regrowth at the expense of a bit of damage. Mainly only use this if they're trying to run away mid-combo, but it can be used to make some of their skill shots much harder to land if you're right up next to them. It's recommended, however, that you keep either a 1 or 3 off cooldown in case you need to escape. Blackthorn Hammer makes using your 1 offensively much much safer, as that emergency cooldown reduction can spell the difference between life and death.
Starter Items
![]() Amaterasu is a jack of all trades, being able to support her team immensely in a team fight as well as dishing out enough burst damage to jungle. She has one of the highest survivabilities of all warriors, wielding a damage mitigation, a speed aura, a self-heal, and a dash and silence.
Amaterasu is a jack of all trades, being able to support her team immensely in a team fight as well as dishing out enough burst damage to jungle. She has one of the highest survivabilities of all warriors, wielding a damage mitigation, a speed aura, a self-heal, and a dash and silence.
Thanks for reading my first ever god guide, and feel free to leave any feedback for either this guide or for if/when I continue making other guides! :)
SMITEFire is the place to find the perfect build guide to take your game to the next level. Learn how to play a new god, or fine tune your favorite SMITE gods’s build and strategy.
Copyright © 2019 SMITEFire | All Rights Reserved


Just wanted to comment on your guide...it is a different take, especially the start, but seems technically grounded well, with explanations to support.
I'll point out a couple of things on my mind with your items and build.
I don't think
So, in that ability damage build, since you don't really have much pen in the build, getting
In the auto-attack build, if you do get
I think I'd say you're missing
A proposed basic attack build (YOLO no protections) would be Shield of Regrowth,
Finally, for a support build, building
Anyway, interesting take on Ama, especially the early Shield.
Shield of Regrowth combined with
I still have some sentimentality to it though, so idk. Maybe I'll replace that for
Thanks for the note on
Speaking of gimmicks, yes, Frostalis is a gimmick combo;
Games in Clash/Joust/Arena usually don't get into late-late game, so I don't usually have time to sell
To be completely honest, I completely forgot about
So I'm thinking about making the following changes after a bit more playtime; let me know what you think:
- (Damage Builds) Try to fit
- (AA Build) Remove
- (Ability Build) Replace
- (Support Build) Make a note on
- (Multipurpose Build) possibly swap out
Thanks again for the in-depth reply :)
And yes, this guide IS a different take on most builds; I wanted to be unique and bring up some new/non-meta items into the game :D