

Vote received! Would you like to let the author know their guide helped you and leave them a message?
 Bluestone Pendant It is the most important item for most sololaners, you get power, mana and hp sustain for the lane.
 Health Chalice HP sustain for the lane.
 Phantom Shell Provides you with a shield and you can also pass through the walls of allies and enemy gods.
 Bifrost Shard gives you a free ward that lasts 90 seconds. It is useful for early ganks from the enemy jungler.
Bluestone Pendant It is the most important item for most sololaners, you get power, mana and hp sustain for the lane.
Health Chalice HP sustain for the lane.
Phantom Shell Provides you with a shield and you can also pass through the walls of allies and enemy gods.
Bifrost Shard gives you a free ward that lasts 90 seconds. It is useful for early ganks from the enemy jungler.
 Bluestone Pendant
Health Chalice
Bluestone Pendant
Health Chalice
 Health Potion
Bifrost Shard
Phantom Shell
Health Potion
Bifrost Shard
Phantom Shell
 Bluestone Brooch gives you a lot of power and poke with your skills.
 Shifter's Shield is very versatile thanks to the number of stats it offers, both defensively and offensively.
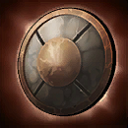 Gladiator's Shield It provides you defensive and offensive attributes thanks to its passive that does extra damage with skills.
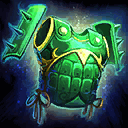 Genji's Guard gives you magical defenses and cooldown reduction and its passive makes that when you receive damage your abilities get 3 seconds less cooldown reduction.
 Shell of Rebuke Provides you with a shield and you can also pass through the walls of allies and enemy gods. It's the same as the relic Phantom Shell but it's an item.
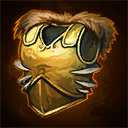 Hide of the Nemean Lion right now the carries are very strong and this item gives you a passive that when you activate it you reflect damage, that's why it's very good vs carries.
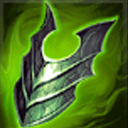 Draconic Scale gives you mixed defenses and a lot of health, plus its passive gives you more defenses if you take damage.
 Blink Rune teleport in front of you, perfect for engage with your ultimate. Bifrost Shard gives you a free ward that lasts 90 seconds. It is useful for early ganks from the enemy jungler.
Bluestone Brooch gives you a lot of power and poke with your skills.
Shifter's Shield is very versatile thanks to the number of stats it offers, both defensively and offensively.
Gladiator's Shield It provides you defensive and offensive attributes thanks to its passive that does extra damage with skills.
Genji's Guard gives you magical defenses and cooldown reduction and its passive makes that when you receive damage your abilities get 3 seconds less cooldown reduction.
Shell of Rebuke Provides you with a shield and you can also pass through the walls of allies and enemy gods. It's the same as the relic Phantom Shell but it's an item.
Hide of the Nemean Lion right now the carries are very strong and this item gives you a passive that when you activate it you reflect damage, that's why it's very good vs carries.
Draconic Scale gives you mixed defenses and a lot of health, plus its passive gives you more defenses if you take damage.
Blink Rune teleport in front of you, perfect for engage with your ultimate.
Bifrost Shard gives you a free ward that lasts 90 seconds. It is useful for early ganks from the enemy jungler.
Bluestone Brooch
Shifter's Shield
Gladiator's Shield
 Genji's Guard
Shell of Rebuke
Genji's Guard
Shell of Rebuke
 Hide of the Nemean Lion
Draconic Scale
Bifrost Shard
Hide of the Nemean Lion
Draconic Scale
Bifrost Shard
 Blink Rune
 Blinking Abyss You can teleport in front of you, perfect to do an engage or escape quickly.
Blinking Abyss You can teleport in front of you, perfect to do an engage or escape quickly.
Blinking Abyss
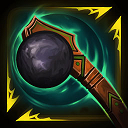 Bumba's Hammer provides you with health and damage, in addition to its passive which makes your next basic attack after an ability deal more damage and reduces the cooldown of your abilities by 1 second. It's really good for making combos with your skills and basic attacks.
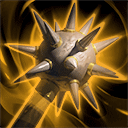 Jotunn's Revenge is very important thanks to the strength and cooldown reduction it offers, allowing you to use your abilities more often.
 Barbed Carver is a very aggressive item that gives you a lot of strength, lifesteal and extra ability damage.
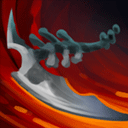 The Reaper is very versatile thanks to the strength, direct penetration and lifesteal it provides, in addition to the passive that heals you with assists and kills.
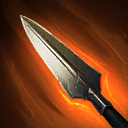 Heartseeker Pure item to do a lot of damage, giving you more damage the more strength you have.
 Titan's Bane is a very important item for damaging tanks and gods with a lot of defense. Blinking Abyss You can teleport in front of you, perfect to do an engage or escape quickly.
 Purification Beads gives you CC's immune when you use. Bifrost Shard gives you a free ward that lasts 90 seconds. It is useful for early ganks from the enemy jungler.
Bumba's Hammer provides you with health and damage, in addition to its passive which makes your next basic attack after an ability deal more damage and reduces the cooldown of your abilities by 1 second. It's really good for making combos with your skills and basic attacks.
Jotunn's Revenge is very important thanks to the strength and cooldown reduction it offers, allowing you to use your abilities more often.
Barbed Carver is a very aggressive item that gives you a lot of strength, lifesteal and extra ability damage.
The Reaper is very versatile thanks to the strength, direct penetration and lifesteal it provides, in addition to the passive that heals you with assists and kills.
Heartseeker Pure item to do a lot of damage, giving you more damage the more strength you have.
Titan's Bane is a very important item for damaging tanks and gods with a lot of defense.
Blinking Abyss You can teleport in front of you, perfect to do an engage or escape quickly.
Purification Beads gives you CC's immune when you use.
Bifrost Shard gives you a free ward that lasts 90 seconds. It is useful for early ganks from the enemy jungler.
Bumba's Hammer
Jotunn's Revenge
Barbed Carver
The Reaper
Heartseeker
Blinking Abyss
 Titan's Bane
Bifrost Shard
Purification Beads
Titan's Bane
Bifrost Shard
Purification Beads

 Y
Y
 B
B
 A
A
 X
X
Tap each threat level to view Ravana’s threats

Tap each synergy level to view Ravana’s synergies
Hi, this guide is brought to you by lestimics. I started playing Smite 1 on PC in 2014. I've been playing competitively since 2020 and have been a professional Smite player from 2021 to 2023. I've played on different teams like JustF6, Gilded Gladiators or Tartarus Titans.
You can check out the SmiteVOD YouTube channel where my recorded professional games are. I've peaked at 3500 MMR GrandMaster/Masters in Ranked Conquest on the PC platform every season since 2018. I've also done Smite Masters (LAN) 4 times in 2022, so I really think I have the knowledge to guide on the Solo/Jungle role in SMITE 2.
I hope you find this guide as a useful learning resource for playing  Ravana as Solo/Jungle.
Here are my socials:
|
Passive -
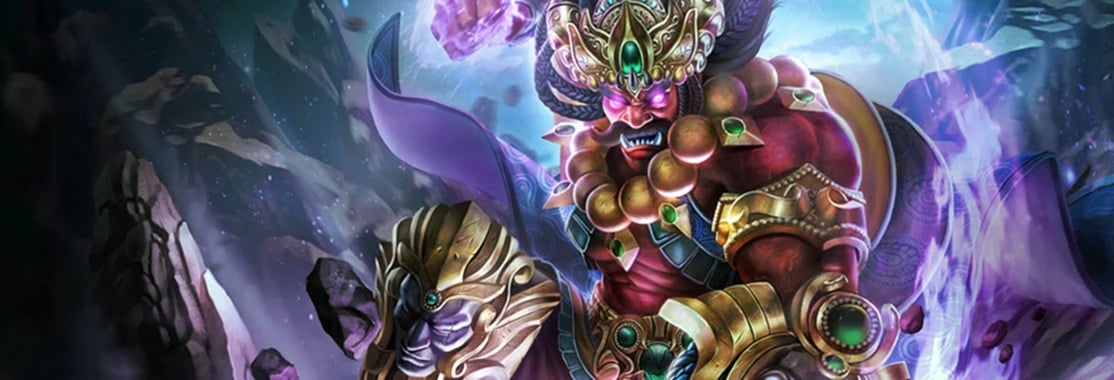
 Chain of Blows Chain of BlowsWhen you hit basic attacks or abilities on an enemy add to Ravana's combo chain, each time his chain reaches 8 you gain a shield, movement speed and physical power. This may stack up to 3 times.It's a very good passive skill, providing both defensive and offensive attributes. |
|
Ability 1 -
 Prana Onslaught Ravana throws a punch in front of him in a very small cone, dealing physical damage and slowing all enemies. Prana Onslaught Ravana throws a punch in front of him in a very small cone, dealing physical damage and slowing all enemies.It's a very basic ability, but it's the main one for pushing and dealing damage, and it's also very annoying because it has a very low cooldown so you can spam it. |
|
Ability 2 -
 Overhead Kick Ravana send a shockwave forward to damage all enemies in a line, and become immune to damage and crowd control and increases your movement speed while using it. Overhead Kick Ravana send a shockwave forward to damage all enemies in a line, and become immune to damage and crowd control and increases your movement speed while using it.This ability doesn't deal a lot of damage, but the immunity is incredibly good, it's like using  Purification Beads and Purification Beads and  Aegis of Acceleration at the same time. Aegis of Acceleration at the same time.It is very important to use this ability at the right moment to evade as much damage and crowd control as possible. |
|
Ability 3 -
 10-Hand Shadow Fist Ravana's fists fly forward, damaging and passing through minions and damaging and rooting the first god hit but will continue passing through to deal damage to the enemies behind. Ravana heals for each enemy hit. 10-Hand Shadow Fist Ravana's fists fly forward, damaging and passing through minions and damaging and rooting the first god hit but will continue passing through to deal damage to the enemies behind. Ravana heals for each enemy hit.This ability will help you push minions and get closer to the enemy god thanks to the root, allowing you to continue dealing damage with your abilities > Prana Onslaught. It also provides a small amount of health sustain. |
|
Ultimate -
 Mystic Rush Ravana leaps to a target location, dealing damage upon landing and applying a debuff to enemy gods that increases the damage they take from all sources. Additionally, Ravana gains mitigations and is immune while leaping. Mystic Rush Ravana leaps to a target location, dealing damage upon landing and applying a debuff to enemy gods that increases the damage they take from all sources. Additionally, Ravana gains mitigations and is immune while leaping.It works like an engage that lets you jump over walls and can help you escape. It also has considerable range and will help you get closer to the enemy. |
Prana Onslaught > 10-Hand Shadow Fist, plus you will gain a lot of shield by pushing and hitting the minions Chain of Blows to then fight the enemy god. 10-Hand Shadow Fist to root and get closer > Prana Onslaught > hits basic attacks while he has slow, remember to use Overhead Kick to avoid crowd control or heavy damage. Your ultimate Mystic Rush is also very useful for chassing enemies or engage. 10-Hand Shadow Fist so that your team contributes damage, and play riskily to bait the enemy, since it is very difficult for them to kill you thanks to your shields Chain of Blows, your immunity Overhead Kick and your ultimate that provides mitigations Mystic Rush.
Prana Onslaught doing it as fast as you can and then go to the lane to push the minions. If you don't lose any minions you will go up to level 2 when you manage to kill one more minion from the next wave of minions. Prana Onslaught. This will push and poke quite a bit. Also, your basic attacks are very good for pushing minions. Ravana's early levels are very strong thanks to his passive Chain of Blows, so try to hit the enemy god as much as you can to put a lot of pressure on him or get a kill 10-Hand Shadow Fist to root and get closer > Prana Onslaught. Bifrost Shard. 10-Hand Shadow Fist > Prana Onslaught. Remember to use Overhead Kick when you receive a lot of damage or CC, don't use it to poke because it does very little damage. 10-Hand Shadow Fist > Prana Onslaught, trying to focus more on the gods that deal the most damage. If you see a good opportunity to engage with your ultimate Mystic Rush, make sure your team follows up.
 Vision Ward
 Sentry Ward

SMITEFire is the place to find the perfect build guide to take your game to the next level. Learn how to play a new god, or fine tune your favorite SMITE gods’s build and strategy.
Copyright © 2019 SMITEFire | All Rights Reserved




 Agni
Agni
 Hades
Hades

 Susano
Leave a Comment This author would like to receive feedback
and suggestions about their guide.
You need to log in before commenting.
Collapse All Comments