
This guide has not yet been updated for the current season. Please keep this in mind while reading. You can see the most recently updated guides on the browse guides page
Vote received! Would you like to let the author know their guide helped you and leave them a message?


Go for the Sands build if you want a stronger mid game build spike. Both the Sands and Conduit builds have a similar lategame, though you can ditch Deso from the Sands build and go Pendulum for lone CDR without needing to invest in other CDR.
 Sands of Time
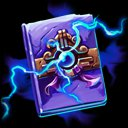
 Spellbook
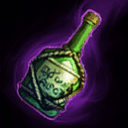 Baron's Brew
![]() Book of Thoth is the typical go to option with
Book of Thoth is the typical go to option with ![]() Pendulum of Ages/
Pendulum of Ages/![]() The Alternate Timeline builds.
The Alternate Timeline builds.
If Anti-Heal is needed, you can trade ![]() Spear of Desolation for
Spear of Desolation for ![]() Divine Ruin.
Divine Ruin.
Can swap ![]() The Alternate Timeline for
The Alternate Timeline for ![]() Pendulum of Ages if you do not feel like you're likely to die in fights.
Pendulum of Ages if you do not feel like you're likely to die in fights.
 The Alternate Timeline
 Book of Thoth
 Spear of Desolation
 Divine Ruin
 Obsidian Shard
 Soul Reaver
Go for the Conduit build if you want stronger early clear. Both the Conduit and Sands builds have a similar lategame. ![]() Gem of Focus buffs
Gem of Focus buffs ![]() Soul Reaver proc damage, which can give a *slight* boost to damage to very high HP targets.
Soul Reaver proc damage, which can give a *slight* boost to damage to very high HP targets.
However, you are forced into ![]() Chronos' Pendant with this build somewhat, as
Chronos' Pendant with this build somewhat, as ![]() Spear of Desolation is your only real early game option otherwise for CDR as
Spear of Desolation is your only real early game option otherwise for CDR as ![]() Soul Gem is both weak/out-of-meta and lategame focused.
Soul Gem is both weak/out-of-meta and lategame focused.
 Conduit Gem
 Lost Artifact
Baron's Brew
Lost Artifact
Baron's Brew
 Healing Potion
If Anti-Heal is needed, swap out ![]() Spear of Desolation for
Spear of Desolation for ![]() Divine Ruin.
Divine Ruin.
Can swap ![]() Obsidian Shard for
Obsidian Shard for ![]() Charon's Coin.
Charon's Coin.
 Gem of Focus
 Chronos' Pendant
Spear of Desolation
Obsidian Shard
Soul Reaver
Chronos' Pendant
Spear of Desolation
Obsidian Shard
Soul Reaver
 Calamitous Rod of Tahuti
 War Flag
 Cloak
Cloak
 Chalice of Healing
![]() Stone of Binding and
Stone of Binding and ![]() Gem of Isolation are your general filler slots that can be traded for whatever is needed for that match.
Gem of Isolation are your general filler slots that can be traded for whatever is needed for that match.
 War Banner
 Prophetic Cloak
 Gauntlet of Thebes
 Reverent Pridwen
 Stone of Binding
 Gem of Isolation
Conduit Gem
Gem of Isolation
Conduit Gem
 Breastplate
Healing Potion
Breastplate
Healing Potion
If ![]() Spectral Armor is needed swap
Spectral Armor is needed swap ![]() Stone of Binding or
Stone of Binding or ![]() Abyssal Stone for it, and consider getting
Abyssal Stone for it, and consider getting ![]() Amulet of the Stronghold instead of
Amulet of the Stronghold instead of ![]() Oni Hunter's Garb.
Oni Hunter's Garb.
Gem of Focus
 Breastplate of Determination
Prophetic Cloak
Breastplate of Determination
Prophetic Cloak
 Oni Hunter's Garb
Stone of Binding
Oni Hunter's Garb
Stone of Binding
 Abyssal Stone
 Temporal Beads
 Aegis of Acceleration
 Horn Shard
Temporal Beads
Horn Shard
Temporal Beads
 Phantom Shell
 Entangling Wings
 Emblem of Increasing Peril
 Sundering Blast
 Sturdy Shard
 Heroic Teleport
Temporal Beads
Sundering Blast
Emblem of Increasing Peril
Entangling Wings
Phantom Shell
Sturdy Shard
Heroic Teleport
Temporal Beads
Sundering Blast
Emblem of Increasing Peril
Entangling Wings
Phantom Shell
Sturdy Shard
![]() Divine Ruin - Standard Anti-Heal option, can still be bought for the on-hit passive and for more squishy focused burst if desired.
Divine Ruin - Standard Anti-Heal option, can still be bought for the on-hit passive and for more squishy focused burst if desired.
![]() Perfected Rod of Tahuti - More CDR / utility focused glyph option compared to Calamitous Glyph, with good synergy with
Perfected Rod of Tahuti - More CDR / utility focused glyph option compared to Calamitous Glyph, with good synergy with ![]() Chronos' Pendant and
Chronos' Pendant and ![]() Spear of Desolation.
Spear of Desolation.
![]() Tablet of Destinies and
Tablet of Destinies and ![]() Soul Gem or
Soul Gem or ![]() Breastplate of Determination - Viable for a alternative Book of Thoth proc damage build path.
Breastplate of Determination - Viable for a alternative Book of Thoth proc damage build path.
![]() Typhon's Fang - 20% pen option that can be considered when running both
Typhon's Fang - 20% pen option that can be considered when running both ![]() Book of Thoth and
Book of Thoth and ![]() Soul Gem.
Soul Gem.
![]() Charon's Coin - Alternative to
Charon's Coin - Alternative to ![]() Obsidian Shard if you want more MP5 / potential mobility.
Obsidian Shard if you want more MP5 / potential mobility.
![]() Pendulum of Ages - More damage focused
Pendulum of Ages - More damage focused ![]() Sands of Time upgrade.
Sands of Time upgrade.
Divine Ruin
 Perfected Rod of Tahuti
 Tablet of Destinies
 Soul Gem
Breastplate of Determination
Soul Gem
Breastplate of Determination
 Typhon's Fang
 Charon's Coin
 Pendulum of Ages
![]() Chronos' Pendant - Good CDR utility option if omitting other sources of cooldown in the build when going for a different build path.
Chronos' Pendant - Good CDR utility option if omitting other sources of cooldown in the build when going for a different build path.
![]() Spear of Desolation /
Spear of Desolation / ![]() Divine Ruin - Offensive damage options, Deso is decent for cooldown if another CDR option was dropped, Divine could be considered for anti-heal.
Divine Ruin - Offensive damage options, Deso is decent for cooldown if another CDR option was dropped, Divine could be considered for anti-heal.
![]() Ethereal Staff - Generally niche bruiser option.
Ethereal Staff - Generally niche bruiser option.
![]() Spectral Armor - For Anti-Crit if the enemy hunter is building into crit or/and other members of the enemy team building crit are a threat.
Spectral Armor - For Anti-Crit if the enemy hunter is building into crit or/and other members of the enemy team building crit are a threat.
![]() Sovereignty - Good into heavy physical damage team comps.
Sovereignty - Good into heavy physical damage team comps.
![]() Sentinel's Gift/
Sentinel's Gift/![]() Sentinel's Embrace - More sustain focused / tankier alternative to
Sentinel's Embrace - More sustain focused / tankier alternative to ![]() War Flag/
War Flag/![]() War Banner, but worse for early game pressure.
War Banner, but worse for early game pressure.
![]() Breastplate of Regrowth - Selfish defensive option that can good for the CDR and mobility.
Breastplate of Regrowth - Selfish defensive option that can good for the CDR and mobility.
![]() Amulet of the Stronghold - Situationally good into magical heavy enemy team comps.
Amulet of the Stronghold - Situationally good into magical heavy enemy team comps.
![]() Spirit Robe - Helpful if getting CC chained or to prevent getting bursted too quickly off of one hard CC.
Spirit Robe - Helpful if getting CC chained or to prevent getting bursted too quickly off of one hard CC.
![]() Shogun's Kusari - Helpful for multiple auto attackers on your team, and/or your team's auto attackers have built more ability based to help their AA dps.
Shogun's Kusari - Helpful for multiple auto attackers on your team, and/or your team's auto attackers have built more ability based to help their AA dps.
![]() Abyssal Stone - Utility option that can be easily applied.
Abyssal Stone - Utility option that can be easily applied.
![]() Bewitched Dagger /
Bewitched Dagger / ![]() Eldritch Dagger - Good utility option when you're having constant relic usage and enemy team has a heavy AA focused team comp (especially melee gods).
Eldritch Dagger - Good utility option when you're having constant relic usage and enemy team has a heavy AA focused team comp (especially melee gods). ![]() Eldritch Dagger is better for some occasional extra tankiness.
Eldritch Dagger is better for some occasional extra tankiness.
![]() Winged Blade - Situationally decent into heavy slow / lockdown comps and can help your team.
Winged Blade - Situationally decent into heavy slow / lockdown comps and can help your team.
![]() Magi's Shelter - Can be considered into certain enemy matchups that rely on specific CC to setup / heavy CC enemy teams, though the passive can be awkward at times to get beneficial use for allies.
Magi's Shelter - Can be considered into certain enemy matchups that rely on specific CC to setup / heavy CC enemy teams, though the passive can be awkward at times to get beneficial use for allies.
Chronos' Pendant
Divine Ruin
Spear of Desolation
 Ethereal Staff
 Spectral Armor
 Sovereignty
 Sentinel's Embrace
 Breastplate of Regrowth
 Amulet of the Stronghold
 Spirit Robe
 Shogun's Kusari
Abyssal Stone
Shogun's Kusari
Abyssal Stone
 Bewitched Dagger
 Eldritch Dagger
 Winged Blade
 Magi's Shelter
 Spartan Flag
![]() Spectral Armor - For Anti-Crit if the enemy hunter is building into crit or/and other members of the enemy team building crit are a threat.
Spectral Armor - For Anti-Crit if the enemy hunter is building into crit or/and other members of the enemy team building crit are a threat.
![]() Reverent Pridwen - Good lategame CDR option for more tankiness after ulting.
Reverent Pridwen - Good lategame CDR option for more tankiness after ulting.
![]() Gladiator's Shield - Offensive CDR tank option.
Gladiator's Shield - Offensive CDR tank option.
![]() Amulet of the Stronghold - Situationally good into magical heavy enemy team comps.
Amulet of the Stronghold - Situationally good into magical heavy enemy team comps.
![]() Ethereal Staff - Generally niche bruiser option.
Ethereal Staff - Generally niche bruiser option.
![]() Divine Ruin - Offensive damage option, Divine could be considered for anti-heal.
Divine Ruin - Offensive damage option, Divine could be considered for anti-heal.
![]() Midgardian Mail - Can be helpful into heavy AA team comps.
Midgardian Mail - Can be helpful into heavy AA team comps.
![]() Genji's Guard - Magical CDR defensive option.
Genji's Guard - Magical CDR defensive option.
![]() Winged Blade - Situationally decent into heavy slow / lockdown comps and can help your team.
Winged Blade - Situationally decent into heavy slow / lockdown comps and can help your team.
![]() Breastplate of Regrowth - Selfish defensive option that can good for the CDR and mobility.
Breastplate of Regrowth - Selfish defensive option that can good for the CDR and mobility.
![]() Gem of Isolation - Can be considered into comps that are more easily locked down by slows.
Gem of Isolation - Can be considered into comps that are more easily locked down by slows.
Spectral Armor
Reverent Pridwen
 Gladiator's Shield
Amulet of the Stronghold
Ethereal Staff
Divine Ruin
Gladiator's Shield
Amulet of the Stronghold
Ethereal Staff
Divine Ruin
 Midgardian Mail
 Genji's Guard
Winged Blade
Breastplate of Regrowth
Gem of Isolation
Genji's Guard
Winged Blade
Breastplate of Regrowth
Gem of Isolation
Can get ![]() Wrap It Up at level 2 for Support and then
Wrap It Up at level 2 for Support and then ![]() Consign Spirits at level 3.
Consign Spirits at level 3.
 Y
Y
 B
B
 A
A
 X
X

Hi, this guide is brought to you by Kriega1, I started playing Smite on PS4 in 2016 around Erlang Shen's release in Season 3, and eventually long term migrated to PC Smite around mid Season 7. I have peaked GM/Masters on PS4 and Masters in Ranked Conquest on PC. I also am a Mentor on the Official Smite Discord where I focus on general building for each role. I hope you find this guide as a useful learning resource for playing ![]() Baron Samedi in the Support role, Mid lane and Solo lane.
Baron Samedi in the Support role, Mid lane and Solo lane.
SMITEFire is the place to find the perfect build guide to take your game to the next level. Learn how to play a new god, or fine tune your favorite SMITE gods’s build and strategy.
Copyright © 2019 SMITEFire | All Rights Reserved


Leave a Comment
You need to log in before commenting.
Collapse All Comments