
This guide has not yet been updated for the current season. Please keep this in mind while reading. You can see the most recently updated guides on the browse guides page
Vote received! Would you like to let the author know their guide helped you and leave them a message?


This generic build example doesn’t include any specific counter-items, but is well-balanced, providing offensive potential, cooldown reduction, and good protections.
![]() Stone of Binding and
Stone of Binding and ![]() Gauntlet of Thebes can be purchased in your preferred order. An earlier
Gauntlet of Thebes can be purchased in your preferred order. An earlier ![]() Stone of Binding provides good early damage potential in-lane, while an earlier Thebes allows for stacking and higher durability. Binding can also be skipped if preferred.
Stone of Binding provides good early damage potential in-lane, while an earlier Thebes allows for stacking and higher durability. Binding can also be skipped if preferred.
Sell ![]() Shoes of Focus for
Shoes of Focus for ![]() Elixir of Speed and an item of your choice.
Elixir of Speed and an item of your choice.
 Shoes of Focus
 Stone of Binding
 Gauntlet of Thebes
 Breastplate of Valor
 Void Stone
 Ethereal Staff
This build example follows a traditional Support route, focusing on tankiness and team support with multiple aura items.
Shoes of Focus
Gauntlet of Thebes
 Sovereignty
Void Stone
Sovereignty
Void Stone
 Pridwen
 Spirit Robe
Standard start for a Guardian Support. You'll typically pick up 4x ![]() Healing Potions and 2x
Healing Potions and 2x ![]() Multi Potions.
Multi Potions.
Alternatively, you can pick up ![]() Hand of the Gods and 4x potions for quicker Void camp clear to get to lane more quickly.
Hand of the Gods and 4x potions for quicker Void camp clear to get to lane more quickly.
 Guardian's Blessing
 Shoes
Shoes
 Healing Potion
 Multi Potion
![]() Ymir greatly benefits from the early cooldown reduction and mana that
Ymir greatly benefits from the early cooldown reduction and mana that ![]() Shoes of Focus provides, making it the standard choice of mobility. Alternatively, you can consider
Shoes of Focus provides, making it the standard choice of mobility. Alternatively, you can consider ![]() Reinforced Shoes for more durability, or Traveler’s Shoes for higher base movement speed and some nice mana sustain.
Reinforced Shoes for more durability, or Traveler’s Shoes for higher base movement speed and some nice mana sustain.
![]() Gauntlet of Thebes is a very strong protection item, providing health, high dual protections, and a protection aura for nearby teammates.
Gauntlet of Thebes is a very strong protection item, providing health, high dual protections, and a protection aura for nearby teammates.
Shoes of Focus
Gauntlet of Thebes
Find more information below on when to properly pick your relics.
 Heavenly Wings
 Magic Shell
 Blink Rune
 Belt of Frenzy
 Cursed Ankh
Find more information below on when to properly pick your defensive situational items.
Sovereignty
Breastplate of Valor
 Midgardian Mail
 Spectral Armor
 Contagion
 Pestilence
 Genji's Guard
 Shogun's Kusari
 Oni Hunter's Garb
Spirit Robe
Oni Hunter's Garb
Spirit Robe
 Mantle of Discord
Pridwen
Mantle of Discord
Pridwen
 Witchblade
 Winged Blade
 Relic Dagger
Find more information below on when to properly pick your aggressive and utility situational items.
Stone of Binding
Void Stone
Ethereal Staff
 Pythagorem's Piece
 Staff of Myrddin
Typical skill leveling for a Support role. ![]() Glacial Strike is prioritized early for aggression and clear. After Strike level 3, priority can switch to
Glacial Strike is prioritized early for aggression and clear. After Strike level 3, priority can switch to ![]() Frost Breath for the significant increase in freeze duration.
Frost Breath for the significant increase in freeze duration.
 Y
Y
 B
B
 A
A
 X
X

|
|
Hey everyone, welcome to the SMITEFire Community guide to |
|
|
|
|
|
Blocking enemy retreat with Ice Wall and body block |
|
Protecting Phoenix from basic attacks |
|
Creating separation when retreating |
|
Separating 2 enemies to only fight one |
|
|
|
|
|
|
|
|
|
|
|
| 4 | 2 | 3 | 1 |
| Shoes of Focus |
|
|
|
| Ethereal Staff |
| Shoes of Focus |
| Sovereignty |
| Pridwen |
|
| Guardian's Blessing | Shoes | Healing Potion | Healing Potion | Healing Potion |
|
|
|
| Shoes of Focus |
|
| Sovereignty | Typically a Support specific item, this is helpful early and mid-game against physical Gods, minions, and structures, which also provides an aura of physical protections and HP5 to nearby teammates. |
|
|
Besides the physical protection, this item provides high cooldown reduction, along with a high mana pool and sustain to support higher ability use. |
|
|
Extremely helpful against basic attackers, |
|
|
Counter item specifically built to decrease damage against critical strikes. Consider when facing multiple enemies building crit items. |
|
|
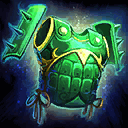
A good anti-healing item against physical heavy teams (4 or more) that have significant healing and/or sustain. Note that its aura will not stack with |
| Pestilence |
The magical version of |
|
|
This item provides magical protection, cooldown reduction, and extremely high MP5 to prevent you from ever running out of mana. |
| Shogun's Kusari |
Helpful with multiple basic attackers on your team and for taking objectives in general. Works quite well with |
|
|
Because |
|
|
Functional balanced protections with added damage mitigation against high CC enemy comps. Also provides cooldown reduction. |
|
|
Luxury item that provides a giant amount of protections and some cooldown reduction. The passive is useful especially in teamfights, stunning enemies around and removing CC applied on you. |
| Pridwen |
Good dual protections and high cooldown reduction are appealing stats. The item’s passive is especially appealing. Since |
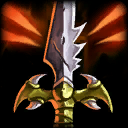
| Witchblade |
This late-game item is used as a counter to enemy basic-attackers. The other stats are generally synergistic with |
| Winged Blade |
One of |
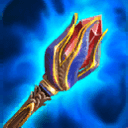
| Relic Dagger |
Solid utility pickup, especially when you get |
|
|
Ymir has CC in all of his damaging abilities; this item provides an easy debuff of an enemy’s protections, allowing you and your teammates to deal more damage. |
|
|
Aggressive defense item to provide you and other magical teammates with extra damage potential. |
| Ethereal Staff | Steal health and mana from enemies for a long time, making yourself tankier. |
| Pythagorem's Piece | This offensive team-based item provides an increase in lifesteal and power for you and nearby teammates. |
|
|
Unique offensive item that provides potential utility in teamfights. After using your ultimate, this allows one ability to be cast twice, which is appealing for any god with strong CC abilities. |
| Heavenly Wings | Magic Shell |
| Belt of Frenzy | Cursed Ankh |
| Heavenly Wings |
|
| Magic Shell |
|
|
|
Aggressive 1st relic choice, or utility as 2nd relic. Allows you to surprise enemies for strong initiation or kill secure potential. |
| Belt of Frenzy | Good situational 2nd relic for when your team needs extra damage. It uniquely provides a general damage boost to all targets, INCLUDING structures/objectives. Also provides attack speed, which is great for basic-attacking teammates and for quicker objective takedown in general. |
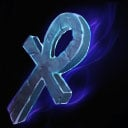
| Cursed Ankh | Situational 2nd relic choice to counter enemy healing. Its upgraded version also deals extra damage to affected enemies that are trying to heal. |
Early Game
Main facts to keep in mind:
Thank you for reading this community guide to ![]() Ymir! If you'd like to contribute regularly to guides like this, just send me a Private Message. Everyone who contributes to one of these Community Guides will be credited in the guide.
Ymir! If you'd like to contribute regularly to guides like this, just send me a Private Message. Everyone who contributes to one of these Community Guides will be credited in the guide.
If you liked the guide, don't forget to vote and leave a comment with your thoughts! If you have any suggestions, criticism or other feedback, comments of all sorts are appreciated. Good luck in your ![]() Ymir games!
Ymir games!
SMITEFire is the place to find the perfect build guide to take your game to the next level. Learn how to play a new god, or fine tune your favorite SMITE gods’s build and strategy.
Copyright © 2019 SMITEFire | All Rights Reserved


I'll let Bran check out your mention about HoG though!
I think the Vod I had of it is deleted but you can test it on the god bots in Jungle Practice.
“In builds that incorporate more offensive items, Polynomicon works well in combination with Frostbite for a nice burst of damage.”
Which means more along the lines of a jungle build. You want to go Poly Ymir? Play him Jungle.
No, and it has flat pen (good for base damage) and offers utility in it's passive, so it's not that reliant on having more power in your build. So nice try at reciprocation but you didn't quite hit the mark.
Did you clearly not get the memo about this being a “Support Build”? Why would it have Poly?"Hey, right now this is just a Support build, so it won't have Poly, which really only becomes more worthwhile in a more offensive build." (there, FTTFY)
@Shining, thanks very much for the feedback. Yeah, Poly is a very solid item for him, and the reason it's been mentioned in the passive section is to 1) acknowledge that, and 2) keep the door open if we want to expand the guide to other roles. That's been something discussed, and we could potentially offer some example builds for a Solo (Solomir) and Jungle (Junglemir) role.
But for now, I wouldn't recommend Poly in a Support role.
Also i'd add Divine Ruin as a situational.