
This guide has not yet been updated for the current season. Please keep this in mind while reading. You can see the most recently updated guides on the browse guides page
Vote received! Would you like to let the author know their guide helped you and leave them a message?

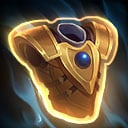
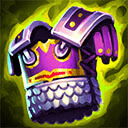
![]() Sentinel's Gift is your well-rounded, supportive starter item. You can alternatively opt for
Sentinel's Gift is your well-rounded, supportive starter item. You can alternatively opt for ![]() Benevolence.
Benevolence.
It is typically paired with the T1 form of ![]() Gauntlet of Thebes and potions for early sustain. Sentinel's provides good mana sustain, so you should only need
Gauntlet of Thebes and potions for early sustain. Sentinel's provides good mana sustain, so you should only need ![]() Multi Potions, but you can change the ratio of potions as you prefer.
Multi Potions, but you can change the ratio of potions as you prefer.
 Sentinel's Gift
 Glowing Emerald
 Healing Potion
 Multi Potion
 Sturdy Shard
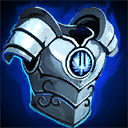
This is a general build for an all-around support. ![]() Gauntlet of Thebes can be replaced with
Gauntlet of Thebes can be replaced with ![]() Prophetic Cloak as preferred.
Prophetic Cloak as preferred.
![]() Pridwen provides additional dual protections and much needed CDR, but can be switched with another CDR item.
Pridwen provides additional dual protections and much needed CDR, but can be switched with another CDR item.
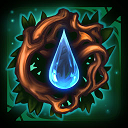
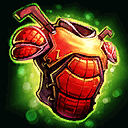
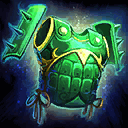
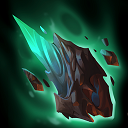
The last 3 items are situational. ![]() Stone of Binding provides a good health boost along with some offensive protection reduction functionality.
Stone of Binding provides a good health boost along with some offensive protection reduction functionality. ![]() Divine Ruin adds anti-heal (which Kuzen can apply very easily with
Divine Ruin adds anti-heal (which Kuzen can apply very easily with ![]() Shell Spikes, and
Shell Spikes, and ![]() Spectral Armor adds anti-crit effect. Replace these if these counters aren't needed.
Spectral Armor adds anti-crit effect. Replace these if these counters aren't needed.
 Sentinel's Embrace
 Gauntlet of Thebes
 Reverent Pridwen
 Stone of Binding
 Divine Ruin
 Spectral Armor
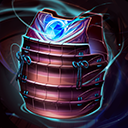
![]() War Flag provides aggressive early function in movement and attack speed, which can give you an advantage during laning phase.
War Flag provides aggressive early function in movement and attack speed, which can give you an advantage during laning phase.
Shown here for added early aggression is ![]() Druid Stone, which you'll build into
Druid Stone, which you'll build into ![]() Stone of Binding. Complete your starting items with potions for sustain.
Stone of Binding. Complete your starting items with potions for sustain.
 War Flag
 Druid Stone
Healing Potion
Multi Potion
Sturdy Shard
Druid Stone
Healing Potion
Multi Potion
Sturdy Shard
This example build targets early aggression from ![]() War Flag, gets CDR early for ability spamming, and has penetration-type items to weaken the enemy.
War Flag, gets CDR early for ability spamming, and has penetration-type items to weaken the enemy.
![]() Divine Ruin adds anti-heal effect, but if it's not needed you can replace it with another item.
Divine Ruin adds anti-heal effect, but if it's not needed you can replace it with another item.
Replace ![]() Stone of Binding as preferred.
Stone of Binding as preferred.
 Spartan Flag
 Prophetic Cloak
 Breastplate of Determination
 Void Doumaru
Divine Ruin
Stone of Binding
Void Doumaru
Divine Ruin
Stone of Binding
All 3 standard Support starter items (![]() Sentinel's Gift,
Sentinel's Gift, ![]() Benevolence,
Benevolence, ![]() War Flag can be functional for Conquest and all other modes. Choose based on your preferred upgrade item.
War Flag can be functional for Conquest and all other modes. Choose based on your preferred upgrade item.
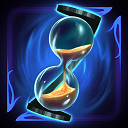
![]() Tainted Steel and
Tainted Steel and ![]() Sands of Time are situational starter items for non-Conquest teamfight modes.
Sands of Time are situational starter items for non-Conquest teamfight modes.
Sentinel's Gift
 Benevolence
War Flag
Benevolence
War Flag
 Tainted Steel
 Sands of Time
Choose your protection items as preferred.
Gauntlet of Thebes
Prophetic Cloak
 Sovereignty
Breastplate of Determination
Sovereignty
Breastplate of Determination
 Oni Hunter's Garb
 Genji's Guard
 Amulet of the Stronghold
 Spirit Robe
Reverent Pridwen
Spirit Robe
Reverent Pridwen
Choose your counter items as fits your needs.
 Winged Blade
 Midgardian Mail
Spectral Armor
Midgardian Mail
Spectral Armor
 Contagion
 Pestilence
 Erosion
If you're confident in your own play, the matchup, your teammates, etc., choose from these items to provide offensive function and/or added utility.
Stone of Binding
Void Doumaru
Divine Ruin
 Relic Dagger
 Ethereal Staff
All of these relics are functional; many are situational and you should choose to fit the team's needs.
 Blink Rune
 Divine Barrier
 Bracer of Radiance
 Horrific Emblem
 Heavenly Wings
 Magic Shell
 Shield of Thorns
 Sundering Spear
Priority:
Ult > 1 > 2 > 3
![]() NeNe Kappa is prioritized first for clear and poke damage.
NeNe Kappa is prioritized first for clear and poke damage.
![]() Shell Spikes is very useful for the situational cooldown it provides, and is also prioritized for decreasing cooldown as it is leveled.
Shell Spikes is very useful for the situational cooldown it provides, and is also prioritized for decreasing cooldown as it is leveled.
![]() Sumo Slam only increases in damage and is prioritized last.
Sumo Slam only increases in damage and is prioritized last.
![]() Watery Grave should typically be upgraded whenever possible.
Watery Grave should typically be upgraded whenever possible.
 Y
Y
 B
B
 A
A
 X
X

Tap each threat level to view Kuzenbo’s threats
|
This guide is maintained by Branmuffin17 in honor of the memory of Gulfwulf. The Intro, pros/cons and skills sections will remain relatively untouched, but other sections will be updated as needed. Community feedback will be considered and appreciated in build and tip recommendations. Thank you in advance, and may Gulf be surrounded by many NeNe Kappas on Olympus. If you'd like to contribute to something in his honor, his wife said that the best way we can honor his memory is one of two ways:
|
 skill discussion
Proper warding is very important because having vision of the enemy's movement can give you early warning of a gank or an attempt on the Fire Giant / Gold Fury. Pathing from the Jungle will come from either your Void Camp or the enemy's area, depending on how far up you are in the lane. Do not try to initiate a team fight near the enemy's tower unless you have vision on a possible gank.
After your first or second back, you should be regularly picking up regular ![]() Wards and dropping them in strategic locations in the jungle to help your ADC and Mid-laner. Consider grabbing a
Wards and dropping them in strategic locations in the jungle to help your ADC and Mid-laner. Consider grabbing a ![]() Proximity Ward to protect your teammates when you're not there.
Proximity Ward to protect your teammates when you're not there.
As the match progresses, you'll want to have a ![]() Sentry Ward handy, which will be used to counter enemy wards and protect the Fire Giant. If you're not always close enough to watch it, a timely
Sentry Ward handy, which will be used to counter enemy wards and protect the Fire Giant. If you're not always close enough to watch it, a timely ![]() Raven Ward can be useful to spot enemies attempting it.
Raven Ward can be useful to spot enemies attempting it.
It's everybody's responsibility to ward, but not everybody does so. Just remember that you can only have a maximum of two wards active at one time.
If you want more specific information on warding, visit The Overarching Conquest Guide's Warding Chapter.
SMITEFire is the place to find the perfect build guide to take your game to the next level. Learn how to play a new god, or fine tune your favorite SMITE gods’s build and strategy.
Copyright © 2019 SMITEFire | All Rights Reserved


In honor of Gulfwulf, I plan to maintain his first and biggest guide. Builds have been updated, with some added writeups.
I would also recommend
Overall nice work, glad to see an updated guide on your belt :P
Also, from my games (your experience could be different), assault didn't last me long enough to buy
I personally wouldn't bother with
There are probably 2 ways you can start. Sent +
Another option would be T1 Shoes + more potions and/or Chalice for higher early aggression.
You might want to uncheck the "starter" and "main build" options, as it makes it read weirdly, and throws the rest of your item options way below.
As for your assault builds, I feel strongly that
Also on start I do not fully agree to start T2 boots and only 2 Hp pots. especially as most will use it after the camp clear. It's better to start with more pots or chalice for supports or just start T1 item as you gold gain is higher than last season with a blessing. Support starts are slightly more flexible than last season
t2 boots can be good if you know you have the better pressure in the pre lvl 5 but if you don't safer to start more sustain so you don't fall behind in exp to much early.
It's very noticeable how much more flexible things are with an extra 200 gold at the start for Supps though (when going Sentinel's).
The other aspect of this is it's Kuzen...his initial clear on the camp should be way better than most supps, due to bouncing his Nenes.
Yes, Midgard is fine to use, but as the main example, I think Nemean fits better. I also think it belongs in the "physical heavy comp" build example.
Hey I found another guide that needs to be archivedNice one Gulf, you have my +1