
This guide has not yet been updated for the current season. Please keep this in mind while reading. You can see the most recently updated guides on the browse guides page
Vote received! Would you like to let the author know their guide helped you and leave them a message?

 Chalice of Mana
 Chalice of Healing
 Ninja Tabi
 Charged Bow
 Jotunn's Wrath
 Malice
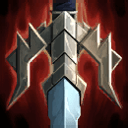
 Qin's Sais
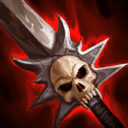 Deathbringer
 Cloak of Meditation
 Y
Y
 B
B
 A
A
 X
X

Hello everybody! This is my first attempt at a guide here. I've had a lot of success experimenting with Cab's builds this season and stumbled across a defensive build that I have a lot of success with regardless of the team comp and player's you get teamed up with. Keep in mind that this is not a carry build and concentrates more on the defensive properties that the hives offer. This build will be very conservative until the crits and attack speed start taking affect in late game.
One of Cab's biggest drawbacks is being such a mana hog and so dependent on his abilities as a hunter. The item order specifically addresses this issue and will give you a lot more sustain early in the game.
![]() Chalice of Mana is a MUST first purchase for this build. Without it you simply will not have enough mana to sustain early on in anything except possibly an arena match. I cannot stress the importance of this item enough. It is simply a must buy item for this build.
Chalice of Mana is a MUST first purchase for this build. Without it you simply will not have enough mana to sustain early on in anything except possibly an arena match. I cannot stress the importance of this item enough. It is simply a must buy item for this build.
![]() Chalice of Healing After purchasing the mana and T2 boots you will have 300 gold left over. I have found that buying this item works very well alongside his kit and other purchases to help ensure you have a lot more sustain in early and midgame than typical with this god.
Chalice of Healing After purchasing the mana and T2 boots you will have 300 gold left over. I have found that buying this item works very well alongside his kit and other purchases to help ensure you have a lot more sustain in early and midgame than typical with this god.
Meditation Cloak is used in conjunction with the chalices to allow you to stay in lane longer and make up some extra gold while others are porting back to the fountain in order to make purchases and/or regenerate and gives the added bonus of allowing your teammates to do the same. This is one of my personal favorites when it comes to relics.
![]() Ninja Tabi are the boots I prefer personally as they give you an early mana boost which is something Cab always seems to be in short supply of even late game.
Ninja Tabi are the boots I prefer personally as they give you an early mana boost which is something Cab always seems to be in short supply of even late game.
![]() Charged BowThis items is picked up early game but can be switched out late game for something that provides a little more power. (I typically like to switch out to
Charged BowThis items is picked up early game but can be switched out late game for something that provides a little more power. (I typically like to switch out to ![]() The Executioner, but finding something that works for your personal playstyle will work best. You can afford to drop the Bow late game as the hives will make up the difference in the attack speed loss.
The Executioner, but finding something that works for your personal playstyle will work best. You can afford to drop the Bow late game as the hives will make up the difference in the attack speed loss.
![]() Jotunn's Wrath is the next item up. It's a no-brainer for me on most physical gods. The penetration, power, and cooldown make it one of those staples in most of my builds. The CD reduction is especially useful for an ability heavy god like Cab.
Jotunn's Wrath is the next item up. It's a no-brainer for me on most physical gods. The penetration, power, and cooldown make it one of those staples in most of my builds. The CD reduction is especially useful for an ability heavy god like Cab.
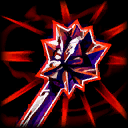
![]() Malice is next. This is when you really start to open up your damage and start ripping into enemy gods with crits. It won't seem like much at first, but the attack speed boost from the hives as well as the
Malice is next. This is when you really start to open up your damage and start ripping into enemy gods with crits. It won't seem like much at first, but the attack speed boost from the hives as well as the ![]() Charged Bow will have you attacking so quickly that you will be hitting crits fairly regularly even at midgame.
Charged Bow will have you attacking so quickly that you will be hitting crits fairly regularly even at midgame.
![]() Qin's Sais is used to help pump your damage output by increasing your power and attack speed yet again. Once you hit this item and have your hives at Lvl 5, you should be sitting with your attack speed in the area of 3. This gives you 3 attack per second and really where this build starts to shine. Where most other damage dealers will be sitting in the 1.8-2.0 range, you will be attacking nearly twice as many times. Which leads us into the final item...
Qin's Sais is used to help pump your damage output by increasing your power and attack speed yet again. Once you hit this item and have your hives at Lvl 5, you should be sitting with your attack speed in the area of 3. This gives you 3 attack per second and really where this build starts to shine. Where most other damage dealers will be sitting in the 1.8-2.0 range, you will be attacking nearly twice as many times. Which leads us into the final item...
![]() Deathbringer This item rounds out your damage output very nicely. Given the attack speed mentioned above and your crits now popping off every other shot or so, you are now putting out 1-2 crits per second which equates to a lot of sustained damage. You should be able to safely face down most threats in 1v1 situations (provided you use the strategies laid out for this build) as well as make all but the toughest guardians back up with a few well placed shots.
Deathbringer This item rounds out your damage output very nicely. Given the attack speed mentioned above and your crits now popping off every other shot or so, you are now putting out 1-2 crits per second which equates to a lot of sustained damage. You should be able to safely face down most threats in 1v1 situations (provided you use the strategies laid out for this build) as well as make all but the toughest guardians back up with a few well placed shots.
One of the most important aspects of Cab and his builds is his passive ![]() Bees! Any time Cab hits an enemy with one of his abilities it activates this passive. The bees will do DoT as well as spread to all nearby enemy combatants. If an enemy is infected for 4 seconds they become disarmed and unable to attack. Hitting them with your basic attacks prolongs the infection of bees. This is honestly his biggest threat and typically forces aggressive enemies to back up or risk engaging in a fight they can't win due to being unable to attack!
Bees! Any time Cab hits an enemy with one of his abilities it activates this passive. The bees will do DoT as well as spread to all nearby enemy combatants. If an enemy is infected for 4 seconds they become disarmed and unable to attack. Hitting them with your basic attacks prolongs the infection of bees. This is honestly his biggest threat and typically forces aggressive enemies to back up or risk engaging in a fight they can't win due to being unable to attack!
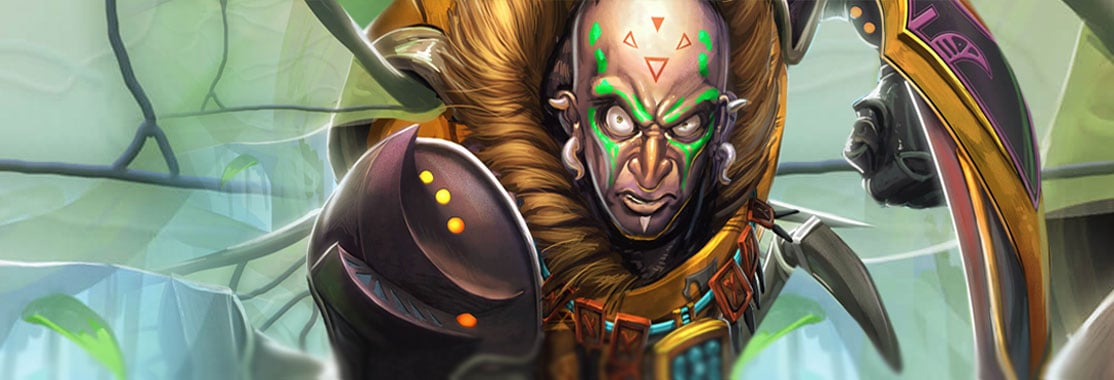
I feel I must start with a disclaimer. This is not a typical cookie cutter style build. This build is actually very unorthodox and goes against a lot of "normal" build rules. There is a reason for this and a method to the madness. Keep in mind that any guide is just that, a guide to help you along the path. Find and tweak new ways of doing things that fit into your personal playstyle. That will always be more important than anything to do with "meta". So without further ado I present the Hive Master build
![]() Hive is the main focus of this build. The hives and their bonuses are key to making this build work. I will explain this in a lot more depth and detail down below in the strategy section. This is the first purchase you should make in any and all modes for this build and focus on upgrading it as often as possible (even above the ultimate)Purchase this at Level 1, 4, and 5 to start with. Hives give Cab movement speed and attack speed bonuses as well as heal him. Hives will also act as wards and alert you to enemies within 20 units. They are the centerpiece of this entire build and strategy. Learning where and how to place these and overlap their coverages cannot be stressed enough.
Hive is the main focus of this build. The hives and their bonuses are key to making this build work. I will explain this in a lot more depth and detail down below in the strategy section. This is the first purchase you should make in any and all modes for this build and focus on upgrading it as often as possible (even above the ultimate)Purchase this at Level 1, 4, and 5 to start with. Hives give Cab movement speed and attack speed bonuses as well as heal him. Hives will also act as wards and alert you to enemies within 20 units. They are the centerpiece of this entire build and strategy. Learning where and how to place these and overlap their coverages cannot be stressed enough.
![]() Swarm This will be your main "poke and clear". Use this ability against groups of minions and enemy gods. The great thing about this and all of Cab's abilities are that they have fantastic synergy and spread to other enemies. Once an enemy character (minion or otherwise) is infected with bees, those bees will spread to others. I typically use this when a line of minions is coming in. Typically enemy gods will be walking in their minions so once that first minion is infected it spreads to the rest including the enemy gods forcing them to back up or become disarmed.
Swarm This will be your main "poke and clear". Use this ability against groups of minions and enemy gods. The great thing about this and all of Cab's abilities are that they have fantastic synergy and spread to other enemies. Once an enemy character (minion or otherwise) is infected with bees, those bees will spread to others. I typically use this when a line of minions is coming in. Typically enemy gods will be walking in their minions so once that first minion is infected it spreads to the rest including the enemy gods forcing them to back up or become disarmed.
![]() Honey This ability is typically used to "Draw a line in the sand". Your hives have a fairly large radius and enemies who step in honey are instantly swarmed by bees from all hives in range starting the disarm mechanic and doing damage over time.
Honey This ability is typically used to "Draw a line in the sand". Your hives have a fairly large radius and enemies who step in honey are instantly swarmed by bees from all hives in range starting the disarm mechanic and doing damage over time.
![]() Stinger This ability is Cab's big damage. It does a decent amount of burst damage and infects the target with bees. If an enemy god who has been damaged by this ability is killed then the stinger is dropped on the map allowing Cab to pick it up and receive a huge reduction in the cooldown of this ability.
Stinger This ability is Cab's big damage. It does a decent amount of burst damage and infects the target with bees. If an enemy god who has been damaged by this ability is killed then the stinger is dropped on the map allowing Cab to pick it up and receive a huge reduction in the cooldown of this ability.
![]() Bees! This is possibly Cab's most important ability and aspect. This is the ability that will actually cause your opponents to back up and hesitate before diving on you. All of Cab's abilities work around this passive and create a fantastic synergy. A perk of this ability that should not go unmentioned is that it also reveals enemy gods to your teammates as well. If the enemy team has a decent stealth assassin on their side, this simple passive can really make life hard for them. They cannot stealth and gank when they are covered in bees and will keep those pesky ganks in check
Bees! This is possibly Cab's most important ability and aspect. This is the ability that will actually cause your opponents to back up and hesitate before diving on you. All of Cab's abilities work around this passive and create a fantastic synergy. A perk of this ability that should not go unmentioned is that it also reveals enemy gods to your teammates as well. If the enemy team has a decent stealth assassin on their side, this simple passive can really make life hard for them. They cannot stealth and gank when they are covered in bees and will keep those pesky ganks in check
As I mentioned earlier, this build is most definitely not a typical "meta" type build, but I have found a lot of success with it recently in S4. The fact that his ultimate is not leveled up until end game will send some into shock I'm sure, but it really works for this build.
In every game mode start with purchasing your T2 boots, Meditation, and the ![]() Chalice of Healing and
Chalice of Healing and ![]() Chalice of Mana. If playing Conquest then put your first skill point in
Chalice of Mana. If playing Conquest then put your first skill point in ![]() Hive. For everything but Conquest I purchase the first level of
Hive. For everything but Conquest I purchase the first level of ![]() Hive,
Hive, ![]() Swarm, and
Swarm, and ![]() Honey.
Honey.
You will start out a bit "weaker" than most opponents with this starting build, but the chalices and relic should give you enough sustain along with your hives to manage. The key thing to remember about this build early game is that you must play a bit more defensively. You will want to play more a the back lines and work on keeping gankers off your teammates and preventing the enemy team from making coordinated dives. I will keep conquest specific strategies for its own section below.
EARLY GAME
The first hive placement goes right outside of the fountain exit. This gives you a "free" hive as your mana will instantly refill. From there you leap frog your hives as best you can to create a fast path back to the battle from the fountain. This ensures that the hive movement speed bonus always gets you back into the fight as fast as possible. After minions have spawned and your team has taken whatever camps it is going for, begin setting up hives at your towers.
For arena I will typically place hives from the fountain to our buff camps basically taking over our side of the map and giving my teammates as relatively safe escape path as I can quickly and easily rotate around the map and help as needed. From this point on you simply want to maintain and spread your hives based on what the rest of your team is doing. If they're currently playing defense, then you'll want a network of hives overlapping across your territory. This will make sure you can move anywhere you need to be quickly.
In Clash, for example, I will often place a hive in the center jungle on our side of the damage camp. Then place 1 hive at each tower. This gives me the ability to rotate from one tower to the other as needed if one lane is getting overrun. It also ensures that nothing can slip into the center jungle secretly to gank from the sides.
MIDGAME
At this point you should have your ![]() Ninja Tabi,
Ninja Tabi, ![]() Charged Bow, and at least have T1 purchased into
Charged Bow, and at least have T1 purchased into ![]() Jotunn's Wrath. While your attack speed will be decent, keep in mind that your damage output will still be struggling a bit compared to other hunters in most cases. As long as you stay within the safety areas provided by your hives, your healing and speed bonuses should keep you in the fight just fine.
Jotunn's Wrath. While your attack speed will be decent, keep in mind that your damage output will still be struggling a bit compared to other hunters in most cases. As long as you stay within the safety areas provided by your hives, your healing and speed bonuses should keep you in the fight just fine.
If your team is successfully taking ground from the enemy and putting consistent pressure on enemy objectives, then you want to start "leap frogging" your hives forward as you can. As you begin to move the radius of your hives forward you'll be able to slowly but surely take and, more importantly, hold enemy ground. You should have 3-4 levels in your hives and 2-3 in swarm and honey at this point.
One thing I think should be mentioned at this point. I purposefully ignore leveling up stinger until my other abilities are maxed out. The stinger, while having some decent burst damage potential, is secondary to the sustain of the hives and your bees passive. Once your hives hit level 3+, the bonuses become invaluable to being able to counter the late early game start.
ENDGAME
Ok, you've made it to the enemy's pheonix and trying to push past them to the Titan. At this point you should be looking into finishing off your ![]() Qin's Sais and/or your second crit item (I typically like
Qin's Sais and/or your second crit item (I typically like ![]() Deathbringer for the burst damage combined with
Deathbringer for the burst damage combined with ![]() Malice) If your damage output isn't quite where you want it to be you can drop
Malice) If your damage output isn't quite where you want it to be you can drop ![]() Charged Bow at this point and grab something with a little attack power and/or penetration. If I find myself in this position I have found that
Charged Bow at this point and grab something with a little attack power and/or penetration. If I find myself in this position I have found that ![]() The Executioner works really well. The attack speed bonus helps mitigate some of the speed you lose from dropping the bow while providing a decent boost in damage output.
The Executioner works really well. The attack speed bonus helps mitigate some of the speed you lose from dropping the bow while providing a decent boost in damage output.
At this point you should be following your team's rotations and fight initiations. Keep a row of hives going down whatever lane you're working. This ensures that you have a fast lane back towards your side of the map should the team fight not pan out. Once you have an area cleared out start placing extra hives in the general area. Remember, any time you hit an enemy with ![]() Honey they will be swarmed by bees from all hives in range.
Honey they will be swarmed by bees from all hives in range.
BASIC STRATEGIES
The thing to keep in mind with this build is that you're almost a quasi guardian. You are very much the fall back position. If your teammates initiate a fight and things go badly, then it is up to you to slow and, if possible, stop the enemy pursuit and encroachment into your side of the map. Having multiple hives set up and using your abilities liberally will get the job done. The chalices will help mitigate the mana drought issues that Cab suffers from, but not get rid of it. You have to be willing and able to fall back.
One of the biggest mistakes I find myself making with this build is staying in lane a bit too long. With all of the healing and sustain it is easy to wrack up a 2k gold and not realize you haven't made a trip back to fountain yet.
Be flexible in rotating. The entire premise of this build takes advantage of Cab's increased mobility due to his hives. You can easily provide base defense quickly to just about any part of the map if you are smart with the placement of your hives.
When under the range of your hives, your movement speed bonus will make it near impossible for most gods to effectively chase you down. Toss in the slow that honey creates and you've got great escape prospects even without any abilities specifically dedicated to that purpose.
Given the nature of this build and the size of the conquest map I felt it necessary to provide a section specifically dedicated to this mode. This build will allow you to fill just about any role and lane you want (not so much as a jungler due to low early game damage output). One other tweak I will make to this build for conquest on occasion is adding in ![]() Death's Toll as a starter item. The health and mana regen are fantastic early game for Cab.
Death's Toll as a starter item. The health and mana regen are fantastic early game for Cab.
SOLO
If you're going to run this in the solo lane then you will want to focus early game at farming minions. You'll typically have the range and movement advantage over enemies in this lane so you'll want to simply use that to safely take down minions and retreating from enemy hero as needed. This is especially true until you hit level 3 and have full use of all 3 abilities.
CARRY/DUO LANE
Same principle here. You will want to stay behind your support/guardian as much as possible and attack minions. You'll want to place 1-2 hives at your tower and simply leap frog them forward as you're able. Don't be afraid to fall back! If you're getting pushed by the enemy duo then simply fall back to your tower and hives. Your abilities will make short work of minions and enemy gods are too weak to do any significant damage to your tower early on. It's better to lose a little farm than it is to feed the enemy team kills.
MID
This is a lane where Cab can actually shine due to the mechanics of his hives. They allow you to easily ward the side jungles against ganks and provide damage and speed boosts against your enemy. 1v1 from midgame on this build should be able to handle anything tossed at it. You may not secure a kill, but you will not give up ground or tower.
The basic thing to remember for this build is the importance of your hives, effectively overlapping their coverage, and keeping up with their placements. It only takes one basic attack to take them down and they're typically one of the first things an enemy team will try to focus on. Learn to place them behind walls, towers, etc.s to obscure their view and force the enemy team to dive deep in order to take them out.
Towards mid to late game your hive bonuses will really start to kick in. Do not underestimate the movement speed bonus to get into and out of fights quickly. This will be your biggest advantage. You should always be in the range of at least one of your hives if at all possible. Without the hive bonuses you will find yourself a bit outpowered and outmatched early to midgame.
Your main goal with this build is to provide relatively "safe" fall back positions for your team. When your team begins to lose a team fight or just decides to disengage and fall back, you should be able and ready to spray honey down, hit swarm, and make the enemy team back up or face being disarmed.
Remember, you can only have 6 hives up at one time. Any hive you place after that will cause your previous hives to disappear. Keep this in mind when placing a new hive as your team moves forward into enemy territory. Unless my team is just consistently rolling up the enemy I almost always keep 1 hive under each tower.
If your team is getting beaten back do not get discouraged. As your team loses ground, this build actually ramps up. In Conquest, for example, once the enemy team has taken down all of your towers, you're left with nothing but phoenixes. This also means that the area you have to cover has gotten significantly smaller. You can easily set up your hive placement to ensure all 3 are covered and provide yourself with a highway to rotate to any of them under attack. With this defensive setup you can almost single-handedly hold off all but the most aggressive enemy pushes.
At endgame levels your attack speed can hit 3. With the build provided above that means you're attacking 3 times per second and about every other shot will be a crit. So where enemy hunters may be doing 1.8-2 attacks, you'll be doing 3. Over 3 seconds that's 9 attacks to their 6. Even if their crit levels are the same, you'll still out damage them many times simply because you're attacking so much faster. This also becomes a huge factor late game as your basics keep the infestation proccing which leads to opponents being disarmed.
SMITEFire is the place to find the perfect build guide to take your game to the next level. Learn how to play a new god, or fine tune your favorite SMITE gods’s build and strategy.
Copyright © 2019 SMITEFire | All Rights Reserved


Leave a Comment
You need to log in before commenting.
Collapse All Comments