

Vote received! Would you like to let the author know their guide helped you and leave them a message?
 Leather Cowl is a different starter than most jungler, but for
 Fenrir is very useful thanks to the speed and power it provides.
 Health Potion HP sustain for the jungle and enemy poke.
 Purification Beads gives you CC's immune when you use.
 Bifrost Shard gives you a free ward that lasts 90 seconds. It is useful for early ganks from the enemy jungler.
Leather Cowl is a different starter than most jungler, but for Fenrir is very useful thanks to the speed and power it provides.
Health Potion HP sustain for the jungle and enemy poke.
Purification Beads gives you CC's immune when you use.
Bifrost Shard gives you a free ward that lasts 90 seconds. It is useful for early ganks from the enemy jungler.
 Leather Cowl
 Axe
 Health Potion
Bifrost Shard
Purification Beads
 Hunter's Cowl is really good because that extra attack speed and power it gives you is top.
 Tyrfing With this item, you will deal extra damage with your basic attacks, furthermore, this bonus also applies when using
 Brutalize.
 Bragi's Harp With this item, you will deal extra damage with your basic attacks, furthermore, this bonus also applies when using Brutalize, this makes a great combo with Tyrfing.
 Jotunn's Revenge is very important thanks to the strength and cooldown reduction it offers, allowing you to use your abilities more often.
 Berserker's Shield gives you physical defenses and a lot of attack speed and the passive gives you more defense and attack speed when your health drops below 60%.
 Ancile is a defensive magic item with good stats, but most importantly, an active that causes your next ability to silence enemies, perfect for use with Brutalize.
 Hide of the Nemean Lion right now the carries are very strong and this item gives you a passive that when you activate it you reflect damage, that's why it's very good vs carries. Purification Beads gives you CC's immune when you use. Bifrost Shard gives you a free ward that lasts 90 seconds. It is useful for early ganks from the enemy jungler.
Hunter's Cowl is really good because that extra attack speed and power it gives you is top.
Tyrfing With this item, you will deal extra damage with your basic attacks, furthermore, this bonus also applies when using Brutalize.
Bragi's Harp With this item, you will deal extra damage with your basic attacks, furthermore, this bonus also applies when using Brutalize, this makes a great combo with Tyrfing.
Jotunn's Revenge is very important thanks to the strength and cooldown reduction it offers, allowing you to use your abilities more often.
Berserker's Shield gives you physical defenses and a lot of attack speed and the passive gives you more defense and attack speed when your health drops below 60%.
Ancile is a defensive magic item with good stats, but most importantly, an active that causes your next ability to silence enemies, perfect for use with Brutalize.
Hide of the Nemean Lion right now the carries are very strong and this item gives you a passive that when you activate it you reflect damage, that's why it's very good vs carries.
Purification Beads gives you CC's immune when you use.
Bifrost Shard gives you a free ward that lasts 90 seconds. It is useful for early ganks from the enemy jungler.
Hunter's Cowl
Tyrfing
Bragi's Harp
Jotunn's Revenge
 Berserker's Shield
 Ancile
 Hide of the Nemean Lion
Bifrost Shard
Purification Beads
 Freya's Tears gives you magical and physical defenses and cooldown reduction, really good to spam abilities.
 Brawler's Beat Stick gives you good defenses, power, and very importantly anti healing.
If you want more defensive items but very good ones:
Freya's Tears gives you magical and physical defenses and cooldown reduction, really good to spam abilities.
Brawler's Beat Stick gives you good defenses, power, and very importantly anti healing.
Freya's Tears
 Brawler's Beat Stick

 Y
 B
 A
 X
Tap each threat level to view Fenrir’s threats

Tap each synergy level to view Fenrir’s synergies
Hi, this guide is brought to you by lestimics. I started playing Smite 1 on PC in 2014. I've been playing competitively since 2020 and have been a professional Smite player from 2021 to 2023. I've played on different teams like JustF6, Gilded Gladiators or Tartarus Titans.
You can check out the SmiteVOD YouTube channel where my recorded professional games are. I've peaked at 3500 MMR GrandMaster/Masters in Ranked Conquest on the PC platform every season since 2018. I've also done Smite Masters (LAN) 4 times in 2022, I also continue to compete in Smite 2 in leagues like SmiteSource and smiteprime so I really think I have the knowledge to guide on the Jungle role in SMITE 2.
I hope you find this guide as a useful learning resource for playing Fenrir as Jungle.
Here are my socials:
|
Passive -
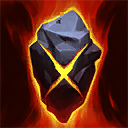 Unbound Runes Your runes are activated by successful basic attacks, or by activating abilities. You activate 5 runes on killing an enemy god. At five runes your next abilities becomes empowered and gains additional effects. This passive is very important so try to have all 5 runes before using an ability. |
|
Ability 1 -
UnchainedIt's a jump forward that does area damage, if you have all 5 runes you stun all enemies in the area. If you don't have all 5 runes and you hit someone with Unchained version, you get 3 runes. This stun is very important to be more easy to combo with your ultimate  Ragnarok and Brutalize. |
|
Ability 2 -
Seething HowlUnleash a howl and gain attack speed, strength, and lifesteal. Seething Howl is important to use before using the skills to do more damage and in case you are missing 2 runes to complete, also gives you a really good 1vs1 thats to the attack speed.
|
|
Ability 3 -
BrutalizeGains protections and leap forward, grab into an enemy and deal Physical Damage repeatedly to all enemies in the area 4 times. At 5 Runes, the Strength scaling is increased, then all Runes are consumed. Gain 1 Rune per successful hit if you don't have 5 Runes. Brutalize is the main ability, it does a lot of damage and you will clear the jungle really fast.
|
|
Ultimate -
RagnarokActivate this ability to grow bigger, increase your movement speed, physical protection, and magic protection. Your next basic attack grabs an enemy god, allowing you to move it and carry it to any position (Grab duration 1.75 seconds) and you gain immunity to CC's. When Ragnarok ends, you gain 5 runes.It’s very useful that you can move an enemy wherever you want, you can pull them into towers or phoenixes, drag them away from their allies, or simply hold them in place so your teammates can easily hit their skills. |
Seething Howl (5 runes) > Unchained to stun the enemy > one basic attack > Brutalize. Seething Howl (5 runes) > Unchained to stun the enemy > Ragnarok to get inside a tower or get close to an ally > Brutalize. Seething Howl (5 runes) > Brutalize > basic attacks until the enemy jumps or dashes and Unchained to stun the enemy > Ragnarok. Purification Beads without having to bite with your ultimate, You need to use your ultimate, but without biting him just stay very close to the enemy, and most people will panic and use their Purification Beads so when they use it, you bite him with Ragnarok.
Brutalize You just have to hit basic attacks (In all buffs and camps, it's important to execute skill combos and basic attacks well to gain a time advantage over the enemy jungler), do the harpies that are nearby and then go to the red buff in which your mid laner will help you do it so you can get this buff and go to the cyclopede camp next door, then you have to go to the harpy camp next to the speed camp, and then do the speed camp, your mid laner will help you set up the cyclopede camp in front of the speed lane that way you'll both reach level 3, then you'll both go to the middle lane. Unbound Runes with 5 runes, it’s a good idea to look for a stun on the jungler or the mid laner Unchained > Brutalize, if you win this pressure, it's best to take the neutral buff. Now you have several options: you can try to gank the solo lane, but if you really think you'll get the kill, it depends on the enemy god they have and how they're positioned, because if he is under the tower, it's very difficult to get the kill. You can also go back to mid to do another minion wave and keep pressuring mid, then move to the duo lane to look for a gank, or you can farm your harpy Camps. Even after that, you can do a small gank on another lane before backing. Purification Beads because it can be a very easy gank if they don't have Purification Beads so you can grab him with Ragnarok, and you can get the fire stones which give a lot of experience and permanent strength. If you're going to gank the duo lane, the most important thing is where the enemy adc is positioned, rormally, if he is more or less in the middle of the lane, it should be an easy kill, but it's quite common for them to have wards. Teamfights in the mid lane are usually quite dangerous because the support is often there and can easily force you to use Purification Beads. Furthermore, if you manage to get a kill or apply a lot of pressure in the lanes, you can kill the Gold Furys or the Pyromancer, which are very important thanks to the experience and gold they grant. Brutalize that way, if the enemy uses a dash or a jump to escape, you can chase him with Unchained followed by auto attacks and your ultimate Ragnarok if you need it. You can also initiate with Unchained to hit a stun, and if you know he doesn't have Purification Beads, you can follow up with Ragnarok > Brutalize. Keep in mind that if they have Purification Beads, they can easily escape your ultimate, although you'll still be dealing damage but there’s a trick to try and force the enemy to use Purification Beads without having to bite with your ultimate, You need to use your ultimate, but without biting him just stay very close to the enemy, and most people will panic and use their Purification Beads so when they use it, you bite him with Ragnarok. Unchained > Brutalize, and take advantage of the movement speed and CC immunity provided by Ragnarok. Unchained > Brutalize or try to force Purification Beads with your ultimate Ragnarok. You can also wait for your team to apply enough CC and damage to all go in together Unchained > Brutalize. Purification Beads you can grab them with Brutalize.
 Vision Ward
 Sentry Ward

SMITEFire is the place to find the perfect build guide to take your game to the next level. Learn how to play a new god, or fine tune your favorite SMITE gods’s build and strategy.
Copyright © 2019 SMITEFire | All Rights Reserved





 Gravity Surge
 Unchained
 Ares
 Shackles

 Artio
 Entangling Vines / Ferocious Roar

 Athena
 Defender Of Olympus

Leave a Comment This author would like to receive feedback
and suggestions about their guide.
You need to log in before commenting.
Collapse All Comments