Smitefire logo

Join the leading SMITE community.
Create and share God Guides and Builds.

Create an MFN Account


Or

Not Updated For Current Season

This guide has not yet been updated for the current season. Please keep this in mind while reading. You can see the most recently updated guides on the browse guides page

x

Vote received! Would you like to let the author know their guide helped you and leave them a message?

Banner for Cabrakan guides

Cabrakan: Get In the Zone (Shadow Zone)!

9 1 32,097
by WedgeSkyrocket updated September 12, 2014

Smite God: Cabrakan

Build Guide Discussion 5 More Guides
Tap Mouse over an item or ability icon for detailed info

Cabrakan Build

The Best Offense is a Good Defense

Build Item Stone of Gaia Stone of Gaia
Build Item Sovereignty Sovereignty
Build Item Hide of the Nemean Lion Hide of the Nemean Lion
Build Item Breastplate of Valor Breastplate of Valor
Build Item Void Stone Void Stone
Build Item Bulwark of Hope Bulwark of Hope
Build Item Magi's Cloak Magi's Cloak
Build Item Hide of the Urchin Hide of the Urchin

Starter

Build Item Watcher's Gift Watcher's Gift
Build Item Boots Boots
Build Item Blink Rune Blink Rune

Early Game

Build Item Midas Boots (M) Midas Boots (M)
Build Item Sovereignty Sovereignty
Build Item Stone of Gaia Stone of Gaia

Support

Build Item Rod of Asclepius Rod of Asclepius
Build Item Pestilence Pestilence

Offense

Build Item Ethereal Staff (Deleted) Ethereal Staff (Deleted)
Build Item Rod of Tahuti Rod of Tahuti

Actives

Build Item Greater Blink Greater Blink
Build Item Combat Blink Combat Blink
Build Item Enfeebling Curse Enfeebling Curse
Build Item Weakening Curse Weakening Curse
Build Item Salvation Salvation
Build Item Shell of Absorption Shell of Absorption
Build Item Heavenly Agility Heavenly Agility
Build Item Greater Purification Greater Purification

Cabrakan's Skill Order

Seismic Crush

1 X Y
Seismic Crush
2 7 11 12 14

Refraction Shield

2 A B
Refraction Shield
1 4 6 8 10

Tremors

3 B A
Tremors
3 15 16 18 19

Tectonic Shift

4 Y X
Tectonic Shift
5 9 13 17 20
Seismic Crush
2 7 11 12 14

Seismic Crush

1 X
Cabrakan becomes enraged, increasing his movement speed. While active, Cabrakan gains 70% increased Attack Speed and his next successful Basic Attack will Stun and do bonus damage. Additionally, Cabrakan gains Haste and is immune to Slows and Roots while this ability is active.

Ability Type: Stun, Damage
Damage: 80 / 125 / 170 / 215 / 260 (+50% of your Magical Power)
Stun Duration: 1s
Movement Speed Increase: 15 / 20 / 25 / 30 / 35%
Duration: 5s
Cost: 50 / 55 / 60 / 65 / 70
Cooldown: 16 / 15.5 / 15 / 14.5 / 14s
Refraction Shield
1 4 6 8 10

Refraction Shield

2 A
Passive: As Cabrakan's shields take damage they store energy and gain Protection stacks.

Active: Cabrakan slams his shields together creating a concussive blast and damaging enemies in front of him, granting him Mana per enemy hit. If his shields have the maximum number of stacks then the enemy gods hit are Stunned, and the Stacks are removed.

Ability Type: Cone, Stun, Damage
Damage: 80 / 135 / 190 / 245 / 300 (+50% of your Magical Power)
Stun Duration: 1.1 / 1.2 / 1.3 / 1.4 / 1.5s
Protections per Stack: 2 / 3 / 4 / 5 / 6
Mana: 10 / 14 / 18 / 22 / 26
Max stacks: 5
Range: 20
Cost: 10
Cooldown: 10s
Tremors
3 15 16 18 19

Tremors

3 B
Cabrakan repeatedly slams the ground with his shields creating an earthquake and causing enemy gods around him to Tremble. Enemies in the earthquake also take damage and are caught in a Vortex which drags them towards Cabrakan. This ability can only be channeled for a maximum amount of 10s.

Ability Type: Circle, Tremble, Damage
Damage: 18 / 28 / 38 / 48 / 58 (+35% of your Magical Power) every 0.5s
Radius: 30
Cost: 20 / 30 / 40 / 50 / 60 every 0.5s
Cooldown: 4s
Tectonic Shift
5 9 13 17 20

Tectonic Shift

4 Y
Cabrakan stomps the ground, creating a wall of earth and a fissure that travels out in front of him and damages any enemies caught in its path. The walls may be destroyed if they take enough hits. Cabrakan may destroy his own walls with a single basic attack.

Ability Type: Area, Wall, Damage
Damage: 150 / 250 / 350 / 450 / 550 (+60% of your Magical Power)
Hits to Destroy: 3
Range: 35
Cost: 100
Cooldown: 75s

Introduction


Boo.

Hi everyone, I'm WedgeSkyrocket, and this is my first guide. I'm relatively new to the game but I'm improving daily, and I wanted to share my build and strategies with Cabrakan.

The first god I played to Mastery 1 with was Ymir, and after researching Cabrakan's skills I found that they bear some similarities and decided to try him out. What you'll see here is the result of several matches testing out different builds and strategies.

So, keep in mind that I'm relatively new, but I welcome any constructive criticism from more experienced players to help me improve my skills and this guide.

Destroyer of Mountains

XXXXXX XXXXXX

So let's take a general look at the Destroyer of Mountains. Cabrakan being a Guardian, of course his strengths lie in his natural Tankiness and Crowd Control. He has decent starting HP and scaling, placing him just about smack-dab in the middle of the Guardians with 2290 base HP at Level 20.

His protections put him tied with Ymir for the best overall among guardians, at 30(+.9) Magical and 23(+3.3) Physical. This combined with his health makes Cabrakan a tough nut to crack, especially late game if he's built to tank.
His passive grants a 5% damage mitigation to surrounding allies (including minions) within 10 meters, which while not much, can be of significant help in a team fight. For fun, jump into jungle practice and watch how you can swing the outcome of a creep wave just by standing next to it! (Obviously you wouldn't want to do this in a real match because you want last hits on minions)

The rest of Cabrakan's kit makes him a true beast of Crowd Control, consisting of two hard stuns, a soft CC AOE, and a line-damage + wall for his ult. With all of this, you can lock down an opponent for an obscenely long time, giving your teammates plenty of opportunity to secure the kill.
Of course, no god is without his weaknesses, and for Cabrakan the biggest weakness is his damage output. Like Ymir, he has fairly long cooldowns on all of his abilities, with the shortest at 8 seconds for Tremors. His most damaging skill other than his ult is Refraction Shield, but a 10-14 second cooldown and fairly high mana cost prevents you from getting spammy. He is also fairly mana-hungry even late game, especially if you make use of his Tremors. Exceptional circumstances aside, it is very unlikely that he will be able to take down an opponent from full or nearly-full health without help from a more damage-focused god.


Like these guys.

Pros / Cons

Pros:

+ High health
+ Tied for highest Protections ( Ymir)
+ Built-in chase with Seismic Crush
+ Crowd Control like a BAWZ
+ All skills deal damage and CC
+ Passive gives free damage mitigation
+ Good placement with Tectonic Shift can decide a team fight/gank

Cons:

- Poor damage output even compared to some Guardians
- Only innate escape is a speed buff
- Mana hungry even mid-late game, OM NOM NOM
- Tremors leaves you vulnerable to pokes
- Shadow Zone can be exploited by AOE
- Bad placement with Tectonic Shift can decide a team fight/gank, too

Skills

Shadow Zone

Exactly what it says in the skill description, folks! The range is decent, but not huge, and the mitigation is significant, but not impossible to brute-force through. It can make a difference in a team fight, but don't expect it to save your life. Combos well with Sovereignty and other Aura items, since you can expect your allies to stick close to you.

Seismic Crush

This is Cabrakan's chase and only means of escape. It functions adequately to initiate, giving you a decent boost in speed and making you immune to slow and roots (But NOT Stuns or Mez, be warned!). Your first successful basic attack applies a 1s stun and some extra damage to the target. You can use it to chase down a fleeing opponent and keep them still long enough to burst them down with your other skills or let your ADC finish them off. As an escape, it suffers from the aforementioned vulnerabilities to Stun and Mez, as well as the fact that it only buffs your speed.

I usually max this second, but I put a second point in after getting Refraction Shield up to level 3 just for the smidge of extra speed.

Refraction Shield

Refraction Shield is Cabrakan's bread and butter. At its most basic it is a short range cone-shaped poke, and your most damaging ability, but there's much more to it. As long as you have at least 1 point in it, it passively increases your protections by 15/20/25/30/35. As you take damage, you build stacks up to 5 but lose 1/5 of the protection per stack. At full stacks it applies a 1s stun to enemies hit by the cone. Using the ability also sheds the stacks, restoring your protections to full immediately.

This ability is good for shutting down multi-hit skills like Berserker Barrage and Taolu Assault, by building stacks and then popping the stun. The downside is that it has a fairly long cooldown (though it reduces with level and is shorter than Seismic Crush), and thus without some CDR you may feel a little naked in a prolonged fight when you don't have a way to stun your opponents and drop your stacks. You can also use it for a faster wave-clear, but without CDR you may want to save it for the enemy gods.

I max this first to take full advantage of the passive protection as well as the additional damage.

Tremors

Tremors is a weird skill to get used to, but it has good utility for holding down an opponent to let your ADC wreak havoc. The damage isn't anything to write home about, and it's a huge mana sink, but it also has the fastest cooldown of any of Cabrakan's skills. By itself, you won't be able to keep anyone stuck in place for very long, and the stationary nature leaves you vulnerable to pokes and counter-CC, but when used in conjunction with your other abilities it can prevent the enemy from escaping. Of note, it has a maximum channeling time of 10s, though it's unlikely that you have either the mana or the survivability to actually stand in one place long enough to breach that cap.

I max this last, as the damage is really secondary to its utility, which doesn't scale with leveling.

Tectonic Shift

And last but certainly not least, the Ultimate. Pretty simple mechanically, but with many strategic applications. It deals fairly heavy damage in a line/cone-ish shape and creates a U-shaped wall of stalagmites at the end of its range. If the damage doesn't finish off the opponent, they now are in the unfortunate position of being between a literal rock and a proverbial hard place ( Cabrakan's fists!). It's good for stopping a runner in their tracks or separating an overextended opponent from their backup. In a pinch, you can turn around and throw the wall up to block enemies from pursuing you, but there are usually better options and this tactic won't work if they're too close since the range is fixed unlike Ymir's Ice Wall. The walls will go down if hit enough times, or you can knock them down yourself in 1 hit.

Skill Combos

Combo #1

>> >>

A basic combo is to hit Seismic Crush to initiate, stunning the target, then immediately combo into Tremors. While stunned, they will be sucked toward Cabrakan and damaged, and meanwhile you will probably be taking hits from minions and/or the enemy team, building your stacks. When the stun wears off and you have full stacks, you break out of Tremors and pop them with Refraction Shield for some damage and a second stun. Due to your limited damage output, you will probably have to rely on a partner to supplement your combos and finish the enemy off for you, especially early game.

Combo #2

>> >> (>>)

If you've got partial or full stacks and you're itching to punish an opponent who's overextended, you can run in shields blazing, hit them with a stun from Refraction Shield and slow them down with Tremors. If they start to flee, hit Seismic Crush to press the chase. If the speed buff is enough to catch them, you can lock them down with the stun and finish them off with your ADC partner, OR if they're about to get away, you can put a stop to that with Tectonic Shift and stun them when you catch up.

Combo #3

>> >> >>

This one will probably require some CDR to pull off, but the basic idea is to open with Refraction Shield, lock them down again with Seismic Crush, and then use Tremors to keep them from running until you can use Refraction Shield again. I wouldn't recommend trying this one too often unless you outnumber your opponents, but with some support you can make it work.

Items

Core Items


Sovereignty

With Cabrakan's passive and status as a Guardian, Sovereignty is the obvious choice for any remotely tanky build. The passive combos with Shadow Zone, spreading the love around in an even wider radius and giving teammates next to you the most protection of all.

Stone of Gaia

The passive grants you an impressive regen made even more impressive by your health reserves. If you aren't directly facing any magical opponents, the protections kind of go to waste, but the passive and health will help you sustain no matter what.

Hide of the Urchin

The best part about Hide of the Urchin is that it counts assists as well as kills, allowing you to build stacks without having to make the final blow. It gives a nice amount of health and mana too, and with max stacks 65 total protections of each.

Starter


Watcher's Gift

Since your teammates will be doing a lot of the wave clearing for you, Watcher's Gift will help you to keep up in terms of gold.

Iron Mail

Alternatively, you can get started on Sovereignty right away, though you might fall behind on gold if you don't finish Midas Boots (M) first.

Midas' Boots

Start with Boots but try to buy up to Midas Boots (M) as soon as you have the gold. If you are having some trouble dealing with enemy CC, feel free to go for Reinforced Greaves instead, unless you opted out of getting Watcher's Gift.

Additional Protections (Physical)


Hide of the Nemean Lion

If you're up against an ADC I probably don't have to explain the advantages of this item. In addition to granting you additional health and a massive amount of protections, you can turn their attacks against them. What's not to love?

Breastplate of Valor

With his long cooldowns, Cabrakan loves some CDR. A respectable buff in protections helps your survivability and a fairly large amount of mana can help you take full advantage of your new-found ability to use skills with impunity.

Mail of Renewal

If you are finding that you and your partner(s) are taking down enemies just fine but your sustain is suffering due to the damage you're taking, then Mail of Renewal can help you to remain in lane longer, and also helps mitigate Cabrakan's insatiable hunger for mana.

Additional Protections (Magical)


Bulwark of Hope

One of the biggest health boosts available, magical protection that is nothing to sneeze at, and a passive that can save your life.

Void Stone

The Void Stone boosts your magical protection and power, and reduces the magical protection of nearby enemies as well. This handily boosts your own damage output and pairs well with a mage partner who can burst your targets down while you hold them in place.
Magi's Blessing

Magi's Blessing

Cabrakan may be a veritable king of CC, but if you find that the opponents are trying to dethrone you, Magi's Blessing could be the ticket to coming out on top. The protections it grants aren't much, but it does give a decent amount of health.

Support


Rod of Asclepius

Having the Rod of Asclepius can help with you and your team with sustaining, especially if you're paired with a god with a healing skill. I find it's most useful in Arena, when your entire team is grouped up most of the time.

Pestilence

This overlaps with magical protection, but it's especially useful if you find yourself tangling with an enemy Ra or Cupid (or any other healer). It is somewhat situational though, so I don't recommend building it unless you think you'll need it.

Offense


Ethereal Staff

The standard item for when you want to roll your tank up to the enemy's doorstep and start blasting. Ethereal Staff's magical power benefits most from having lots of health, so it is best built late game when you're ahead and you know that your survivability won't suffer from straying from your tank build.

Rod of Tahuti

Of course you can't talk about magical offense without mentioning the Rod of Tahuti. There's not much to say, really. It provides the highest magical power boost in the game. Think of it as a luxury item for late game to help you secure the win.

Actives


For Actives, you'll want to choose 2 of the above depending on your needs:
  • Greater Blink can help you initiate, while Combat Blink can help you escape.
  • Enfeebling Curse can help you lay on even more Crowd Control, and Weakening Curse is the obvious choice if an enemy healer is giving you trouble.
  • Salvation can be the answer to your mana woes, as well as making you a decent healer in your own right since it heals based on a percentage of your own health.
  • Shell of Absorbtion can be used in a pinch to save yourself or your teammates, and perhaps turn the tide of a battle that isn't going your way.
  • Heavenly Agility is of course to help supplement your chase or escape; I take it over Greater Sprint because we're building for support here, running away alone isn't very supportive now is it?
  • Greater Purification is a no-brainer if the enemy team is heavy on Crowd Control. A natural choice if you find yourself laning against another Guardian or any god who can counter-stun you while you are doing your thing.

Team Work

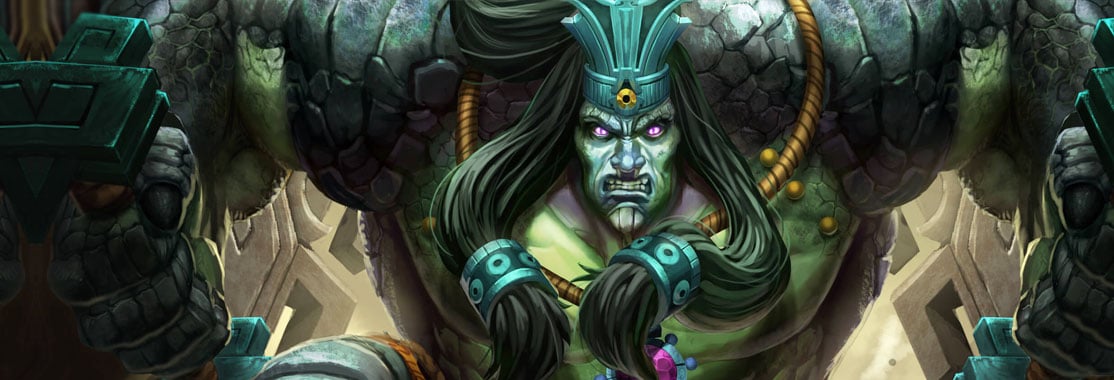
Teamwork is especially important for a Guardian, especially in a Support Tank role, as you will be relying on your team to secure the kills. Your role as Cabrakan is to set them up so your team can knock 'em down.

Strategy


The first step to good teamwork is to get to know most of the commonly-played gods in the current metagame. Know what their skills do, and how to counter them. Once you know this, pay attention to the team compositions. Who's on your team? Who is on the enemy team?

If you know what your team's gods excel at, especially whoever you are partnering with, you can set up scenarios that best take advantage of their strengths. The next step is observation/communication. You don't want to set up the perfect scenario for your mage to use their ult if it's on cooldown.

Likewise, keep an eye on your opponents and know which of their skills are on cooldown and which they still have available. If the enemy Neith has already used her Backflip, then she's a prime target for you to lock her down and knock her out, but if she has her own Guardian then their own CC abilities might get in the way. Do you have a way to counter that? Is your partner ready to secure the kill? Communication is key, and you should be thinking about these things in any scenario.

Know who to focus on as well. Let's say you are paired with an Artemis against an enemy Apollo and a Ymir. Ymir is the tankiest god in the game, and a quick tab check reveals that he's built for it too. Apollo is almost always built as an ADC, which leaves him rather squishy. So who should your target be? You know that Ymir will be trying to intercept your attempts to kill Apollo, and he has just as much CC as you do. On the other hand, it will take a lot more poking to take Ymir down. In general, you will want to focus on the squishier god, as your own Artemis (or whoever you are with) will be able to make quick work of the enemy once they are stunned. Your job is twofold; you will need to control the enemy ADC while interfering with the enemy tank's attempts to do the same to yours. Without a heavy damage partner to back him up, you will more than likely be able to defeat the remaining tank or at least force them to flee.


Positioning


Knowing where to be at any given moment is key in effectively executing your strategy. As support/tank, your place is generally in front of but not far from your ADC or mage. Your role is to take hits for your partner and assist them in defeating the enemy ADC or mage.

You will want to position yourself between your partner and the enemy, but keep in mind that sustained punishment can still take you down. It will take some practice knowing when to dodge and when to block, but you will start to get a feel for how much punishment you can take before it gets dangerous.

One strategy for avoiding damage is to weave in and out of your minion wave, if available. Your attacks pass through friendly minions, whereas the enemy's attacks will not. Allowing them to last hit your minions too much can put you at a disadvantage gold-wise, but it's far less than the gold gain they would otherwise get from killing you or your partner.

The enemy will likely use their Crowd Control and other abilities to try to separate you from your partner so that they can take you both down more easily. Be aware of your partner's positioning relative to your own and if you get separated, try to get back with them ASAP.


Roaming


At some point in the game, probably closer to mid/late game, you may want to start straying from your lane or position to assist with ganks and team fights. Used properly, Cabrakan can set up a gank quite well, but as with all teamwork, communication is key.

Make sure that you communicate to your team that you are leaving position to help set up a gank, and be sure that you are aware of any enemies you might run into in the jungle that could spoil your plans.

So long as you are able to sneak in without being noticed, you can wreak havoc on an out of position enemy. One unexpected stun can spell disaster for an ADC who has overextended, and as long as your team is in position to take advantage of it, you are quite likely to come out on top.

God Matchups

Individual god matchups are coming soon, as I gain more experience with using Cabrakan with and against specific gods.

Conclusion

If you've stuck with me this long, all I have left to say is thanks for taking the time to read my guide. I put in a lot of effort but there are still more things I would like to add, and if anyone has suggestions they want to make then I would be happy to hear them.

I hope you enjoy using Cabrakan as much as I have and are able to make use of him with the build and tips from my guide. Thank you and check back for updates soon!

Leave a Comment

You need to log in before commenting.

Collapse All Comments

1
Harambe | August 17, 2016 10:48am
wtf stolen -rep
1
DucksRock (41) | August 17, 2016 11:42am
Harambe means that hirez has stolen his appearance with Cabrakan.

Don't doubt Harambae pls.

#****sOutForHarambe
1
Zilby (132) | August 17, 2016 12:05pm
Oh lol I didn't even notice the name.
#****sOutForHarambe
1
Zilby (132) | August 17, 2016 11:19am
Wait whaaa? This guide is from 2014 how could it steal anything lmao
1
Devampi (105) | September 17, 2014 10:34am
well this guide is really well made. The only point you could improve is the first part of the build. It's a bit messy. I would recommend putting them in a different catogory and make the one that's 8 items now your recommended build.
Loading Comments...
Load More Comments

SMITEFire is the place to find the perfect build guide to take your game to the next level. Learn how to play a new god, or fine tune your favorite SMITE gods’s build and strategy.

Copyright © 2019 SMITEFire | All Rights Reserved