Smitefire logo

Join the leading SMITE community.
Create and share God Guides and Builds.

Create an MFN Account


Or

Not Updated For Current Season

This guide has not yet been updated for the current season. Please keep this in mind while reading. You can see the most recently updated guides on the browse guides page

x

Vote received! Would you like to let the author know their guide helped you and leave them a message?

Banner for Tsukuyomi guides

Tsukuyomi - [A New Moon Rises] (S7, Patch 7.8)

16 7 31,137
7.2
by Fraeduu updated January 25, 2021

Smite God: Tsukuyomi

Build Guide Discussion 12 More Guides
Choose a Build: Jungle
Jungle Solo Arena
Tap Mouse over an item or ability icon for detailed info

Tsukuyomi Build

Example Start

Build Item Assassin's Blessing Assassin's Blessing
Build Item Mace Mace
Build Item Healing Potion Healing Potion
Build Item Hand of the Gods Hand of the Gods

Example Build

Build Item Warrior Tabi Warrior Tabi
Build Item The Crusher The Crusher
Build Item Hydra's Lament Hydra's Lament
Build Item Atalanta's Bow Atalanta's Bow
Build Item Arondight Arondight
Build Item Heartseeker Heartseeker
Build Item Elixir of Speed Elixir of Speed
Build Item Bloodforge Bloodforge

Boots Options

Build Item Warrior Tabi Warrior Tabi
Build Item Ninja Tabi Ninja Tabi

Core Options

Build Item The Crusher The Crusher
Build Item Hydra's Lament Hydra's Lament
Build Item Transcendence Transcendence

Damage Options

Build Item Atalanta's Bow Atalanta's Bow
Build Item Heartseeker Heartseeker
Build Item Serrated Edge Serrated Edge
Build Item Bloodforge Bloodforge

Utility

Build Item Arondight Arondight
Build Item Malice Malice
Build Item Jotunn's Wrath Jotunn's Wrath

Situational

Build Item Brawler's Beat Stick Brawler's Beat Stick
Build Item Soul Eater Soul Eater

Defense Options

Build Item Winged Blade Winged Blade
Build Item Mantle of Discord Mantle of Discord
Build Item Void Shield Void Shield
Build Item Magi's Cloak Magi's Cloak

Relic Options

Build Item Blink Rune Blink Rune
Build Item Purification Beads Purification Beads
Build Item Aegis Amulet Aegis Amulet

Tsukuyomi's Skill Order

Dark Moon Shuriken

1 X Y
Dark Moon Shuriken
2 4 6 7 10

Kusarigama

2 A B
Kusarigama
1 8 11 12 15

Silver Moon Caltrops

3 B A
Silver Moon Caltrops
3 13 16 18 19

Piercing Moonlight

4 Y X
Piercing Moonlight
5 9 14 17 20
Dark Moon Shuriken
2 4 6 7 10

Dark Moon Shuriken

1 X
Tsukuyomi calls upon Shingetsu, summoning forth a Dark Moon Shuriken. The Shuriken damages enemies and stops on gods, sticking into them. If Tsukuyomi gets close to the god he retrieves the Shuriken and reduces its cooldown.

After casting this ability Shingetsu's next Basic Attack becomes ranged. This attack steals Movement Speed from the enemy hit.

Ability Type: Line, Slow, Damage
Shuriken Damage: 85 / 135 / 185 / 235 / 285 (+80% of your Physical Power)
Cooldown Reduction: 4s
Movement Speed Steal: 25%
Cost: 50 / 60 / 70 / 80 / 90
Cooldown: 12s
Kusarigama
1 8 11 12 15

Kusarigama

2 A
Shingetsu and Mangetsu form themselves into a Kusarigama. Tsukuyomi swings the weapon to his left and right, damaging and disarming enemies hit. He then swings the weapon forward with more force stunning enemies hit. While channeling Tsukuyomi gains 25% Movement Speed and is immune to Knockups.

Ability Type: Area, Crowd Control, Damage
Swing Damage: 35 / 60 / 85 / 110 / 135 (+40% of your Physical Power)
Disarm Duration: 1s
Final Damage: 60 / 115 / 170 / 225 / 280 (+80% of your Physical Power)
Stun Duration: 1 / 1.1 / 1.2 / 1.3 / 1.4s
Cost: 70 / 75 / 80 / 85 / 90
Cooldown: 14s
Silver Moon Caltrops
3 13 16 18 19

Silver Moon Caltrops

3 B
Tsukuyomi holds Mangetsu aloft as it erupts into starlight, sending stars falling to the ground. As they land they become Caltrops, damaging enemies in the area and slowing them for 2.5s. Enemies who move inside this Caltrop field take damage and are slowed again.

After casting this ability Mangetsu's next Basic Attack becomes ranged. This attack deals bonus Physical Damage.

Ability Type: Area, Slow, Damage
Damage: 20 / 35 / 50 / 65 / 80 (+20% of your Physical Power)
Slow: 20 / 22.5 / 25 / 27.5 / 30%
Bonus Damage: 5 (+30% of your Physical Power)
Cost: 40 / 45 / 50 / 55 / 60
Cooldown: 14s
Piercing Moonlight
5 9 14 17 20

Piercing Moonlight

4 Y
Tsukuyomi channels the power of the Full Moon, gaining Crowd Control immunity and 20% Damage Reduction. He fires forward 4 powerful piercing beams of moonlight. Enemy gods damaged become marked. Each beam can hit up to 3 enemy gods. After firing all beams Tsukuyomi charges forward at light speed, dashing through all enemies in the order they were hit, dealing heavy damage. Tsukuyomi will end his dashing at the final enemy hit. If Tsukuyomi kills an enemy god with this ability he will gain both of his ranged basic attacks.

Ability Type: Line, Buff, Damage
Beam Damage: 30 / 50 / 70 / 90 / 110 (+15% of your Physical Power)
Dash Damage: 70 / 100 / 130 / 160 / 190 (+50% of your Physical Power)
Cost: 80 / 90 / 100 / 110 / 120
Cooldown: 90s

Introduction


Hello again, I'm Fraeduu!

As my interest in creating guides for the newest gods in Smite continues to grow, my other two guides (for Baba Yaga and Cthulhu) are both growing as well! It's amazing to see so many people being able to learn from the guides I write and potentially see the builds I try and configure work themselves into normal play.


Tsukuyomi

Preface


As I mentioned previously,
Tsukuyomi is another very interesting addition to Titan Forge's lineup of playable gods to enjoy in Smite. This new assassin focuses on debilitating enemies, alternating between melee and ranged attacks, and making use of his unique passive.

I've personally had a very fun time experimenting with Tsukuyomi and trying to push him to test just how flexible this new god of the moon can be. More on the roles that he can viably play will be included in a later section, though.

I often feel the need to include a note in my guides explaining the following; these guides are tailored to work with many players and show success. However, builds are still going to lean towards my personal playstyle with a god. This is how most builds should be though, in my opinion. Experiment, try out these builds, adjust items according to what you feel most comfortable with. Don't force yourself to fit someone else's playstyle, simply adapt their build to fit your own style of playing.

When it comes down to it, that's the core of Smite. No tier lists or builds are set in stone or unchanging. Over the course of 1 month Nike had gone from D tier in the vast majority of tierlists into S tier without having received any changes. So what forced this adjustment? Players proved that she could work. They proved that she was powerful by adapting her into their own style of play. Prove to others that your style of play is not only what makes you unique as a player, but what can set your abilities apart from others on the very same god/goddess.

Pros & Cons


PROS
- Lots of CC and utility in kit
- Good lockdown potential
- Many ranged damage options for an assassin
- High potential damage output

CONS
- Low mobility
- No built-in sustain
- Ultimate requires good target priority to not end up in an unfavorable position

Abilities


PASSIVE
Shingetsu & Mangetsu

Ability Description & Stats

This passive is actually surprisingly interesting, but not one that you necessarily need to immediately worry about. Once comfortable with Tsukuyomi though, there is a lot of potential here to pay attention to upcoming basic attacks and the effects they will have on your character. The effectiveness of this passive is further enhanced with some other abilities that specify which of Tsukuyomi's two weapons he will attack with in certain circumstances.


1
Dark Moon Shuriken

Ability Description & Stats

This ability appears simple on the surface, but has a lot of potential to be highly effective if used correctly. Important to note however, that this is a viable waveclear ability for Tsukuyomi and is typically the best option in my experience. Although the ability does do fairly substantial damage, I find one of the greatest benefits of this ability to be the movement speed steal. It's incredibly crucial to understand that this is stealing movement speed, and not simply gaining it. This means that not only do you gain movement speed yourself, but you are also slowing the enemy in the process.


2
Kusarigama

Ability Description & Stats

This ability is deceptively simple, and appears much more complex at first than it truly is. This attack has 2 phases. First, Tsukuyomi attacks all enemies in a small radius around him (this phase will disarm and damage enemies that are hit). Next, he will perform a line-attack quickly afterwards with a reasonable range, stunning all enemies hit. It is also worth noting that multiple enemies can be both disarmed and stunned using this ability, making it an invaluable tool for not only setting up kills, but also peeling for teammates.


3
Silver Moon Caltrops

Ability Description & Stats

Silver Moon Caltrops is an excellent ranged crowd control option. It can also be used to damage a minion wave as they walk over the area of effect. Otherwise, the damage on this is really just a passive tool to irritate enemies during a teamfight and deal good additional damage. The primary usefulness behind this ability lies in the strong slow, allowing you to quickly catch up to your enemy and potentially further lock them down using your Kusarigama.


4
Piercing Moonlight

Ability Description & Stats

Piercing Moonlight is not only one of my favorite ultimate ability names in the game, but is also one that I feel people will not pay full attention to when casting. The ability does deal excellent damage to all targets hit, however the ability poses a massive potential risk to Tsukuyomi himself. It is crucial to understand that the last enemy hit by a beam will be the last enemy he dashes to; this means that by the end of the cast, he will be wherever that particular enemy is at the time. If a player does not pay attention to which enemies they are hitting with the beams of this ultimate, they may quickly find themselves in a disastrous situation in the middle of the enemy team.

Combos


CHASING AN ENEMY


One of Tsukuyomi's specialties is his excellent CC and utility in his kit. Players can easily capitalize on this utility to chase down and enemy and set up a kill for either yourself or others. While chasing your enemy, you can lay down your Silver Moon Caltrops immediately ahead of wherever the enemy is running for an ensured slow. Using that slow, you may close in for further damage and to stun them using Kusarigama.

Note: You may also use Dark Moon Shuriken to steal movement speed from your enemy either before or after Silver Moon Caltrops for even more slow being inflicted onto the enemy, or simply to allow yourself to catch up to them a bit more easily.


‎‎ ‎ ‎ ‎ ‎ ‎ULTIMATE FOLLOW-UP


This is an excellent combo to use immediately as you activate Piercing Moonlight during a fight. Whoever you end your ultimate on will ideally be a susceptible target to a large amount of burst damage or kill set-up on your part. In order to best capitalize on this, I find that activating Kusarigama for a disarm and near-immediate stun as soon as you finalize your ultimate casting is a necessary tool to make best use of Tsukuyomi's kit. After the enemy is stunned, you may set Silver Moon Caltrops on top of them. This allows for you to ensure a few ticks of the passive caltrop damage on your enemy, and slow them after the stun ensuring that their escape is as difficult as possible.

Note: If you are building Hydra's Lament, be sure to use a basic attack in between each of this ability uses. This is simply easy additional damage which can be the difference between the enemy dying and surviving.

Warding


Early game warding is fairly simple. As a jungler though, your ward positions are more often than not very inconsistent. Your main objective is to fill in the gaps according to where your teammates are not warding. Essentially, you want to be making sure there are wards at all of the marked locations showcased on the left.

If most lanes are all warding properly, you may usually focus on warding objectives such as the Gold Fury, or the Fire Giant/Pyromancer. As for the wards in mid-lane, you want to judge the state of the game to the best of your ability when placing them. If your team is generally ahead and is not having issues with being invaded by the enemy team, you can focus a bit more on the mid-lane wards that are on the enemy team's side of the map. If you are behind, however, it may be best to ward on your team's side of the middle lane to prevent any unforeseen ganks.


When you start to enter the middle of the game, as a jungler your role and job does not change much in terms of warding. The main adjustment you'll want to start making is to begin buying sentry wards. For those who don't know, these wards allow your team to not only gain vision over the area they are placed in, but to also see and potentially destroy any enemy wards placed in that same area.

These are most important to place on the primary objectives; Gold Fury, and Fire Giant/Pyromancer. If those positions are already being warded effectively by teammates, you can opt to ward the main hotspots of the map around this time - the mid lane.


Late game warding is always highly situational, with a few exceptions. As a preface, please understand that the wards being displayed here are not the only wards that are necessary or recommended to include at this stage of the game. However, these sentry wards are very important in the later stages of the game to help with attacking enemy towers/phoenixes or defending your own.

As for other wards on the map, standard wards may still be placed at the locations previously mentioned in this section of the guide. Otherwise, keep track of where the enemies are. Assess the risks of your particular match. Have the enemies been hanging out a lot around the left lane and consistently trying to apply pressure or push? Are they stealing camps all the time? React to events like these and proactively ward according to what you feel like they are doing, or what you feel like they are going to do.


Most important to note is that this is a bit of an oversimplification of early game support wards. That being said, during the early game for supports until they leave lane, these are the two spots that should always be warded for your duo lane.

One of the other very safe and highly profitable ward positions in this phase of the game is on duo lane's side of the gold fury, immediately behind where your own team's harpy is. This helps to know if an enemy is attempting to push around the small obstacles (usually the support at this time) and potentially cause some issues.


During this middle phase of the game as you start to rotate, your ADC should be starting to pick up wards. If they are not, you should continue to help with warding the duo lane in some vital spots. Assuming they are warding as they should, the support tends to help with warding mid lane similar to a jungler. However, there are two support wards that seem to be criminally neglected.

Both of these wards provide immensely valuable information for your team overall, and especially your jungler. The first of these wards is a little bit past the enemy's red buff. This ideally will cover the pathing of an enemy jungler either to the red buff from their jungle, or from their back harpies to anywhere else. The other location, as marked on the map to the left, is a bit less important; however, it is still very helpful for your team. By warding the enemy's harpy & shrine area, the ability of your team to track the enemy jungler and avoid any potential ganks is substantially increased.


Later in the game, you should always have both possible wards on the map. Your jungle objectives will still remain the highest priority, with various other standard wards scattered around the map depending on what the enemy has been doing. Just like with jungle warding, this is highly situational. You should be considering where the enemy has been, what they have been doing, and what you think they will do next.

Wards near either team's phoenixes are incredibly valuable. Do not undervalue wards placed in positions either near the enemy team's phoenixes or near your own. Which of these you focus on is clearly dependent on the state of the game and whether your own team is ahead, behind, or drawing a stalemate. Notice that on the map displayed on the right, I specified a normal ward be placed on the left side of the enemy base instead of a sentry ward. This should and could just as easily be a sentry ward, but I find that priority is often put around the enemy's speed buff.

Pathing


Jungling can appear intimidating at first, but the most essential part is arguably the pathing you take. To the left of this text, you can see a guide for the most common jungler pathing you will see in the game. Please note that there is one deviation to this when your solo laner may want you to start at their blue buff; if this is the case, proceed immediately from the speed buff to your blue buff. Afterwards, you may continue the pathing similar to what I have drawn out here.

You mat notice an exclamation mark by the large mid harpies. If you know that you are significantly ahead of the enemy jungler in terms of speed, then you can attempt to take this camp at the start. Otherwise - if you are unsure, skip this camp and head straight to the damage buff for the mid-laner. After getting the damage buff, you have a choice; you may either go for your back harpies, or you can look for a gank on the duo lane depending on what the positioning looks like. Either way, following this 6th step you should head immediately to your speed buff again.

You should be sure to grab your speed buff at the beginning of the game, and prioritize it as much as possible - you should be getting this every time it comes up/respawns. After starting at your speed buff, on your way to your harpies you can just take half a second to smack the gold shrine. It's not a substantial difference, but it helps. Make sure that you are also getting the blue buff for your solo laner as soon as it respawns until the time approaches mid-game or you feel they are comfortable with doing it themselves.

Roles


Jungle will without a doubt be
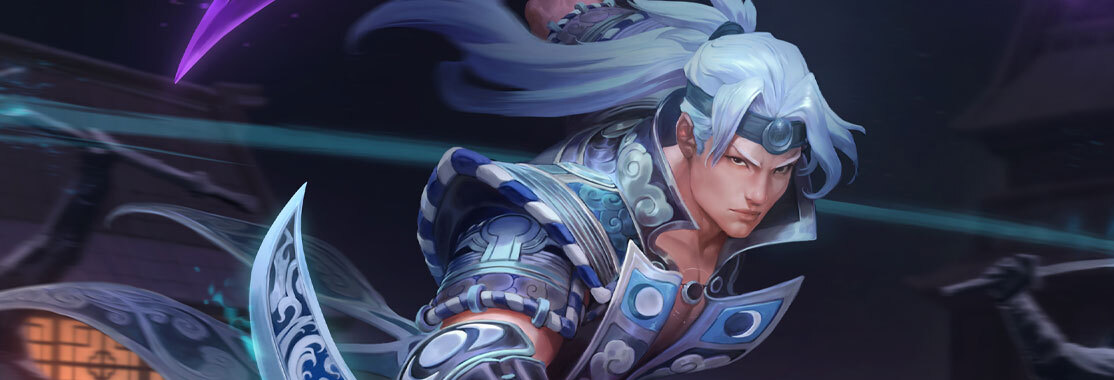
 Tsukuyomi's most played role. That can often go without saying of course, as he is an assassin. Tsukuyomi is a utility based assassin that has immense potential to catch a target off god and make quick work of them using his high damage potential and plethora of CC to keep them still. His viability is not up for very much debate in the jungle.

I also find that Tsukuyomi has a very good teamfight ultimate for an assassin. While it does not quite rival that of assassins such as Da Ji, the worth is undeniable. One of the drawbacks to this new moon god in the jungle, however, is that he lacks any natural mobility. He may steal movement speed from others, but not conjure his own. This makes his potential for quick rotations immediately lower than that of some other gods. Also worth noting, his clear for jungle camps can be a bit underwhelming sometimes. But this isn't substantial enough to become a point of contention, either.


Thankfully, this lack of mobility is not enough to demerit the rest of Tsukuyomi's kit nor his damage potential when ganking. Tsukuyomi is an excellent assassin.


I feel the need to add a disclaimer... I am 100% a fan of forcing flex picks into the support role. I main support as a role, but it's uncommon for me to play a guardian (despite having them all mastered and plenty of experience on them). Tsukuyomi's ability to support is still up in the air. I am not saying that support is his best role; nor am I saying that he is incapable of doing so. I simply feel as if it is a viability that must be discussed due to the nature of his kit.


Thankfully, I'm also proud to say that Tsukuyomi COULD become an excellent addition to the lineup of support assassins. One of the biggest weaknesses with assassins as support tends to actually be the early game more than the lategame. The lack of survivability or overall tankiness can be detrimental considering the necessity for melee attacks. Tsukuyomi quickly eliminates some of this fear as he utilizes not just melee attacks, but frequent ranged hits as well.

Moving on though, it's crucial to look at Tsukuyomi's kit according to the most important element of a support: Crowd Control. Tsukuyomi is an incredible utility-based assassin, and that utility lends itself incredibly well to the support role. At a first glance, Tsukuyomi has a disarm, stun, and two slows. Also worth considering is that if he reclaims his Dark Moon Shuriken, he is able to slow the enemy again within 4 seconds.

This CC is more than enough to act as a support and peel for teammates whilst setting up kills constantly. However, crowd control is not always enough. A support is usually best if they can take some damage; tankiness is important. While tools like Lono's Mask are available and are of course options in situations such as this, they shouldn't be relied on to force someone into a role. One of his largest problems as a support, however, is that his stun may be interrupted before the cast finishes. Although additional movement speed and attention on the behalf of the player at the control can help, they are not consistently enough to avoid being CC'd out of this stun. This puts the viability of Tsukuyomi as a standard support in this role much more into question.

That being said, Tsukuyomi doesn't actually need to build very differently than a support such as Serqet (also my current favorite support assassin). More on potential itemization and builds will be included in the next section, and in the build guides above.

Tsukuyomi, in my honest opinion, has the potential to be used as a support assassin. However, that claim is very dependent on the future of Tsukuyomi in terms of balance and adjustments.


After thorough discussion with community members and also members of the SMITEFire Discord Server, I've realized just how necessary a thorough and in-depth analysis of Tsukuyomi as a possible support option is. Furthermore, we will walk through his kit, potential weaknesses, and his greatest strengths.


PROS & CONS of TSUKUYOMI SUPPORT


Support Positives

Good utility in kit
Ultimate helps to disrupt backline
High peel potential
Damage reduction in ultimate
Tsukuyomi is absolutely a good utility assassin, and that much is indisputable. That utility lends itself very well to the new moon god's ability to support his team. His 2 slows, 1 disarm, and 1 stun all make for excellent peel and potential kill setup for his team. The damage reduction (50%) during his ultimate also help to ensure that he can harass the enemy's backline or core in the middle of a teamfight whilst not immediately taking fatal damage.


While Tsukuyomi in the support role does have many positives, there are just as many negatives that must be considered. Most notably are that he has no immediate mobility, and that his stun may be cancelled. Usually, the lack of mobility would not necessarily be a detriment to a guardian's ability to support. However, Tsukuyomi's CC is close ranged and will require him to be very close to the enemy in order to compensate. Additionally, he may be stunned before he finishes the final strike of Kusarigama, thereby preventing the only true "Hard CC" in his kit - his stun.

Support Negatives

No immediate mobility
Stun may be cancelled/prevented
Does not have a supportive ultimate
Built-in sustain is not substantial


FURTHER ABILITY ANALYSIS


Shingetsu & Mangetsu
This passive does not offer very much in the way of affecting Tsukuyomi's ability to support, but there are some elements that make it worth noting. When Tsukuyomi strikes with Shingetsu, his purple blade, he restores mana. When he strikes with Mangetsu, his blue blade, he restores health. Pay attention to this during a match when playing supportively, and you may find yourself able to survive in many more situations and react based on what your next attack's effect will be.

Dark Moon Shuriken
Dark Moon Shuriken is the first active ability in Tsukuyomi's kit, and also the first with a crowd control effect. As mentioned previously, this ability will steal movement speed from an enemy. This primarily acts simply as a slow effect in terms of support play, but can also help you catch up to enemies in hopes of applying more CC such as Kusarigama's stun. The unfortunate aspect of this is that while trying to capitalize on movement speed to catch up with an enemy team, you will more than likely soak up a lot of unnecessary damage. This is the primary weakness of Tsukuyomi due to his lack of any immediate mobility.

Also consider that the next basic attack, which applies a slow, will restore mana.

Kusarigama
This is Tsukuyomi's best CC, but can also be unreliable to land. The disarm that this ability offers is fantastic, and 2.5 seconds at max rank is nothing to laugh at. However, this ability is crippled by the ability for enemies to stun you before you are able to execute the stun after your first two strikes. It does help that you are immune to knockback during this duration, but that is not enough to compensate. Additionally, your disarm period may be entirely wasted if you opt to stun the same players that you hit with the disarm. Because of this, it may be worth considering stunning enemy players that weren't affected by your initial disarm. This is entirely a case by case basis, though.

While this is the strongest CC in Tsukuyomi's kit, it also has the potential to be his most crippling attribue when it comes to support peel and crowd control.

Silver Moon Caltrops
These caltrops are another great tool for catching with enemies or preventing an ally's death. However, their range at which they can be deployed is deceptively small. Because of this, Tsukuyomi yet again suffers from his lack of mobility to close distance faster. That being said, most of this ability is strictly positive; a significant slow covering a wide area, with good damage.

Piercing Moonlight
Although Kusarigama does have downsides as a good CC ability, Piercing Moonlight lacks any inherent utility for your team. Three massive strengths of this ability are that it makes you CC immune for its duration, provides 50% damage reduction while channeling, and can place you in a favorable position to disrupt the enemy team as a support/tank. However, the ability still poses no inherent utility or benefits to your team, and is actually your only form of innate mobility. Piercing Moonlight is a fantastic ultimate, but not necessarily a support ultimate.


VERDICT


Whether or not Tsukuyomi can support is very much open for debate. If you are on the fence about the decision and still would like to play him in a much more tanky manner, I would opt for the safer bet as a solo laner.

The ideal scenario to play this god in support is absolutely when the rest of your team has some sufficient CC of their own. To be the only crowd control your team consistently relies on, which supports usually are, is not somethign Tsukuyomi could or should be trusted to do.

I mentioned at the beginning of this section that I absolutely love taking gods and forcing them into a flex role as support. Many gods can do this very well. Tsukuyomi is best described in my opinion as a borderline support. You won't be throwing or necessarily go wrong in picking him as a support, but there are many other choices which will be infinitely better - however... please try to avoid picking him in ranked or competitive settings until he is or can be established as a proper and viable support.


Realistically, this is Tsukuyomi's best role if you want to build him as a bruiser or tankier assassin. The utility in his kit lends itself especially well towards a role like this, potentially compensating for some of the issues you might see if he were to be picked as a support.

I foresee the primary downside to this god in solo lane to be his lack of self-sustain. Although he does have sustain in the form of healing with every attack of his Mangetsu, it does not quite compete with that of other solo laners you may encounter. With that said, he is still absolutely viable in the solo lane and can be an excellent pick to harass your enemy in style.

A warding guide was not provided for the solo lane as solo laners typically ward the least in early game. However, when warding the solo lane you will primarily want to focus on the path around the Fire Giant area towards your lane on your side of the map, as well as the area around the enemy team's blue buff.

Playstyles


SOLO


Playing solo with Tsukuyomi isn't actually much different than playing most other assassins in the game. You can opt to start at the blue buff if you prefer, or simply stay in your lane for the first wave. In this case, it mostly comes down to your own preference and the thoughts of your jungler. Ensure that between waves you are focusing on completing the Totem of Ku whenever possible. If you are unable to destroy it faster than your enemy or your enemy got there first, take the opportunity to box your lane opponent and potentially deal some free damage. When the time comes to rotate out of lane, your role in teamfights will be very similar to what is explained for a support-role Tsukuyomi as described above.


JUNGLE


Similar to the solo role, your job in the jungle is not very different than a standard jungler. A good rule of thumb in the jungle is to match your enemy jungler's rotations. If you have an idea of what lane the enemy jungler will gank next, be prepared around that lane to support your teammate(s) with the attack. When initiating a gank on your own, I recommend starting the engagement with your ultimate if it is available. If not, use Dark Moon Shuriken to slow the enemies and allow for further CC with Silver Moon Caltrops. Once in close range, you can easily finish the enemies off with Kusarigama and your powerful attacks.

When in teamfights, carefully consider when you will use your ultimate. Pay special attention so that you may avoid accidentally ending up on the wrong side of the enemy team, or potentially ending in the middle of their formation. Your Silver Moon Caltrops are an excellent tool in teamfights, and you should be sure not to neglect using them to their fullest for some passive damage and potent slow.

Leave a Comment

You need to log in before commenting.

Collapse All Comments

1
Kriega1 (143) | August 20, 2020 10:22am
Why... is there a... "support" build?
1
Fraeduu (2) | August 20, 2020 11:44am
Kriega1 wrote:
Why... is there a... "support" build?

You're right, I've removed the "Support" from the "Support/Solo" build name. I forgot to remove it prior to publishing. Check my other responses to Gulfwulf for more information, though.
1
Gulfwulf (81) | August 20, 2020 10:29am
That was my first thought. I think Tsu's better in jungle or solo.
1
Fraeduu (2) | August 20, 2020 11:41am
Gulfwulf wrote:
That was my first thought. I think Tsu's better in jungle or solo.

That's what I mention here as well. Tsukuyomi is absolutely better in jungle and solo. That being said, I've seen him played in support sometimes and have had thorough discussions on the viability which are also detailed within the "role" breakdown within my guide. To quote what I state there, Tsukuyomi is "borderline" support at best, and solo is by far a better choice if you want to play him in a more tanky fashion.
Load more comments (3 more replies) →
2
Gulfwulf (81) | August 20, 2020 9:35am
If you're playing Support, you should really be getting Guardian's Blessing over Warrior's Blessing because Support tends to lag behind in gold spooling and guardian's really helps with that. Also, I'd either get Hide of the Urchin much earlier or drop it entirely. And where is Gauntlet of Thebes? It's a very stat-efficient item when it comes to cost/protection ratio. Plus it provides protections to nearby teammates.

Not a bad guide overall, so have my +1.
1
Fraeduu (2) | August 20, 2020 11:43am
Gulfwulf wrote:
If you're playing Support, you should really be getting Guardian's Blessing over Warrior's Blessing because Support tends to lag behind in gold spooling and guardian's really helps with that. Also, I'd either get Hide of the Urchin much earlier or drop it entirely. And where is Gauntlet of Thebes? It's a very stat-efficient item when it comes to cost/protection ratio. Plus it provides protections to nearby teammates.

Not a bad guide overall, so have my +1.


This should fix a lot of the confusion. I changed the name of the Support/Solo build to just "Solo." I don't want to contradict what I stated in the guide itself by including mention of a support build in the builds section. Any thoughts otherwise?
1
Gulfwulf (81) | August 20, 2020 11:40pm
I'm not a solo main, but I'd probably drop the aura items like Sovereignty and Heartward Amulet. Urchin is a good 3rd choice, but the previous two are more for the support who should be rotating more than you before team fights start becoming common place.
Load more comments (2 more replies) →
Loading Comments...
Load More Comments
League of Legends Build Guide Author Fraeduu
Tsukuyomi - [A New Moon Rises] (S7, Patch 7.8)
Table of Contents

SMITEFire is the place to find the perfect build guide to take your game to the next level. Learn how to play a new god, or fine tune your favorite SMITE gods’s build and strategy.

Copyright © 2019 SMITEFire | All Rights Reserved