

Vote received! Would you like to let the author know their guide helped you and leave them a message?

 Axe will evolve into
 Tyrfing.
 Purification Beads will save you during early game giving CC immunity during 2 seconds.
I would always recommend this starter because gives a lot of gold that in early game will make a difference comparing to other starters right now in the game!
Axe will evolve into Tyrfing.
Purification Beads will save you during early game giving CC immunity during 2 seconds.
 Gilded Arrow
Axe
 Health Potion
Purification Beads
 Sharpshooter's Arrow it is a really good starter because provides you high attack damage, attack speed a critical chances that fit perfectly with this build! Tyrfing, if you are winning early game and you want to snowball as much as possible, this item is perfect for that because of the strength that provides and the passive which adds more damage to your basic attacks!
 Dagger Of Frenzy is always a great option for early game because it provides you good strength, attack speed and a passive with attack speed and attack speed damage boost every 15 seconds only for 2400 gold (really cheap item).
 Dominance gives you early penetration and high strength stat while providing you with attack speed which fits perfectly in an attack speed based build.
 Odysseus' Bow is pretty cool for farming damage and dealing high amount of damage during team fights in late game. The only problem that it has is that it doesn't provide of any power stat so you will have less DPS.
 Riptalon you should always buy this item because of its statistics and passive which allows you to have a really good survival and sustain kit.
 The Executioner incorporating this item in an attack speed based build it is crucial because it will give you attack speed, strength and penetration to burn objectives and tanky gods.
Sharpshooter's Arrow it is a really good starter because provides you high attack damage, attack speed a critical chances that fit perfectly with this build!
Tyrfing, if you are winning early game and you want to snowball as much as possible, this item is perfect for that because of the strength that provides and the passive which adds more damage to your basic attacks!
Dagger Of Frenzy is always a great option for early game because it provides you good strength, attack speed and a passive with attack speed and attack speed damage boost every 15 seconds only for 2400 gold (really cheap item).
Dominance gives you early penetration and high strength stat while providing you with attack speed which fits perfectly in an attack speed based build.
Odysseus' Bow is pretty cool for farming damage and dealing high amount of damage during team fights in late game. The only problem that it has is that it doesn't provide of any power stat so you will have less DPS.
Riptalon you should always buy this item because of its statistics and passive which allows you to have a really good survival and sustain kit.
The Executioner incorporating this item in an attack speed based build it is crucial because it will give you attack speed, strength and penetration to burn objectives and tanky gods.
Sharpshooter's Arrow
Tyrfing
Dagger Of Frenzy
 Dominance
Riptalon
 The Executioner
Odysseus' Bow
Purification Beads
 Phantom Shell should be bought if their set up doesn't have gods with much CC's and they have walls in their kits like ymir version or
 Cabrakan.
 Aegis of Acceleration it is a really good option because it has low CD. You should always buy it in the games where the enemy gods don't have much CC's or in the case they have many burst skills.
Phantom Shell should be bought if their set up doesn't have gods with much CC's and they have walls in their kits like ymir version or Cabrakan.
Aegis of Acceleration it is a really good option because it has low CD. You should always buy it in the games where the enemy gods don't have much CC's or in the case they have many burst skills.
 Phantom Shell
Aegis of Acceleration
Axe will evolve into
 Devourer's Gauntlet. Purification Beads will save you during early game giving CC immunity during 2 seconds.
I would always recommend this starter because gives a lot of gold that in early game will make a difference comparing to other starters right now in the game!
Axe will evolve into Devourer's Gauntlet.
Purification Beads will save you during early game giving CC immunity during 2 seconds.
Gilded Arrow
Axe
Health Potion
Purification Beads
 Sharpshooter's Arrow it is a really good starter because provides you high attack damage, attack speed a critical chances that fit perfectly with this build! Devourer's Gauntlet works perfectly with this starter because you don't have any sustain and this item gives you good lifesteal and strength. Dagger Of Frenzy is always a great option for early game because it provides you good strength, attack speed and a passive with attack speed and attack speed damage boost every 15 seconds only for 2400 gold (really cheap item). Dominance gives you early penetration and high strength stat while providing you with attack speed which fits perfectly in an attack speed based build.
 Deathbringer is the best critical item because boosts your critical damage. You need to build this item as soon as possible to have enough critical chances to make this build work. Riptalon you should always buy this item because of its statistics and passive which allows you to have a really good survival and sustain kit. The Executioner incorporating this item in an attack speed based build it is crucial because it will give you attack speed, strength and penetration to burn objectives and tanky gods.
Sharpshooter's Arrow it is a really good starter because provides you high attack damage, attack speed a critical chances that fit perfectly with this build!
Devourer's Gauntlet works perfectly with this starter because you don't have any sustain and this item gives you good lifesteal and strength.
Dagger Of Frenzy is always a great option for early game because it provides you good strength, attack speed and a passive with attack speed and attack speed damage boost every 15 seconds only for 2400 gold (really cheap item).
Dominance gives you early penetration and high strength stat while providing you with attack speed which fits perfectly in an attack speed based build.
Deathbringer is the best critical item because boosts your critical damage. You need to build this item as soon as possible to have enough critical chances to make this build work.
Riptalon you should always buy this item because of its statistics and passive which allows you to have a really good survival and sustain kit.
The Executioner incorporating this item in an attack speed based build it is crucial because it will give you attack speed, strength and penetration to burn objectives and tanky gods.
This build is meant for competitive because your enemies are supposed to be in communication and playing smart so you will be in most of the cases only hitting tanks or junglers that are trying to kill you. Most of them will have more than 200 hundred physical and magical protections and more than 3500 HP so you will need to have bought penetration items for being able to kill them as quick as possible.
Sharpshooter's Arrow
 Devourer's Gauntlet (Evolved)
Dagger Of Frenzy
Dominance
 Deathbringer
Riptalon
The Executioner
Purification Beads

 Y
 B
 A
 X

Tap each threat level to view Hachiman’s threats

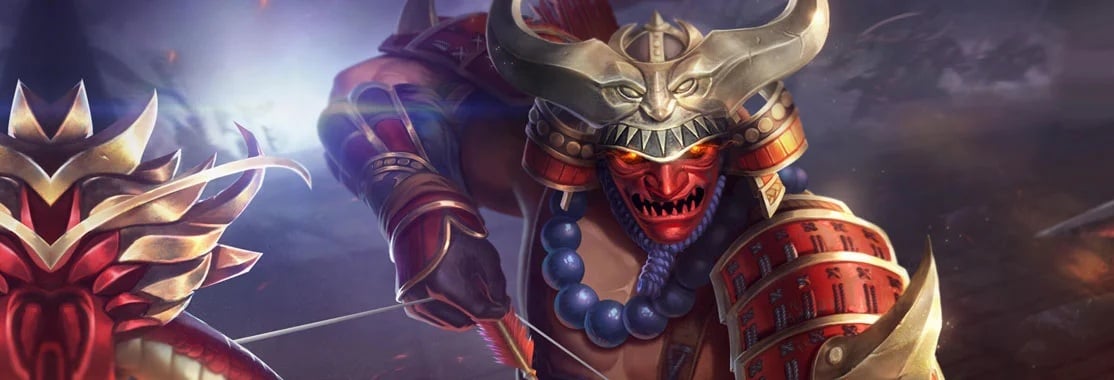
Hey, this guide is brought to you by TottiGR! I started playing Smite on PC in February 2014. I have been playing competitive since 2016 and I have been a professional Smite player between March 2020 to July 2023. I have played in different teams like JustF6, Gilded Gladiators or Tartarus Titans this last year. I have peaked 3500 MMR GM/Masters in Ranked Conquest on PC every season since 2017. I also made Smite Masters (LAN) 4 times in 2022 so I really think I have the knowledge about guiding about the ADC role. I hope you find this guide as a useful learning resource for playing Hachiman as an ADC.
Here are my socials:
|
Passive -
 Master of Arms To show you in a simple way,  Hachiman passive will come in handy throughout all stages of the game, providing increased attack speed and mana regeneration every time you land basic attacks on enemies. Overall, it is a great passive ability to have, granting excellent sustain in lane and helping you stack up attack speed quickly during extended trades and teamfights. |
|
Ability 1 -
 Eagle Eye This ability matches well with Heavenly Banner for Hachiman's ranged poke, allowing him to safely hit enemies from extreme distances with empowered basic attacks.It grants bonus range and additional damage on hits, especially against targets hit at long range. Eagle Eye doesn't require complex setup, making it ideal for continuous harassment or sniping fleeing low-health targets.
|
|
Ability 2 -
Heavenly Banner Hachiman's second ability provides instant area-of-effect damage while dropping a sacred flag that buffs attack speed for both himself and nearby teammates. This as previously mentioned pairs really well to clear minion waves efficiently, but it is also a great engagement tool during teamfights to buff your entire team's DPS output.
|
|
Ability 3 -
Iaijutsu Hachiman's mobility and setup ability! Something he can use to gap-close, escape dangerous situations, or initiate tight skirmishes with hard control!This is his go-to utility ability paired with Eagle Eye, allowing Hachiman to dash through enemies and follow up with a spinning blade sweep. Hitting an enemy god with both parts stuns them, setting up easy kill confirmations in 1v1s or teamfights.
|
|
Ultimate -
Mounted Archery Mounted Archery is Hachiman's ultimate skill. This fourth skill is for sure a game-changer for Hachiman, mounting his horse to gain full crowd control immunity and high movement speed. It allows him to charge across the battlefield and sweep a wide target cone with arrows, dealing massive damage and heavy slows that make it incredible for initiating, chasing down targets, or safely escaping risky fights.
|
 Heavenly Banner > Eagle Eye >
 Iaijutsu >
 Mounted Archery
 > Iaijutsu > Heavenly Banner > Eagle Eye ---> This last skill will allow you to safely finish off the enemy at range if they try to retreat.
Heavenly Banner (After slowing/buffing yourself, your chance of landing the dash-stun will be highly increased) > Iaijutsu > Eagle Eye > Mounted Archery
Hachiman is a god that has a lot of combos because he has a very versatile and adaptive set of skills, so depending on the situation, you will have a lot of choices about what skill you should use for 1vs1 boxing or long-range teamfighting.
Iaijutsu, later, if you have won the pressure you should always look to do the central buff, do it with your support and then come back to lane. Aegis of Acceleration or Phantom Shell before going into the Fire Giant. I really good advice is to use actives as soon as the solo laner, support or jungler engages on you to try to avoid as much damage and crowd control as possible, if you stay safe as an ADC on a late game teamfight, your team will have enough DPS to do Fire Giant or if you kill all your enemies, you can even finish the game. Calydonian Boar this will make you win a lot of time for your teammates to peel you or kill the gods that are engaging on you, Mounted Archery will also do a lot of damage to enemies hit. Then after coming down, you will also have your
 Purification Beads and Aegis of Acceleration so you will be safe enough to do DPS and kill the enemies frontlane. THIS HAS A LOT OF VALUE FOR YOUR TEAM OVER THE LATE GAME TEAMFIGHTS AROUND OBJETIVES OR STRUCTURES!

 Sentry Ward (GREEN COLOUR CIRCLE) your purple buff and make sure to call your teammates at least 1 minute before spawning.
SMITEFire is the place to find the perfect build guide to take your game to the next level. Learn how to play a new god, or fine tune your favorite SMITE gods’s build and strategy.
Copyright © 2019 SMITEFire | All Rights Reserved




 Cabrakan
 Tectonic Shift

 Brutalize
 Unchained


Leave a Comment This author would like to receive feedback
and suggestions about their guide.
You need to log in before commenting.
Collapse All Comments