
Vote received! Would you like to let the author know their guide helped you and leave them a message?

![]() Bluestone Pendant great item for early mana sustain that give us usefull extra damage on abilities, perfect item for picks with bad early game.
Bluestone Pendant great item for early mana sustain that give us usefull extra damage on abilities, perfect item for picks with bad early game.
![]() Gem little amount of intelligence for early push and jungle camps.
Gem little amount of intelligence for early push and jungle camps.
![]() Purification Beads this item will allow us to be save against huge CC gods.
Purification Beads this item will allow us to be save against huge CC gods.
 Bluestone Pendant
 Gem
Gem
 Health Potion
 Purification Beads
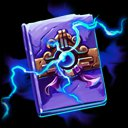
![]() Bluestone Brooch great item for
Bluestone Brooch great item for ![]() Ah Puch as we are constantly sending out corpses and spamming abilities.
Ah Puch as we are constantly sending out corpses and spamming abilities.
![]() Gem of Focus gives
Gem of Focus gives ![]() Ah Puch a huge passive movement speed that are super valuable on a god with no dash or escape of his own.
Ah Puch a huge passive movement speed that are super valuable on a god with no dash or escape of his own.
![]() Totem Of Death because
Totem Of Death because ![]() Ah Puch is constantly hitting enemies with his abilities, stacking the enemy protection debuff is effortless.
Ah Puch is constantly hitting enemies with his abilities, stacking the enemy protection debuff is effortless.
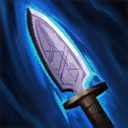
![]() Soul Reaver with tanks being everywhere in the current meta and everyone stacking health, this item is an absolute must. Poking a big bruiser with
Soul Reaver with tanks being everywhere in the current meta and everyone stacking health, this item is an absolute must. Poking a big bruiser with ![]() Empty the Crypts while Soul Reaver ticks away is just disgusting.
Empty the Crypts while Soul Reaver ticks away is just disgusting.
![]() Rod of Tahuti the core item for any mage, no exceptions.
Rod of Tahuti the core item for any mage, no exceptions.
![]() Obsidian Shard another mandatory pickup for any mage. Without the penetration this item gives, both tanks and squishies will shrug off damage that should be killing them.
Obsidian Shard another mandatory pickup for any mage. Without the penetration this item gives, both tanks and squishies will shrug off damage that should be killing them.
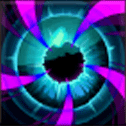
![]() Blinking Abyss makes
Blinking Abyss makes ![]() Ah Puch a lot safer. Since he has zero mobility in his kit, having a blink to either escape an assassin diving you or reposition into a better angle in teamfights is genuinely game-changing.
Ah Puch a lot safer. Since he has zero mobility in his kit, having a blink to either escape an assassin diving you or reposition into a better angle in teamfights is genuinely game-changing.
 Bluestone Brooch
 Gem of Focus
 Totem Of Death
 Soul Reaver
 Rod of Tahuti
 Obsidian Shard
 Blinking Abyss
Purification Beads
Blinking Abyss
Purification Beads
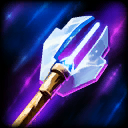
![]() Spear of Desolation instead of
Spear of Desolation instead of ![]() Totem Of Death if you want to go full damage without worrying about protection debuffs.
Totem Of Death if you want to go full damage without worrying about protection debuffs.
![]() Divine Ruin instead of
Divine Ruin instead of ![]() Totem Of Death if the enemy team is stacking healing. If you already have
Totem Of Death if the enemy team is stacking healing. If you already have ![]() Fleeting Breath applying anti-heal, adding Divine Ruin on top of that makes healing gods like
Fleeting Breath applying anti-heal, adding Divine Ruin on top of that makes healing gods like ![]() Aphrodite or
Aphrodite or ![]() Baron Samedi basically useless.
Baron Samedi basically useless.
![]() Chronos' Pendant instead of
Chronos' Pendant instead of ![]() Gem of Focus is a great option if you feel like you need even more cooldown and sustain to keep spamming your abilities.
Gem of Focus is a great option if you feel like you need even more cooldown and sustain to keep spamming your abilities.
![]() Time-Lock Aegis instead of
Time-Lock Aegis instead of ![]() Blinking Abyss if the enemy has a god with a massive damage combo that can one-shot you.
Blinking Abyss if the enemy has a god with a massive damage combo that can one-shot you.
![]() Magi's Cloak is worth considering if the enemy team has a lot of hard CC targeting you specifically.
Magi's Cloak is worth considering if the enemy team has a lot of hard CC targeting you specifically. ![]() Ah Puch with no mobility is a natural target for crowd control chains, and Magi's Cloak blocking one CC effect can be the difference between getting your full combo off and dying before you cast anything.
Ah Puch with no mobility is a natural target for crowd control chains, and Magi's Cloak blocking one CC effect can be the difference between getting your full combo off and dying before you cast anything.
 Spear of Desolation
 Divine Ruin
 Chronos' Pendant
 Time-Lock Aegis
 Magi's Cloak

We start by maxing out ![]() Undead Surge first since this is our main poke, wave clear, and the primary way we generate corpses on the ground for
Undead Surge first since this is our main poke, wave clear, and the primary way we generate corpses on the ground for ![]() Hollow Ground. Getting the slow up to 40% and the anti-heal online as fast as possible.
Hollow Ground. Getting the slow up to 40% and the anti-heal online as fast as possible.
After that we go for ![]() Corpse Explosion, as this is where all the actual burst damage comes from. The more ranks we get into it, the harder our corpse detonations hit.
Corpse Explosion, as this is where all the actual burst damage comes from. The more ranks we get into it, the harder our corpse detonations hit.
We leave ![]() Fleeting Breath for last since the utility it provides, mainly the Stun on healers and the DoT, doesn't scale as hard with rank compared to the raw damage of our first two abilities.
Fleeting Breath for last since the utility it provides, mainly the Stun on healers and the DoT, doesn't scale as hard with rank compared to the raw damage of our first two abilities.
Obviously, every time we can we upgrade our ultimate ![]() Empty the Crypts. More damage per tick, bigger healing reduction stacks, and the bonus corpses from the post-cast basic attacks all get significantly stronger with each rank.
Empty the Crypts. More damage per tick, bigger healing reduction stacks, and the bonus corpses from the post-cast basic attacks all get significantly stronger with each rank.
 Y
Y
 B
B
 A
A
 X
X
Tap each threat level to view Ah Puch’s threats
Tap each synergy level to view Ah Puch’s synergies
Hi, my name is Ragna and I started playing Smite 1 on PC in 2021. I started playing in little community tournaments and after a lot of training and work I manage to play professional tournaments on Atlanta as the Smite Content Cup in 2024.
Now, in Smite 2 I have reached Deity every single split and I have competed in tournaments like Smite Vegas Qualifiers (ending in 5th position of EU) and right now Smite Prime, so Im always getting updated about the best metas on the game.
Apart from that I have a Twitch channel Ragna_smite where we play Smite 2 every single day and we do coaching for the subs to help them to improve on Smite 2, answering questions, talking about the game, etc.
Hope you find this guide as a good starting point for the midlane and helps you improve your ![]() Ah Puch skills and knowledge.
Ah Puch skills and knowledge.
Here are my socials:
|
Passive - When This passive completely changes how you play the game. Positioning yourself to walk over corpses between casts lets you spam your kit far more aggressively than the base cooldowns suggest. |
|
Ability 1 - Raises two decaying corpses from the underworld that surge forward, dealing Magical Damage to enemies in their path. Enemies hit are Slowed and have their Healing reduced for a duration. The corpses explode when they contact an enemy, reach max range, or when you reactivate the ability. After exploding they collapse and leave a corpse on the ground that you can pick up with your passive. This is your main wave clear and poke tool. The anti-heal is incredibly relevant in the current meta so try to always apply it before the enemy can heal up. |
|
Ability 2 - Detonates a target area, dealing Magical Damage to all enemies inside. Any decaying corpses within the blast zone are also triggered, dealing a significant additional chunk of Magical Damage per corpse that goes off. This is your main burst damage button and the core of every combo. The key is always setting up corpses with |
|
Ability 3 - Throws a charm from the underworld that awakens a decaying corpse and applies to enemies in the area, dealing Magical Damage over time. If any enemy affected by this ability uses or receives healing during the debuff, they take a heavy burst of bonus Magical Damage and are Stunned at the end of the effect. The corpse spawned by this ability also falls to the ground and can be picked up. This ability is your anti-healer punish tool and your only hard CC. Against gods that heal frequently like |
|
Ultimate - Unleashes a massive field of spirits at a target location. Enemies standing inside take Magical Damage every and build up stacking debuffs that reduce their Healing and their Damage Dealt with each tick, up to 3 stacks. After casting, your next 3 basic attacks also launch zombies that leave decaying corpses behind. This is your zone control monster and your teamfight finisher. The healing reduction stacks combined with the damage reduction debuff make this one of the most oppressive zone control abilities in the game, perfect for stalling objectives or forcing an entire enemy team to scatter. |
SMITEFire is the place to find the perfect build guide to take your game to the next level. Learn how to play a new god, or fine tune your favorite SMITE gods’s build and strategy.
Copyright © 2019 SMITEFire | All Rights Reserved


Leave a Comment This author would like to receive feedback
and suggestions about their guide.
You need to log in before commenting.
Collapse All Comments