
Vote received! Would you like to let the author know their guide helped you and leave them a message?

![]() Sands of Time great item for early mana sustain that give us usefull cooldown.
Sands of Time great item for early mana sustain that give us usefull cooldown.
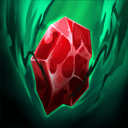
![]() Gem little amount of intelligence for early push and jungle camps.
Gem little amount of intelligence for early push and jungle camps.
![]() Aegis of Acceleration this item is possible with
Aegis of Acceleration this item is possible with ![]() Ra as he has an inmune CC ability with
Ra as he has an inmune CC ability with ![]() Searing Pain
Searing Pain
 Sands of Time
 Gem
Gem
 Health Potion
 Aegis of Acceleration
![]() Pendulum of Ages
Pendulum of Ages![]() Ra’s survivability depends on his passive movement speed, which requires constant ability casting. This item provides a massive 20% Cooldown Reduction.
Ra’s survivability depends on his passive movement speed, which requires constant ability casting. This item provides a massive 20% Cooldown Reduction.
![]() Book of Thoth As a spam-heavy mage,
Book of Thoth As a spam-heavy mage, ![]() Ra consumes mana rapidly. This item solves your resource issues and converts your total mana into a massive Intelligence boost.
Ra consumes mana rapidly. This item solves your resource issues and converts your total mana into a massive Intelligence boost.
![]() Gem of Focus because we get pathfinding (movement speed) and cooldown that allows us to move while we are using abilities.
Gem of Focus because we get pathfinding (movement speed) and cooldown that allows us to move while we are using abilities.
![]() Rod of Tahuti its the ultimate damage spike for mages. Its passive grants 25% bonus itelligence. Core item for every mage rigth now.
Rod of Tahuti its the ultimate damage spike for mages. Its passive grants 25% bonus itelligence. Core item for every mage rigth now.
![]() Obsidian Shard its essential for the late game when enemy Guardians and Solos have built high Magic Protection. The 35% Penetration ensures your sunlight burns through even the tankiest targets.
Obsidian Shard its essential for the late game when enemy Guardians and Solos have built high Magic Protection. The 35% Penetration ensures your sunlight burns through even the tankiest targets.
![]() Nimble Ring great item for
Nimble Ring great item for ![]() Ra as it boost your attack speed with
Ra as it boost your attack speed with ![]() Divine Light making it a god with a great combination between abilities and autos damage.
Divine Light making it a god with a great combination between abilities and autos damage.
![]() Soul Gem this item helps
Soul Gem this item helps ![]() Ra to have even more lifesteal sustain during teamfights and extra damage.
Ra to have even more lifesteal sustain during teamfights and extra damage.
 Pendulum of Ages
 Book of Thoth
 Gem of Focus
 Rod of Tahuti
 Obsidian Shard
 Nimble Ring
 Soul Gem
Aegis of Acceleration
Soul Gem
Aegis of Acceleration
![]() Divine Ruin instead of
Divine Ruin instead of ![]() Gem of Focus if the enemy has heavy healing (e.g.,
Gem of Focus if the enemy has heavy healing (e.g., ![]() Aphrodite,
Aphrodite, ![]() Baron Samedi, or high Lifesteal builds), even if they have these gods it isnt that neccesary the anti-heal.
Baron Samedi, or high Lifesteal builds), even if they have these gods it isnt that neccesary the anti-heal.
![]() Blinking Abyss instead
Blinking Abyss instead ![]() Nimble Ring if you want to have a double relic to engage or leave a teamfight.
Nimble Ring if you want to have a double relic to engage or leave a teamfight.
![]() Talisman Of Purification or
Talisman Of Purification or ![]() Time-Lock Aegis instead of
Time-Lock Aegis instead of ![]() Blinking Abyss if you want to have a safer relic.
Blinking Abyss if you want to have a safer relic.
 Divine Ruin
 Blinking Abyss
 Talisman Of Purification
 Time-Lock Aegis

You can choose between ![]() Divine Light or
Divine Light or ![]() Solar Blessing if you wanna focus more on objective damage go for the first option if you want more healing go for the second option.
Solar Blessing if you wanna focus more on objective damage go for the first option if you want more healing go for the second option.
 Y
Y
 B
B
 A
A
 X
X

Tap each threat level to view Ra’s threats
Tap each synergy level to view Ra’s synergies
Hi, my name is Ragna and I started playing Smite 1 on PC in 2021. I started playing in little community tournaments and after a lot of training and work I manage to play professional tournaments on Atlanta as the Smite Content Cup in 2024 and SCC during 2023.
Now, in Smite 2 I have reached Deity every single split and I have competed in tournaments like Smite Vegas Qualifiers (ending in 5th position of EU) and right now Smite Prime, so Im always getting updated about the best metas on the game.
Apart from that I have a Twitch channel Ragna_smite where we play Smite 2 every single day and we do coaching for the subs to help them to improve on Smite 2, answering questions, talking about the game, etc.
Hope you find this guide as a good starting point for the midlane.
Here are my socials:
|
Passive - Every time Keeping your passive stacks up is vital for survival since |
|
Ability 1 - This is your primary waveclear and poke tool. Because it has a travel time, try to aim where the enemy will be, or wait for your teammates to land CC like |
|
Ability 2 - Use this as a self-peel tool when an assassin like |
|
Ability 3 - In team fights, place this where your frontline (Guardians/Warriors) are fighting. It provides them with essential sustain while forcing the enemy to take ticking damage if they want to stay in the area. |
|
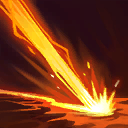
Ultimate - This is one of the most iconic snipes in the game. You are immune to CC while casting it. Use it to secure objectives like Fire Giant , to finish off low-health carries through walls where they don't expect the hit or to scape some CC ability from the enemies. |
SMITEFire is the place to find the perfect build guide to take your game to the next level. Learn how to play a new god, or fine tune your favorite SMITE gods’s build and strategy.
Copyright © 2019 SMITEFire | All Rights Reserved


Leave a Comment This author would like to receive feedback
and suggestions about their guide.
You need to log in before commenting.
Collapse All Comments