

Please verify that you are not a bot to cast your vote.

Join the leading SMITE community.
Create and share God Guides and Builds.
Account Login
Create an MFN Account
Or
This guide has not yet been updated for the current season. Please keep this in mind while reading. You can see the most recently updated guides on the browse guides page
Vote received! Would you like to let the author know their guide helped you and leave them a message?
 Death's Toll
 Short Bow
 Healing Potion
Build wind demon before poisoned star, and build shadowsteel earlier depending on how much lifesteal the enemy team has
 Death's Embrace
 Ichaival
 Demon Blade
 Poisoned Star
 Shadowsteel Shuriken
 Qin's Sais
 Heavenly Wings
Allows you to do more damage to gods at the cost of your ability to solo jungle bosses as easily
 Deathbringer
 Ichaival
 Demon Blade
 Poisoned Star
 Shadowsteel Shuriken
 Qin's Sais
 Heavenly Wings
Leveling spike shot early allows you to annihilate minion waves and jungle camps, especially with ichaival
 Y
Y

 B
B

 A
A

 X
X


Tap each threat level to view Charybdis’s threats
Sobek's grab is faster than your 3, and if it connects you will be cced for a fair time before you can try to esccape. Keep as much distance as you can, and try to hide behind your own support until he uses it.
Array ( [god] => Array ( [god_id] => 9 [display_name] => Sobek [url] => sobek ) [scoreVal] => 1 [notes] => Sobek's grab is faster than your 3, and if it connects you will be cced for a fair time before you can try to esccape. Keep as much distance as you can, and try to hide behind your own support until he uses it. ) 1
Anhur's ult can be pretty much negated by your 3; however, he does a good amount of damage and his knockback is very discombobulating. Try to avoid his knockback; if he hits it, he will likely gain the upper hand in a fight.
Array ( [god] => Array ( [god_id] => 5 [display_name] => Anhur [url] => anhur ) [scoreVal] => 3 [notes] => Anhur's ult can be pretty much negated by your 3; however, he does a good amount of damage and his knockback is very discombobulating. Try to avoid his knockback; if he hits it, he will likely gain the upper hand in a fight. ) 1
Artemis is cc heavy, and her poke is especially annoying. Try not to fight her with her stim up, and if you get caught in a trap, it is a good idea to use your 3. The windup on her ult is slower than your 3 too, and it is easy to counterult her when she casts it.
Array ( [god] => Array ( [god_id] => 1 [display_name] => Artemis [url] => artemis ) [scoreVal] => 3 [notes] => Artemis is cc heavy, and her poke is especially annoying. Try not to fight her with her stim up, and if you get caught in a trap, it is a good idea to use your 3. The windup on her ult is slower than your 3 too, and it is easy to counterult her when she casts it. ) 1
Buy beads against him and he shouldn't be too much trouble. Don't underestimate his damage, especially with the stun from his 1
Array ( [god] => Array ( [god_id] => 93 [display_name] => Cerberus [url] => cerberus ) [scoreVal] => 3 [notes] => Buy beads against him and he shouldn't be too much trouble. Don't underestimate his damage, especially with the stun from his 1 ) 1
Make sure to distance yourself enough from him to avoid his grab. If he hits his root, the grab will likely follow, so have your 3 available.
Array ( [god] => Array ( [god_id] => 68 [display_name] => Khepri [url] => khepri ) [scoreVal] => 3 [notes] => Make sure to distance yourself enough from him to avoid his grab. If he hits his root, the grab will likely follow, so have your 3 available. ) 1
Don't let ymir get close enough to you to freeze you and you should be fine. If he walls behind you, use your 3 to get away as he is likely lining up his combo, then keep your distance.
Array ( [god] => Array ( [god_id] => 12 [display_name] => Ymir [url] => ymir ) [scoreVal] => 3 [notes] => Don't let ymir get close enough to you to freeze you and you should be fine. If he walls behind you, use your 3 to get away as he is likely lining up his combo, then keep your distance. ) 1
Keep your distance from artio, her stun and root are powerful and she can do a lot of damage for a support.
Array ( [god] => Array ( [god_id] => 90 [display_name] => Artio [url] => artio ) [scoreVal] => 2 [notes] => Keep your distance from artio, her stun and root are powerful and she can do a lot of damage for a support. ) 1
Athena's dash and taunt combo is powerful, and will make you take a lot of damage if it connects. Try to stay to the side as she will likely charge through your wave, and make sure your support is closer.
Array ( [god] => Array ( [god_id] => 37 [display_name] => Athena [url] => athena ) [scoreVal] => 2 [notes] => Athena's dash and taunt combo is powerful, and will make you take a lot of damage if it connects. Try to stay to the side as she will likely charge through your wave, and make sure your support is closer. ) 1
Sylvanus' cc is strong, but relatively slow. Use your 3 if he hits you with a root, as his grab andd possibly ult will likely follow.
Array ( [god] => Array ( [god_id] => 58 [display_name] => Sylvanus [url] => sylvanus ) [scoreVal] => 2 [notes] => Sylvanus' cc is strong, but relatively slow. Use your 3 if he hits you with a root, as his grab andd possibly ult will likely follow. ) 1
Ares can do a lot of damage, but he is easy to avoid, especially since you can cleanse his chains with both your 3 and 4. If necessary, you can cancel his 3 with the knockup from your 3
Array ( [god] => Array ( [god_id] => 23 [display_name] => Ares [url] => ares ) [scoreVal] => 4 [notes] => Ares can do a lot of damage, but he is easy to avoid, especially since you can cleanse his chains with both your 3 and 4. If necessary, you can cancel his 3 with the knockup from your 3 ) 1
His knockup is annoying but generally unproblematic. He is not much of a threat, but can help your enemy gain the upper hand quite easily
Array ( [god] => Array ( [god_id] => 48 [display_name] => Geb [url] => geb ) [scoreVal] => 4 [notes] => His knockup is annoying but generally unproblematic. He is not much of a threat, but can help your enemy gain the upper hand quite easily ) 1
Tap each synergy level to view Charybdis’s synergies
Good ult synergy, and his abilities make it easy for you to secure kills
Array ( [god] => Array ( [god_id] => 93 [display_name] => Cerberus [url] => cerberus ) [scoreVal] => 2 [notes] => Good ult synergy, and his abilities make it easy for you to secure kills ) 1
Ymir's freeze and wall allow you to easily use your two and 1 to do a strong amount of damage
Array ( [god] => Array ( [god_id] => 12 [display_name] => Ymir [url] => ymir ) [scoreVal] => 2 [notes] => Ymir's freeze and wall allow you to easily use your two and 1 to do a strong amount of damage ) 1
Good combo potential with his ult, and his chains will help you chase down enemies.
Array ( [god] => Array ( [god_id] => 23 [display_name] => Ares [url] => ares ) [scoreVal] => 3 [notes] => Good combo potential with his ult, and his chains will help you chase down enemies. ) 1
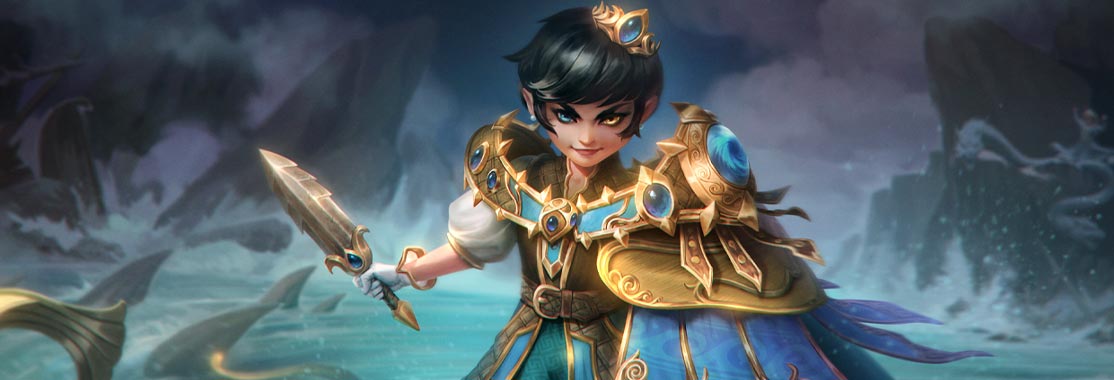
Despite her glitchy release, I have been playing a lot of charybdis since her release (and got my first star as her), and have been running this build wit hgenerally good results.
She is a fun god to play, and is capable of a lot of late game damage when the build comes online; however, her early game is rather weak, especially when supports are laning with you (which is why I have mostly written supports as threats)
Passive:
It is a good idea to have her passive stacked at all times. It can be a good idea to try and farm it on minions before engaging properly, since not having it can leave you at a distinct disadvantage, making your 2 and 3 a lot weaker.
1:
Spike shot is a powerful ability, especially against minions and jungle monsters, making it your main clear. I recommend having it leveled highly early, as it will make laning a lot easier. Its penetration can be used to attack the enemy carry through the melee minions from the side to deal a fair amount of damage, after which they will likely back off and allow you to focus on minions.
In fights, the shot speed and wider projectiles make it easier to hit enemies that are fleeing, and the projectile spread can deal a fair amount of damage when firing into groups.
2:
Probably the odd one out of her abilities, her 2 can be used as a clear assist. It is a good engage for enemies that are cced, and is a strong tool for slowing down fleeing or pursuing enemies. It is useful for the fact it penetrates walls, allowing you to catch out people trying to loop around or hide behind obstacles. It is unwise to use it when in a firefight, as your autos will likely end up doing more damage.
3:
One of the best escapes in the game, you can use it to avoid many ults, and turn the tides of battle by making enemies waste high damage abilities. You will want to always have enough tide to proc it again, as it is fairly useless for mobility in the base state. You will usually be using this ability to evade damage, and should try to avoid combat while it is down. However, it does do damage and gives a healthy move speed buff, and the knockup at the end makes it strong for securing kills.
4:
This ult is not too strong in 1v1 situations. It is very hard to hit, and can easily be sidestepped after it is cast. Try to use it when enemies are not focused on you, or simply as a cc immune escape. It is good at pushing enemies into tower or firing into massed enemies to help break them down. When fleeing, it can be smart to run into the jungle using the ult, forcing the enemies to group up, and then cast the ult to extend the distance between you and your pursuers
Try and play her safe until late game. Supports are able to bully you quite easily early on, and unless you get a strong lead early on, you should play safe around the enemy carry as well. Preserve your 3, and you should be capable of dealing a lot of damage and gettng away with it
You need to log in before commenting.
Collapse All Comments
Smite is an online battleground between mythical gods. Players choose from a selection of gods, join session-based arena combat and use custom powers and team tactics against other players and minions. Smite is inspired by Defense of the Ancients (DotA) but instead of being above the action, the third-person camera brings you right into the combat. And, instead of clicking a map, you use WASD to move, dodge, and fight your way through the detailed graphics of SMITE's battlegrounds.
SMITEFire is the place to find the perfect build guide to take your game to the next level. Learn how to play a new god, or fine tune your favorite SMITE gods’s build and strategy.
Copyright © 2019 SMITEFire | All Rights Reserved
This build is massively missing % pen. Just the situational 10% from Wind Demon is not enough. You either need
And while