
Vote received! Would you like to let the author know their guide helped you and leave them a message?


![]() Warrior's Axe Every time you hit an enemy, you deal extra damage and heal, but it can only happen once every 8 seconds. It's really good for 1v1s in the first levels.
Warrior's Axe Every time you hit an enemy, you deal extra damage and heal, but it can only happen once every 8 seconds. It's really good for 1v1s in the first levels.
![]() Health Chalice Hp sustain for the lane.
Health Chalice Hp sustain for the lane.
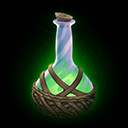
![]() Purification Beads gives you CC's immune when you use.
Purification Beads gives you CC's immune when you use.
![]() Bifrost Shard gives you a free ward that lasts 90 seconds. It is useful for early ganks from the enemy jungler.
Bifrost Shard gives you a free ward that lasts 90 seconds. It is useful for early ganks from the enemy jungler.
 Warrior's Axe
 Health Chalice
 Health Potion
 Bifrost Shard
 Purification Beads
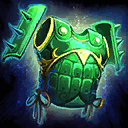
![]() Sundering Axe It gives you defenses, damage and its passive makes that when you hit an enemy god you do extra damage and heal yourself, it can only happen every 8 seconds.
Sundering Axe It gives you defenses, damage and its passive makes that when you hit an enemy god you do extra damage and heal yourself, it can only happen every 8 seconds.
![]() Stampede gives you physical defenses and health, and its active is a sprint for you and allies that increases your movement speed by 30%, really good for chasing or escaping.
Stampede gives you physical defenses and health, and its active is a sprint for you and allies that increases your movement speed by 30%, really good for chasing or escaping.
![]() Genji's Guard gives you magical defenses and cooldown reduction and its passive makes that when you receive damage your abilities get 3 seconds less cooldown reduction.
Genji's Guard gives you magical defenses and cooldown reduction and its passive makes that when you receive damage your abilities get 3 seconds less cooldown reduction.
![]() Shell of Rebuke Provides you with a shield and you can also pass through the walls of allies and enemy gods. It's the same as the relic
Shell of Rebuke Provides you with a shield and you can also pass through the walls of allies and enemy gods. It's the same as the relic ![]() Phantom Shell but it's an item.
Phantom Shell but it's an item.
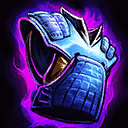
![]() Hide of the Nemean Lion right now the carries are very strong and this item gives you a passive that when you activate it you reflect damage, that's why it's very good vs carries.
Hide of the Nemean Lion right now the carries are very strong and this item gives you a passive that when you activate it you reflect damage, that's why it's very good vs carries.
![]() Spirit Robe provides you mixed defenses in addition to its passive that protects you when you are hit by a CC, giving you a lot of defenses.
Spirit Robe provides you mixed defenses in addition to its passive that protects you when you are hit by a CC, giving you a lot of defenses.
![]() Draconic Scale gives you mixed defenses and a lot of health, plus its passive gives you more defenses if you take damage.
Draconic Scale gives you mixed defenses and a lot of health, plus its passive gives you more defenses if you take damage.
![]() Purification Beads gives you CC's immune when you use.
Purification Beads gives you CC's immune when you use.
![]() Bifrost Shard gives you a free ward that lasts 90 seconds. It is useful for early ganks from the enemy jungler.
Bifrost Shard gives you a free ward that lasts 90 seconds. It is useful for early ganks from the enemy jungler.
 Sundering Axe
 Stampede
 Genji's Guard
 Shell of Rebuke
 Hide of the Nemean Lion
 Spirit Robe
 Draconic Scale
Bifrost Shard
Purification Beads
Draconic Scale
Bifrost Shard
Purification Beads
![]() Talisman Of Purification You always need this item if you and your team need
Talisman Of Purification You always need this item if you and your team need ![]() Purification Beads in the area against teams that have a lot of CC.
Purification Beads in the area against teams that have a lot of CC.
![]() Spectral Armor very good against characters with high attack speed and critical chances because reduces enemy attack speed and critical damage. You need this item if the enemy team has critical items.
Spectral Armor very good against characters with high attack speed and critical chances because reduces enemy attack speed and critical damage. You need this item if the enemy team has critical items.
 Talisman Of Purification
 Spectral Armor
![]() Phantom Shell Provides you with a shield and you can also pass through the walls of allies and enemy gods. If the enemy team has a
Phantom Shell Provides you with a shield and you can also pass through the walls of allies and enemy gods. If the enemy team has a ![]() Odin or something like that its a good option.
Odin or something like that its a good option.
 Phantom Shell

 Y
Y
 B
B
 A
A
 X
X

Tap each threat level to view Bacchus’s threats
Tap each synergy level to view Bacchus’s synergies
Hi, this guide is brought to you by lestimics. I started playing Smite 1 on PC in 2014. I've been playing competitively since 2020 and have been a professional Smite player from 2021 to 2023. I've played on different teams like JustF6, Gilded Gladiators or Tartarus Titans.
You can check out the SmiteVOD YouTube channel where my recorded professional games are. I've peaked at 3500 MMR GrandMaster/Masters in Ranked Conquest on the PC platform every season since 2018. I've also done Smite Masters (LAN) 4 times in 2022, so I really think I have the knowledge to guide on the Support role in SMITE 2.
I hope you find this guide as a useful learning resource for playing ![]() Bacchus as Support.
Bacchus as Support.
Here are my socials:
|
Passive -
Get drunk from chug to gain increased strength, intelligence, physical protection, and magical Protection. Also adds additional effects to your abilities. You have a bar indicating how drunk you can be, always try to keep it at its maximum. |
|
Ability 1 - Get Drunk, Heal, gain increased Strength and Intelligence, and your next basic attack deals additional Magical Damage. It's important to use this skill first before the others, to deal more damage with your abilities. |
|
Ability 2 -
It's a very good skill for engaging and combo with your teammates, and also for escaping. |
|
Ability 3 -
Channel to deal magical damage repeatedly to enemies in front of you. The final hit will Stun if you are Tipsy or Smashed. It is the most important ability of |
|
Ultimate -
Deal magical damage and intoxicate enemies around you. Gain strength and intelligence if you are Smashed. |
SMITEFire is the place to find the perfect build guide to take your game to the next level. Learn how to play a new god, or fine tune your favorite SMITE gods’s build and strategy.
Copyright © 2019 SMITEFire | All Rights Reserved


Leave a Comment This author would like to receive feedback
and suggestions about their guide.
You need to log in before commenting.
Collapse All Comments