Smitefire logo

Join the leading SMITE community.
Create and share God Guides and Builds.

Create an MFN Account


Or

Vote received! Would you like to let the author know their guide helped you and leave them a message?

Banner for Ymir guides

Ymir Solo

Solo Conquest
0 0 268
by lestimics updated April 28, 2025

Smite God: Ymir

Build Guide Discussion 0 More Guides
Tap Mouse over an item or ability icon for detailed info

Ymir Build

Started build

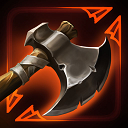
Notes Warrior's Axe Every time you hit an enemy, you deal extra damage and heal, but it can only happen once every 8 seconds. It's really good for 1v1s in the first levels.

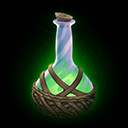
Health Potion HP sustain for the lane.

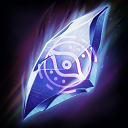
Sundering Arc You deal damage in a cone to enemy gods and jungle monsters, allowing you to buff faster and secure them easily.

Notes

Warrior's Axe Every time you hit an enemy, you deal extra damage and heal, but it can only happen once every 8 seconds. It's really good for 1v1s in the first levels.

Health Potion HP sustain for the lane.

Sundering Arc You deal damage in a cone to enemy gods and jungle monsters, allowing you to buff faster and secure them easily.

Build Item Warrior's Axe Warrior's Axe
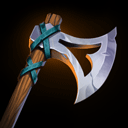
Build Item Axe Axe
Build Item Health Potion Health Potion
3
Build Item Sundering Arc Sundering Arc

Full Build

Notes Sundering Axe It gives you defenses, damage and its passive makes that when you hit an enemy god you do extra damage and heal yourself, it can only happen every 8 seconds

Runeforged Hammer It gives you a lot of Hp, damage and the passive makes you do more damage after applying a hard CC and reduces your cooldown.

Mystical Mail gives you a lots of health, defense and has an offensive effect. The important thing about this item is the aura that deals damage to nearby enemies.

Glorious Pridwen gives you mixed defenses, cooldown reduction and an active one that gives you a shield based on your defense and when it explodes it does damage.

Shield Splitter gives you mixed defenses and health, in addition to its active that you throw this object forward doing true damage and reducing enemy shields and adding them to you.

Mantle of Discord defenses, cooldown reduction and its passive makes that if you are below 40% of your life all enemies around you are stunned and you gain immunity to CC's.

Hide of the Nemean Lion right now the carries are very strong and this item gives you a passive that when you activate it you reflect damage, that's why it's very good vs carries.

Sundering Arc You deal damage in a cone to enemy gods and jungle monsters, allowing you to buff faster and secure them easily.

Notes

Sundering Axe It gives you defenses, damage and its passive makes that when you hit an enemy god you do extra damage and heal yourself, it can only happen every 8 seconds

Runeforged Hammer It gives you a lot of Hp, damage and the passive makes you do more damage after applying a hard CC and reduces your cooldown.

Mystical Mail gives you a lots of health, defense and has an offensive effect. The important thing about this item is the aura that deals damage to nearby enemies.

Glorious Pridwen gives you mixed defenses, cooldown reduction and an active one that gives you a shield based on your defense and when it explodes it does damage.

Shield Splitter gives you mixed defenses and health, in addition to its active that you throw this object forward doing true damage and reducing enemy shields and adding them to you.

Mantle of Discord defenses, cooldown reduction and its passive makes that if you are below 40% of your life all enemies around you are stunned and you gain immunity to CC's.

Hide of the Nemean Lion right now the carries are very strong and this item gives you a passive that when you activate it you reflect damage, that's why it's very good vs carries.

Sundering Arc You deal damage in a cone to enemy gods and jungle monsters, allowing you to buff faster and secure them easily.

Build Item Sundering Axe Sundering Axe
Build Item Runeforged Hammer Runeforged Hammer
Build Item Mystical Mail Mystical Mail
Build Item Glorious Pridwen Glorious Pridwen
Build Item Shield Splitter Shield Splitter
Build Item Mantle of Discord Mantle of Discord
Build Item Hide of the Nemean Lion Hide of the Nemean Lion
Build Item Sundering Arc Sundering Arc

Situational Items

Notes Magi's Cloak defenses, cooldown reduction and its passive makes CC's immune to the first CC once every 90 seconds. You have to replace it for Hide of the Nemean Lion if you need this passive.

Notes

Magi's Cloak defenses, cooldown reduction and its passive makes CC's immune to the first CC once every 90 seconds. You have to replace it for Hide of the Nemean Lion if you need this passive.

Build Item Magi's Cloak Magi's Cloak

Ymir's Skill Order

Ice Wall

1 X Y
Ice Wall
4 8 10 15 16

Glacial Strike

2 A B
Glacial Strike
1 3 6 7 9

Frost Breath

3 B A
Frost Breath
2 11 12 13 14

Shards Of Ice

4 Y X
Shards Of Ice
5 17 18 19 20
Ice Wall
4 8 10 15 16

Ice Wall

1 X
Create a Wall that Knocks Back enemies on creation.
  • Reactivate to destroy the Wall early.
Lifetime: 2.5 / 3 / 3.5 / 4 / 4.5s
Range: 11.2m
Radius: 3.2m
Cooldown: 15 / 14.5 / 14 / 13.5 / 13s
Cost: 50 / 55 / 60 / 65 / 70

Additional Notes:
  • The Wall Impedes all characters.
  • Create the Wall at your feet to Displace yourself up and forward.
  • Displaces Enemies up and away from the Wall.
  • Reactivate to destroy the Wall early.
Glacial Strike
1 3 6 7 9

Glacial Strike

2 A
Smash your club into the ground, creating a field of ice that deals Magical Damage and Slows.

Damage: 90 / 145 / 200 / 255 / 310
Damage Scaling: 70% Intelligence + 55% Strength
Slow: 25%
Slow Duration: 2s
Range: 6m
Radius: 3.6m
Cooldown: 8 / 7.5 / 7 / 6.5 / 6s
Cost: 45 / 50 / 55 / 60 / 65

Additional Notes:
  • Damaging area starts at Ymir and moves away over time.
  • You are Slowed by 42.5% during activation.
Frost Breath
2 11 12 13 14

Frost Breath

3 B
Unleash your freezing breath, Stunning enemies in front of you and dealing Magical Damage.

Damage: 50 / 85 / 120 / 155 / 190
Damage Scaling: 55% Intelligence
Stun Duration: 1 / 1.1 / 1.3 / 1.4 / 1.6s
Cone Angle: 90 degrees
Cooldown: 14s
Cost: 40 / 50 / 60 / 70 / 80

Additional Notes:
  • You are Rooted during activation.
Shards Of Ice
5 17 18 19 20

Shards Of Ice

4 Y
Freeze the air around you, Slowing enemies as you Channel.
  • After 3 seconds, erupt with a burst of Magical Damage to all enemies in range.
  • You may cancel this ability early, dealing less damage.
  • You are CC Immune while using this ability.
Damage: 550 / 750 / 950 / 1150 / 1350
Damage Scaling: 160% Intelligence + 30% Protections
Slow: 40%
Radius: 5.6m
Cooldown: 90 / 85 / 80 / 75 / 70s
Cost: 80 / 90 / 100 / 110 / 120

Additional Notes:
  • Damage scales linearly from 35% to 100% based on Channel time.
  • Max Channel time of 3 seconds.
  • You are Rooted while Channeling.

Ymir Threats

Tap each threat level to view Ymir’s threats

Max
0
Major
0
Even
3
Minor
0
Tiny
0

Ymir Synergies

Tap each synergy level to view Ymir’s synergies

Ideal
0
Strong
1
OK
2
Low
0
None
0

Introduction

Hi, this guide is brought to you by lestimics. I started playing Smite 1 on PC in 2014. I've been playing competitively since 2020 and have been a professional Smite player from 2021 to 2023. I've played on different teams like JustF6, Gilded Gladiators or Tartarus Titans.

You can check out the SmiteVOD YouTube channel where my recorded professional games are. I've peaked at 3500 MMR GrandMaster/Masters in Ranked Conquest on the PC platform every season since 2018. I've also done Smite Masters (LAN) 4 times in 2022, so I really think I have the knowledge to guide on the Solo role in SMITE 2.

I hope you find this guide as a useful learning resource for playing Ymir as Solo.

Here are my socials:

Abilities

Ymir's Abilities


Passive - Frostbite

All of Ymir's abilities that affect enemies apply a debuff to the enemy called Frostbite. All of Ymir's basic attacks against a target afflicted by Frostbite do 100% more damage. Enemies afflicted by Frostbite deal 10% less damage. Lasts for 6s.

This passive is very important to keep active while hitting any enemy.


Ability 1 - Ice Wall

Ymir create a wall that displaces enemies on creation. Applies Frostbite to displaced enemies. If you press the ability again you make the wall disappear.

It's very important to use it correctly to block the enemy gods' path and leave them with no way out.

Also, if you use the wall above you, it will knock you forward, which can help you escape.


Ability 2 - Glacial Strike

This is the primary ability for pushing minions. It's a forward rectangle that deals magic damage and slows enemies. Applies Frostbite on successful hit.


Ability 3 - Frost Breath

Ymir freezes in a cone in front of him, dealing magical damage and stunning enemies. Applies Frostbite on successful hit.

This skill is very important not to miss, to ensure your next abilities and provide your team a stun that is easy to follow to do damage.


Ultimate - Shards Of Ice

Ymir channel to slow enemies around you. Deal a burst of magical damage when the channel is complete. Applies Frostbite immediately to enemies in the area.

You are CC immune while channeling, you can also cancel this ability early, doing less damage.


Example Combos:

From the distante Ice Wall to enclose the enemy > Frost Breath to stun the enemy and hit 1 basic attack > Glacial Strike to continue hitting basic attacks.

If you are close enough Frost Breath to stun the enemy and hit 1 basic attack > Glacial Strike to continue hitting basic attacks > if the enemy god use a dash continue chasing until you enclose with Ice Wall > and finish with Shards Of Ice.

You can also do a burst of damage with Frost Breath to stun the enemy and hit 1 basic attack > Glacial Strike and hit 1 basic attack > Shards Of Ice fast before the enemy use a dash (Remember that you can cancel this ability to deal damage sooner).

How to play Ymir

Gameplay Start / Early Game
  • Start at the Fire Giant side in the lane. You have to start on the blue buff leveling up your Glacial Strike, with the jungler helping you do it quickly, and then go to the lane to push the minions. If you don't lose any minions you will go up to level 2, but if you lose any minions in the next wave of minions you will go up to level 2.

  • It is important to know that in order to push the minions correctly you have to use Glacial Strike in front of the melee minions to hit all minions, and continue hitting basics attacks to the minions with the passive active (Frostbite) you will be doing around 100 damage with basic attacks. You have a very good 1vs1 thanks to its passive so try to hit all the basics you can on the enemy god with Frostbite activated.

  • The following moves are push the lane and try to win the Totem (Totem gives gold for all the team and mana regeneration). From this point on you have to try to win the pressure of the lane to be able to kill the side camps and get more gold and experience.

  • On the side camps you can kill the gold camp which doesn't give you experience but a lot of gold, and the two harpy camps give gold and experience. Also if you have pressure online you can invade their harpies too.

  • When you get the first item of the build, you are incredibly strong in 1vs1 so you will be able to look for some kills and pressure a lot or you can try to invade the blue buff callling you jungle to help you.

  • Remember to buy wards to avoid the ganks and try to comunicate to the jungle to invade blue buffs or try to kill the solo laner.

Mid Game:
  • At this point of the game, which is roughly between 10:00 and 20:00 minutes, you have to push the lanes as quickly as possible and try to rotate, either by using the teleports of the sides of the lane for the duo lane or rotating to the mid lane.

  • If you do mid lane rotations, Ymir is a very good character for teamfights because she has a lot of life and defense and thanks to her passive you do a lot of damage, in addition to being very useful thanks to her stuns and walls. This is why if you play with the team you have a great advantage to be able to get a kill and pressure a lot to look to do some objective like the Gold Fury or the Pyromancer.

  • If you use the teleporter from the solo to the duo lane, you have to do the same play but trying to kill the carry or the support and gain the pressure to be able to do the Gold Fury.

Late Game:
  • At this point in the game your job is to be the frontline with the support as teamfights start around the fire giant at around minute 25:00.

  • You have to harass, poke and kill the enemy carry, mid and jungler as they are the most dangerous for your team.

  • To deal with this type of situation you have to take advantage using Frost Breath to stun enemies so your teammates can easily deal damage, you can also enclose the enemy gods with Ice Wall, it is very important to constantly call your team so that they follow you when you perform a stun or you are trying to enclose someone.

  • The moment you have the fire giant buff, the sieges on the Phoenix begin. Here you have to continue taking advantage of your stun with Frost Breath to get a kill and destroy the Phoenix with the help of your carry and mid. You can also go with your jungle to another Phoenix to create pressure since you have a lot of defense to tank and your jungle can do good damage to the Phoenix easily.

  • If the enemy has the fire giant and it is your turn to defend the Phoenix, you have to be in a group with your team and defend under the Phoenix, being careful with the picks.

  • Constantly call for all information, when you engage try to be followed by your team, always be sure of your decision making.

  • Remember to wards all the zone on fire giant and when you are sieging you need wards too.

How to ward as Solo

White circles: Vision Ward
Green circles: Sentry Ward

Early/Mid Game

Here you can see the best spots to ward as a Sololaner.

These wards will help you to know where the enemy sololaner is moving, as well as if the jungler is trying to gank you.


High Pressure Game

These wards are when you have a lot of pressure in lane and you want to invade blue buffs and red buffs. Remember to call your team that you want to invade so they can help you.


Late Game

These wards are for fire giant teamfights. Remember that you can only have 2 wards active at the same time, so you will need help from your team to ward the entire area from the fire giant.


Siege/Defense Phoenix

These wards are very important when it comes to sieges and defending phoenixes. In this case, the wards are the same whether you defend or attack.
This wards are important because mages often cast abilities through walls, you will be able to react better to their abilities.

Leave a Comment

You need to log in before commenting.

Collapse All Comments

Loading Comments...
Load More Comments

SMITEFire is the place to find the perfect build guide to take your game to the next level. Learn how to play a new god, or fine tune your favorite SMITE gods’s build and strategy.

Copyright © 2019 SMITEFire | All Rights Reserved