
This guide has not yet been updated for the current season. Please keep this in mind while reading. You can see the most recently updated guides on the browse guides page
Vote received! Would you like to let the author know their guide helped you and leave them a message?

In-depth notes down below.
 Benevolence
 Glowing Emerald
 Healing Potion
 Hand of the Gods
 Magic Shell
 Cloak of Meditation
In-depth notes down belowes.
 Compassion
 Gauntlet of Thebes
 Pridwen
 Lotus Sickle
 Spear of Desolation
 Mantle of Discord
 Cloak of Ascetic
 Aegis of Acceleration
 Temporal Beads
 Greater Magic Shell
in-depth notes down below.
 Relic Dagger
 Spirit Robe
 Jade Emperor's Crown
 Toxic Blade
As Yemoja you can do you some damage, while being able to heal your mates as well. But you really wanna focus on the healing aspect. You go for the 1 first to have a clear and deal damage to the camps, minions, enemies while also being able to slow and stun them.
Second you go with your heal to provide some sustainability early in the game. The three isn't needed in most early game match-ups at all. Though if you have an aggressive playstyle and an aggressive carry that can put a lot of pressure onto the enemies (e.g. Izanami), feel free to level your 3 before your 2. That way you can secure the XP-Camps in the jungle more easily by blocking of the enemy with your Riptide. Also it provides some security against very early ganks.
You will for your 1 at level four, just to have a better clear and deal a bit more damage. Levellinng up the the doesn't really make sense until the end, which is why you don't bother about that at all. And at this point of the game, levelling up your heal doesn't make as big as a difference as you might think.
At level five you obviously go for your Ultimate. At this point it's up to your mid whether you level your 1 or 2. If your mid is struggling to get waves, go for your one. If your mid is struggling to survive, go for your 2. If your mid is actually doing a good job at both surviving and waves, go for your 2 to allow more aggressive plays.
From now on you max out your 2 for max. sustainability and go for your ult whenever possible. I might've said you don't care about damage on Yemoja, but your ult actually just gives the opponent a huge slap. It can definetly secure kills.
After maxing out your 2, you max your 1 for more damage and your 3 after that.
 Y
Y
 B
B
 A
A
 X
X

Tap each threat level to view Yemoja’s threats
Tap each synergy level to view Yemoja’s synergies
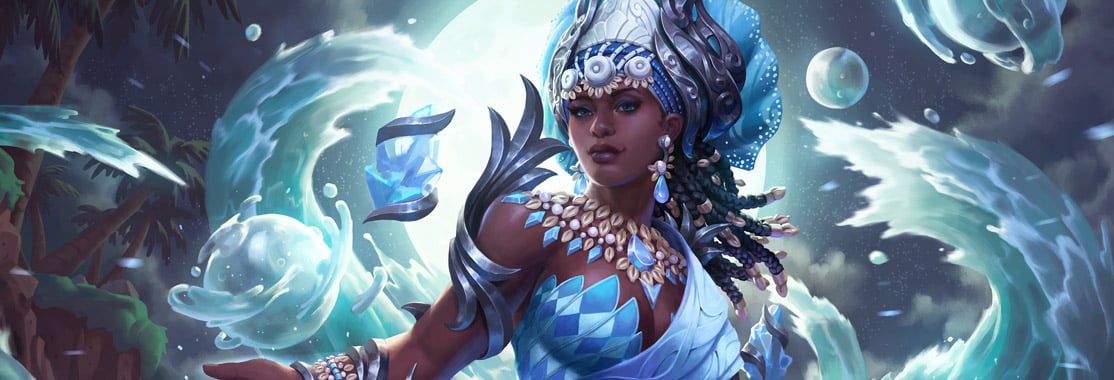
Hello and welcome to my first god guide here on SmiteFire.
As a little disclaimer: I am by no means a Smite expert, pro or anything. Though I have played over 150 games of Yemoja and wanted to share my experience with here with the hope of helping a few people out. Also I'm not a native english speaker, so I'm sorry if there are any grammar mistakes.
Make sure to leave feedback, I'd love to see some opinions on this. Enjoy the guide.
Benevolence's +7HP5 really help you staying in duo lane without bothering too much about being low. Of course this isn't to promote risky plays and thinking you can get away with it, because your HP recover faster, but it definetly helps you in getting Gauntlet of Thebes faster. You might argue Sentinel's Gift is beeter because it gives protection, but the HP5 boost really is a quality of life change to this character in duo lane.
You can get HOG, it definetly helps you with clearing the purple faster and getting to your wave quicker to build better pressure, but if you feel like your carry has a good enough clear, consider buying neither HOG nor health potions but chalice of healing instead. It adds more to your sustainability not only early game, but also throughout mid when you're trying to rotate around the map.
Depending on who your carry is, you have to choose your relic. If your carry is heavily ability-based and mana-dependent, get Cloak of Meditation to help him out with health and mana at the same time. Even if he's not ability-based, you should definetly get Cloak of Meditation as second relic at least (See Full Build for explanation on that.) Though if you're playing against a very sweaty duo lane (Izanami e.g.), consider taking Shell to potentially save yourself and your teammate and allowing more of an aggressive playstyle if needed.
When your gauntlet is bought, that's the time when you should start rotating to mid-lane. From there on Pridwen is your next choice as it makes you tankier but also gives CDR (cooldown reduction). The choice of the next item you buy heavily depends on how you and your team are doing in teamfights.
If you're performing well, outdamaging the opponent, winning the fights, get Spear of Desolation before Lotus Crown. That way you get the most value out of it. If you're team is getting the kills in teamfights, nothing stops you from spamming your heals and/or stuns to snowball the enemy out of the game.
If you're team is loosing teamfights, get Lotus Crown before Spear of Desolation. You wont get the full value out of SOD if you're not able to use it's passive by getting assists/kills. Henc,e if your team isn't doing good in teamifghts, you wont. You're better off with Lotus Crown which helps keeping your team alive, as it gives protection when you heal your mates. At this point your goal is to keep your team alive hoping you can turn around the game like that.
At this point your levelling progress will usually be around 16-17. Make sure to upgrade your starter before you buy Mantle of Discord. MOD is a big item and the anount of gold Compassion gives you with it's passive is not to be underestimated.
If you didn't buy Cloak of Meditation at the start, I truly recommend you to buy it as soon as you get to level 12 and spend some gold on the Cloak of Ascetic upgrade. This upgrade makes you totally OP in the four seconds that it lasts. I'm not kidding when I tell you it restocks your Omi faster than you can use it. It's a MUST for this character if you ask me.
Depending on what enemy gods you're facing, choose your second relic. A lot of CC? -> Beads. But if you get beads make sure to upgrade it to Temporal Beads as it restocks some Omi when activated.
If you go for Aegis, upgrade it to Aegis of Acceleration. It feels better and is better in getaways.
If you bought Shell as first relic it's up to you which upgrade you buy. Though if you're playing against gods who can create structures like Ymir or Cabracan, get Phantom Shell to just walk through their walls.
If you're feeling comfortable with your match and feel like it, consider getting Relic Dagger. It's stats are not bad for the price, but the passive helps you spamming Cloak of Ascetic more which is, as I said, totally OP on Yemoja. It's a bit risky, but you can buy it instead of Spear of Desolation.
If you're playing against CC-dependent gods like Ymir, Khumbakarna, Chaac etc., I recommend you get Spirit Robe instead of Mantle of Discord.
Jade Emperor's Crown is a good item you can use against physically dominant teams. Sometimes you just come across meme/troll teams or just those, who didn't pay attention to their distribution of physical and magical damage.
Buy toxic blade if you have one or another good healer on the enemy team. You can swap out Lotus Crown for this.
1:
Easy and simple to use, though there's a few tweaks on how you can make your placements perfect.
For the bubble version: When going for jungle camp you want to aim down, so that both of your big bubbles hit all targets. A tip for the green buff specifically: At the start of clearing it, stand right on top of the scorpion and release your bubbles. While walking backwards, hit your autos. By doing this, not only the two big ones will hit, but also a little one at the edge which will save you and your carry at least one auto attack - it can make a difference.
For the cylinder version: When clearing a wave (and I do not recommend doing so with the cylinder version. You want this to stun the enemy), stand in the middle of it to hit both the archers and meeles. Usually you can hit both groups with two circles each, dealing more damage.
When clearing camps with the cylinder version, you don't the big circle to hit the monster, but rather three small ones to deal more damage.
2:
Simple. Not much to say about this one. But as soon as you get comfortable with hitting your heals, switch over to instant proc. Makes spamming easier.
Also a little tip for this one: When you want to damage the enemy but also heal your mate at the same time, let the enemy stand in between you and shoot him. Your 2 will pass through him and still heal your mate. The little damage can make a huge difference.
3:
Use the riptide to get to teamfights and lanes faster. But only do so, if you have enough Omi left after using it to engage in a fight. What is the use from being there a bit earlier if you can't do anything, when you're there?
As good as you can mock your enemies with this ability, make sure not to sandbag your teammates with it. You can get enemies to disengage from your mates by reverse-placin a riptide in front of them while they're chasing your mate, but sometimtes the gap between the two can be very small and therefore it can be hard to knock back the enemy only.
You can also use your riptide as a getaway for yourself. Bur don't be selfish, your teammates might need it the same or even more than you.
Huge tip: When an enemy ability slows or pulls your mates, you can use your riptide to help them out. E.g. a Hades ult. You will not only make you mates receive less damage because of the protection buff, but also might be getting them out of the attack completly.
You can use your riptides perfectly to block of enemies from objectives like camps, buffs, gold fury, fire giant etc. Make sure to just not set the riptides preamptively, as they'll just walk past them. Use them on the enemy so they don't get a chance to evade it.
Last but least:
When chasing an enemy, you can reverse-place a portal in front of him to pull him back and slow him. But that's often not the best choice as the slow duration is less than the speed boost you can get and as of level 3 the speed boost even is greater than the slow.
The only case you want to use your riptide to knock the enemy back is, when one of your mates is chasing him as well and there's a chance they get confused by being pushed forwards by your riptide which could cause them to miss an ability or such.
4:
Use this one wisely. If you're using it in a lne, try to stand as close to the edge as possible, to close down the whole lane without a gap to fit in. You can use it trap enemies inside your Phoenix/Tower.
You don't have to use it in an offensive manner exclusivley. It's perfect for getaways. Also you can secure objectives likes gf and fg with it.
Passive: Omi
Use it wisely. For real. Especially early game.
Don't ever use abilities to clear out Xp camps when a mate is nearby to help you. It's a waste you'll regret as soon as the next fight starts.
This guide contains the main information I wanted to share. i will keep adding synergies and threats as well as a Pro/Con section and more.
There are also builds for other game modes as well as meme builds coming up (Yemoja Jungle actually works, yes).
Stay tuned and feel free to give feedback.
SMITEFire is the place to find the perfect build guide to take your game to the next level. Learn how to play a new god, or fine tune your favorite SMITE gods’s build and strategy.
Copyright © 2019 SMITEFire | All Rights Reserved


Leave a Comment This author would like to receive feedback
and suggestions about their guide.
You need to log in before commenting.
Collapse All Comments