
This guide has not yet been updated for the current season. Please keep this in mind while reading. You can see the most recently updated guides on the browse guides page
Vote received! Would you like to let the author know their guide helped you and leave them a message?

You wanna start to try and get Telkhines Ring online ASAP.
Alternatively to Cloak, you could choose to grab Beads first, however I like to have the extra sustain on hand from the beginning of the match.
 Manikin Scepter
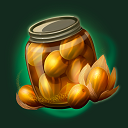 Golden Gooseberries
 Healing Potion
 Multi Potion
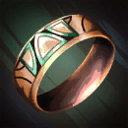
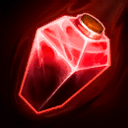
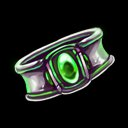 Emerald Ring
 Cloak of Meditation
 Claw Shard
Generally, you'll end up with HUGE Attack Speed off of this, which will mix well with your high CC kit. because of Hastened early on, you'll be able to chase down enemies while still landing your autos. basically, this build is good for ganking from early on, and providing good objective shredding late game with your team, while still being able to shred squishy gods fast and possibly even help do big dmg to tanks on account of Demonic Grip.
I recommend getting Berserker's Shield 3rd item, right after Hastened Ring, just because it gives MASSIVE Attack Speed, and Berserk after going below 60% hp is huge for you, since you get ANOTHER 20% attack speed as well as 5% dmg mitigation. It gives you slightly more sustain too, especially when paired with your 3, because of the prots. It's actually not often in the jungle that you'd build prots, so the prots on this combined with the attack speed really help you out in the jungle, be it against monsters or in a fight.
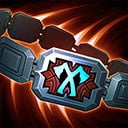
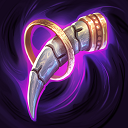
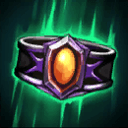 Telkhines Ring
 Hastened Ring
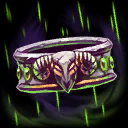
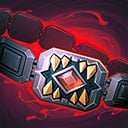
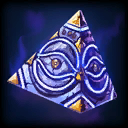
 Cyclopean Ring
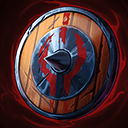 Berserker's Shield
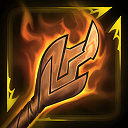
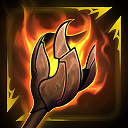
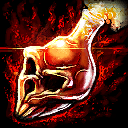
 Demonic Grip
 Manikin Mace
 Cloak of Ascetic
 Temporal Beads
Some alternate options for relics are: Cloak of the Avatar if you need a bit better sustain to escape, Emblem of Trembling Terror if you want to slow the enemy and make then do less dmg to you, Emblem of Increasing Peril if you want them slowed more as opposed to doing even less dmg, Belt of Insatiable Hunger if you think your team can get kills around you during the 8 seconds in order to refresh the effects and shred objectives better, or Belt of the Berserker if you wanna REALLY shred objectives quickly while the enemy isn't nearby.
 Emblem of Trembling Terror
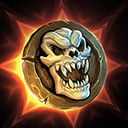
 Belt of Insatiable Hunger
 Belt of the Berserker
 Emblem of Increasing Peril
Not much to say here, but there are some alternate shards you could pick up. I generally recommend Claw Shard for it's extra damage and lifesteal, which is great for sustain early game, however Wing Shard is also super viable both offensively and defensively, due to the extra attack speed and movement speed. Horn Shard is great on Geb as well, since he has some rather higher cooldowns, at least early in the game.
You likely won't take it often, but if you're honestly comfortable without a shard, or find that you forgor to use your shard in the early game often, you can take the good ol' Vision Shard. It's still basically a ward, which can stop you from needing to buy wards as often in the early-mid game.
 Wing Shard
 Horn Shard
 Vision Shard
If the enemy team has a lot of healing, I recommend taking Toxic Blade as opposed to either Demonic Grip or Cyclopean Ring. If you decide you want a little better sustain and would like some lifesteal to compensate, then take Nimble Bancroft's Talon as opposed to Cyclopean or Demonic.
I wouldn't recommend it, as Manikin Mace is super good for shredding enemies with the DOT on your autos, but if you decide you want a little more prots while in the jungle, you can choose to go for Eye of the Jungle instead of Manikin Scepter off rip, and grab Protector of the Jungle in the late game for the protections. Do keep in mind that you only get those protections while in the jungle, so team fights in lane will leave you squishier, and you won't rly have extra damage to compensate for that.
 Toxic Blade
 Protector Of The Jungle
 Nimble Bancroft's Talon
ALWAYS buy a Baron's Brew in place of 2 multi's and a healing potion if you have Baron Samedi on your team. It's just better overall to have, and refills when you go back to the fountain.
Ward, ward, ward. You usually wanna have 2 wards on you in the mid-late game. If you have the space, make sure to get a Sentry Ward as well for warding the Fire Giant. This is the biggest thing as a Jungler to learn. Warding is sometimes hard to remember, but it's extremely important. I know you may want to buy your items faster, but it's often worth it to drop 100 gold on a couple wards when you can, because that vision can be the difference between getting ganked or backing off in time.
As always, Potion of Power is just great to have late game, and once your full build is online, make sure to grab Elixir of Power asap.
 Ward
Ward
 Sentry Ward
 Elixir of Power
 Potion of Power
 Baron's Brew
So, your 2 is your most important skill. The knock-up is super good, and can often force beads out of panicking Mid-laners. It's also good for damage when clearing out Jungle camps and wave early game. Huge pressure move, so it's your first and primary focus.
After that, focus your 1. Your 1 is a decent mobility, and once ramped up, it makes you CC immune, while also knocking the enemy forward when you hit them. This is best used to initiate ganks from the Jungle, which is the main way you'll probably use it. Can also be used in tandem with your Purification Beads to escape, altho that's not often my recommendation unless it's a tight situation.
Of course, get your ult at lvl 5 and level it whenever possible. Your ultimate is another very good CC, and it can output some decent dmg in a team fight or against a squishy. Use this to stop them from running when your other moves are on cooldown.
Finally, your 3 is your least focused, however still very useful skill. Your 3 will shield a teammate within range, however you can also target yourself with it. This is huge for surviving, and can often be the difference between you or a teammate living or dying in a fight. ALWAYS use this in a fight, especially late game. Try to focus using it on your team when you're not alone, unless you're low and/or the situation is rather dire.
 Y
Y
 B
B
 A
A
 X
X

Tap each threat level to view Geb’s threats
Tap each synergy level to view Geb’s synergies
Howdy lads, I'm Frisk. So uh. . . I play a lot of Jungle, and I rly like going off meta picks and bein' wild. That said, I've had a big fascination with Geb lately (mostly because of his Optimus Prime skin), and that's lead me to playing him in my favourite role. Now, I know that a Guardian in the Jungle seems like a bad idea, but trust me, it's surprisingly good. Guardians generally have high CC kits, which actually makes them prime real estate for auto attack-centered builds, because their high CC from abilities compliments a chase down build, which auto attack builds excel in due to items such as Hastened Ring, which will rid you of your movement slow due to auto attacks.
Anyone who's seen my previous build knows I love taking Guardians and giving them goofy auto attack builds in the Jungle, such as my only other build on SmiteFire, an auto attack Maui build. I play these a lot, so I can assure you that they work quite well.
So, the early game is actually quite simple, generally speaking. Buy your items, go to Duo-Side Speed Camp, clear it and then help the Mid-laner do their Attack Camp. From there, you wanna help the Mid-laner in lane for a short bit. During this phase, you wanna keep pressure on the enemy team with your 2, because it has a deceptively long range, and it does decent damage for the start of the game. If the enemy has too much pressure, you wanna use your 2 to keep them at bay so that your Mid-laner doesn't die early in the game. ALWAYS be ready to punish over extension by the enemy Jungler or Mid-laner if your Mid-laner is more aggressive. You can easily score an early game kill and catch them off guard with your 1, which will give a short stun and easily follow up with a couple autos and your 2. It's very easy for you to keep the enemy in range of your Mid-laner this way, which can get them melted quickly and give your Mid-laner the early advantage.
Now this is where things branch. Either you can choose to be a bit more passive and help until lvl 4, or you can start leaving Mid-lane at level 3. If you choose to stay for any reason, such as the enemy having high pressure and you trying to protect your Mid-laner, then you'll want to be passive and try not to take the farm too much from your Mid-laner. Also try to help your Mid-laner get the side harpies, as they can give a major Xp boost early game, granting you the advantage.
If, however, you choose to go your way, you can either start farming in the Jungle on the Solo-lane side, or you can try for early ganks quickly. I definitely recommend going for a gank in Duo if you see the enemy pushed up super far, otherwise I'd say you should go to Solo-side Jungle and start collecting your Speed camp and the mini-buff XP camp, before rotating to Duo-side Jungle and collecting the Health camp, Gold camp, and last Speed camp. Do this rotation until you get your first item, however keep an eye on the map and try to go for ganks if you see a good opportunity. You're extremely important for helping your team create an early game advantage.
So you now have your first item, which should be Telkhines Ring. now you will simply be doing your general rotation, except you'll be trying to force ganks whenever possible. Communicate with your team, and try to get them to kite their enemy out of tower so that you can easily pick them off in fights. This will create a gap that will give your team a huge advantage, allowing you guys to have a big gold lead and get your builds online sooner. This is generally how you want to play until you get to your 4th item. By that point, we start moving on to the late game, which is where you start to fall of compared to your heavy hitters on the team, such as your Mid-laner and ADC.
Late game can be quite complicated, as it's extremely reliant on how well you and your team did in the early and mid game. if you guys have been doing really good, then you'll likely be pushing for larger objectives together, such as Gold Fury or Pyromancer. During this stage, you should have high attack speed, so you'll actually be extremely useful for helping shred objectives along with your ADC. At this point, you basically fill the role of a semi-ADC, having fast autos for objective shredding, but also having good CC for fights. As you gain more objectives, keep wards placed in high traffic areas of the Jungle, preferably into the enemy's Jungle. This will allow your team to plan out objective attacks with more information, and lead to higher success rates in actually defeating the objectives without them being stolen by the enemy team. It's also important for keeping your team aware of the enemies' locations so they can safely retreat before getting jumped deep in lane.
Don't be afraid to split push sometimes. You do have high attack speed, and if your team can take on a 4v5, you can seriously be a huge help by taking towers and other objectives. You might not be able to solo things like the Gold Fury, but pushing lanes during team fights when you're too far to make it in time can throw off the enemy and not allow them to run down lane so much.
Above all, you're still rather squishy, so be sure to try and flank when going into team fights. Your 1, once you've gone far enough while using it, will knock the enemy back, so it's better used as a flanking option in team fights to push the back line up into your team, allowing them to be shredded quickly. Be sure to prioritize using your 3 on your Mid-laner or ADC in team fights, as those 2 are the squishiest on your team. That shield can be the difference between them living and dying.
So, given all I've informed you on, I hope you can give this build a try. Geb, despite not seeming like it, is actually quite an interesting and fun god to play in the Jungle. Flanking the enemy team as a giant rolling boulder (or in my case, truck) and launching them into your teammates is super funny, and often you'll just be having a ton of fun. And that's what matters most, right? Don't forget that this build is mainly to give you something unique to play and enjoy, so do have fun with it. Often, with Guardians in the Jungle, you gotta be a little less serious and just go with the flow. Anyway, hope y'all enjoyed the guide. Remember to have fun, and stay determined.
SMITEFire is the place to find the perfect build guide to take your game to the next level. Learn how to play a new god, or fine tune your favorite SMITE gods’s build and strategy.
Copyright © 2019 SMITEFire | All Rights Reserved


Leave a Comment This author would like to receive feedback
and suggestions about their guide.
You need to log in before commenting.
Collapse All Comments