
This guide has not yet been updated for the current season. Please keep this in mind while reading. You can see the most recently updated guides on the browse guides page
Vote received! Would you like to let the author know their guide helped you and leave them a message?

Standard start with some lifesteal + MP5 to help overall sustain in early game.
 Leather Cowl
 Morningstar
 Healing Potion
 Mana Potion
A hit-and-chase build, able to make you outmaneuver any enemy
Poisoned Star is very underrated in Hou Yi, as its slow can keep enemy in your Sunbreaker and/or in range for your Divebomb or just allowing you to catch up to the enemy
Wind Demon and Deathbringer will be your core crit dmg itens, with the 30% increased damage on crit hits and atk speed + pen% buff provided. Additionally, you'll get a relevant movement speed increase for some seconds, which combo well with the slow from Poisoned Star.
 Hunter's Cowl
 Transcendence
 Ninja Tabi
 Demon Blade
 Poisoned Star
 Deathbringer
AA killer, regardless of skills used
A good Crit raw dmg build, with good penetration and decent anti-ADC passive (due to Ichaival)
Although its a standard 'Staple ADC Build', it works fine in most matchups. keep in mind that this build provides no antiheals, slows or other passive utilities, so either adapting 4th item for the desired utility or going for other builds set up might suit you better.
Hunter's Cowl
 Dominance
Ninja Tabi
Dominance
Ninja Tabi
 Ichaival
 Rage
Deathbringer
Rage
Deathbringer
Build with good sustain (Devourer's Gauntlet + Asi)
Early game mana sustain can be an issue, yet Eye of The Jungle Passive can make up for it, specially for a rotating-ADC (as while in jungle, you'll get increased HP5 and MP5).
Given the increased dmg to jungle monsters, this build power spike requires you to rotate and help with red buff, oracles, rush alpha harpies whenever possible and ocasionally steal the purple buff from enemy ADC. It also makes much more easy to solo Great Scorpions in an earlier stage than Hunter's Cowl/Death's Toll starter builds.
Hydra's Lament and Jotunn's will help with cooldowns and remember to proc its passive everytime possible.
Mark of the Golden Crow will not only proc Hydra's passive, but also provide even more buffed dmg and secondary effects to all your skills.
 Protector Of The Jungle
 Devourer's Gauntlet
Ninja Tabi
Devourer's Gauntlet
Ninja Tabi
 Hydra's Lament
 Asi
Asi
 Jotunn's Wrath
Since your MP5 and HP5 bonus from Eye of The Jungle passive will trigger only while inside the jungle, Multi Potion might come in handy for sustain during lane combats.
 Eye Of The Jungle
 Spiked Gauntlet
 Multi Potion
Same starter from Crit DMG Build
Atalanta's Bow can be replaced by other itens, for a more utility-driven set up.
Toxic Blade or Brawler's Stick for antiheal
Ichaival for enemy atk speed decrease + phys power build up
Bloodforge for a good phys power surge + increased sustain
Overall, the pen% from Dominance + Executioner's debuff and Qin's Sais augmented health-based dmg are AA tankshredder cores, so the buy order should depend on each matchup, although this is the go-to for optimal uses of passives, in my opinion.
Hunter's Cowl
Dominance
Ninja Tabi
 The Executioner
 Atalanta's Bow
 Qin's Sais
Although nerfed, Fail-Not CDR% is very useful, specially after a Hou Yi ult, which should wipe out most of enemy team, leaving the survivors in even more disadvantage.
This build lacks high early AA speed, yet makes up for it with Rage right after boots since it requires stacking.
Wind Demon can be bought earlier then Dominance if the extra AA speed is needed.
 Death's Embrace
Ninja Tabi
Rage
Dominance
Demon Blade
Death's Embrace
Ninja Tabi
Rage
Dominance
Demon Blade
 Fail-Not
With Death's Toll starter, T1 Boots can work reasonably well for increased mobility in early Duo Lane
 Death's Toll
 Boots
Multi Potion
Boots
Multi Potion
Overall defensive options with good effects on Hou Yi
Berserker's Shield/ Shifter's Shield for phys protection and Atk speed upkeep/ Phys power surge, respectively
Mantle of Discord, Spirit Robe and Void Shield mostly for its passives
Winged Blade and Witch Blade for utility reasons, on passive triggering
Ancile as a good anti-mage Carry (great for countering an enemy Sol-carry, for instance)
 Berserker's Shield
 Mantle of Discord
 Shifter's Shield
 Spirit Robe
 Void Shield
 Winged Blade
 Ancile
 Witchblade
Itens showed here are not included in the sample builds provided, yet they can all be interchangeable;
Just make sure to combine effects for optimal dmg output with raw dmg (phys power) + pen (raw) + pen% + CDR% + crit chance (if going for crit builds)
Malice for increased crit + overneeded CDR%
Brawler's Stick or Toxic Blade/Shadowsteel Shuriken for anti-heal builds
Odysseus' Bow for AA speed and using its passive for lane clearing with poke, preserving skill use
Bloodforge for a kill-chasing sustain (due to passive shield + movement speed increase)
Heartseeker for extra skill dmg and mana (combo well with Transcendence's passive while also increasing your phys power for its own passive)
Ornate Arrow/ Crusher for aggresive builds
Silverbranch Bow for the AA-speedcap maniacs (works well in Tankshredd setups)
 Malice
 Bloodforge
 Brawler's Beat Stick
 Heartseeker
 Odysseus' Bow
 Shadowsteel Shuriken
 The Crusher
 Toxic Blade
 Silverbranch Bow
For me, Aegis + Blink is a good comprehensive ADC relic kit, yet Heavenly wings and Sundering Spear can come in handy, depending on the matchup.
 Aegis Amulet
 Blink Rune
 Heavenly Wings
 Sundering Spear
 Horrific Emblem
 Belt of Frenzy
Make sure to exploit all secundary effects of skills while target is marked with Mark of the Golden Crow.
Overall, you should go for:
1st Ricochet for lane clearing + poke damage (dmg scale on lvl 9 instead of Sunbreaker's should give you a good advantage on 1v1's);
2nd Mark of the Golden Crow, although lvl 2 you should go for Divebomb upgrade I;
3rd Divebomb for engage/escape;
4th Sunbreaker for that incredibly loud and high dmg-output ult.
 Y
Y
 B
B
 A
A
 X
X

Tap each threat level to view Hou Yi’s threats
Tap each synergy level to view Hou Yi’s synergies
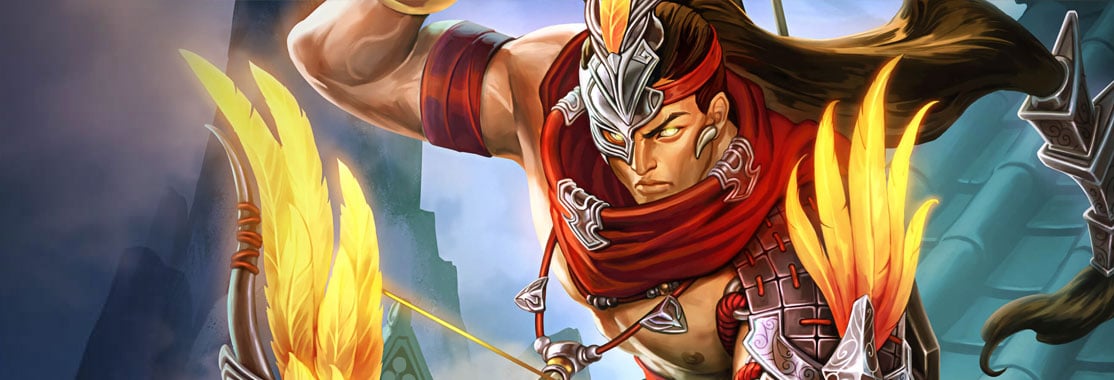
While for most hunter's, you have trouble choosing which guide to open first, I found the lack of updated tailored builds for Hou Yi compelling, so here's my attempt to make you start testing this awesome Hunter.
Its passive by itself can force enemy ADC to let go of crit builds, rendering as a good utility for the whole team as you get 3s of uncounterable critical dmg immunity everytime enemies inflic critical damage on you (either magical - aim somewhere else, Olorun - or physical)
His kit, although hard to full-combo, is incredibly intuitive, designed to prevail in 1v1's and full of secondary skill effects to keep enemies inside your ultimate damaging skill AoE
Ricochet may require some training to actively land it where you want it, yet is absolutelly gamechanging in combat. Take your time in practice mode to test different angles while advanced in enemy tower to estimate how to bullseye the low-HP enemy "safely" teleporting to fountain.
I might write an overall view of Hou Yi's Carry gameplan in conquest with some useful tips/strategies that I use in the future; but for the time being, lets see the community feedback on the example builds itself before I invest more time to this future chapter
Make sure to exploit all secundary effects of skills while target is marked with Mark of the Golden Crow in addition to the increasing dmg effect of this skill itself.
1st Ricochet for lane clearing + poke damage. Keep in mind that it greatly extends in range and damage during ricochets, so you can poke enemies while completely safe near your tower. Keep in mind that either pressing on enemy tower/behind your own, the Tower itself and surrounding walls do pivot ricochets, so it all comes to your positioning for that skilfull shot. Jungle combats are marvelous for that cluster combats in more confined places, allowing more easily that triple ricochet strike on enemies (roughly 5x damage upon all 3 hits)
2nd Mark of the Golden Crow: Although 1st upgrade only comes in lvl 3, its scaling effect for your AA's, Ricochet, Divebomb and Sunbreaker will make you level it up right after Ricochet. Normally, your combos will start with this skill (as it does last long and will make the difference for your dmg output, especially in 1v1's.
3rd Divebomb: Hou Yi's best skill in my opinion, as it is useful for both engage/escape; However, its quick casting animation is what really makes the difference for me; While Anhur's escape is incredibly good, go through walls and have a nice range, it does take some animation time to trigger and effectivelly get out of harm. Hou Yi's Divebomb cast immediatelly throws him up in the air safely watching the havoc from above and THEN you can take your time to aim where to land with the same perks (go through walls, good range and damaging impact - with possibility of knockback if target has Mark of the Golden Crow). Baron Samedi's/Ah Puch/Scylla's/Hades'/AoE ults in general can be easily escaped with Divebomb, as you are quickly launched in the air and can idle there for some time while aim where to land. This will evade most, if not all, ground-level damaging effects. However, its damaging scale should not be your priority, so leave it as last skill while leveling your ult as it becomes available. Additionally, mind the CD time, or else you'll be engaging on a suicide mission rather than your killing skill rotation.
4th Sunbreaker: upgrade as it becomes available (except on lvl 9, as Ricochet's scale fare better at this point of the game), since this skill's damage scaling does help a lot in this kit and will make the difference in teamfights mid game or even enemy tower pressure/gankbuster. Keep in mind that it does take some time to start dealing damage, so careful prediction of enemy movement/synergy with some kind of CC is of utmost importance for maximizing dmg output. A Marked enemy will move slower inside the AoE, take additional dmg each .5s and is prone for a Ricochet's stun and Divebomb's Knockback secundary effects - so your whole kit is designed to keep enemies inside this obnoxiously damaging and loud ability.
WIP
<let me know if you think this will indeed help out>
SMITEFire is the place to find the perfect build guide to take your game to the next level. Learn how to play a new god, or fine tune your favorite SMITE gods’s build and strategy.
Copyright © 2019 SMITEFire | All Rights Reserved


Leave a Comment This author would like to receive feedback
and suggestions about their guide.
You need to log in before commenting.
Collapse All Comments