

This guide has not yet been updated for the current season. Please keep this in mind while reading. You can see the most recently updated guides on the browse guides page
Vote received! Would you like to let the author know their guide helped you and leave them a message?
Jormungandr does more than devour mortals, he devours mana as well. In order to destroy your enemies you have to be comfortable with chaining your abilities. This will almost always end with you having 0 mana and your enemies fleeing with terror. Starting out with chalices will help make your early game a little more manageable, when playing as Jorm almost any jungle buff will work on you, if your mage has good mana rates then blue will help exponentially, if your playing with a Rama then maybe your precious purple will have to be given up. Remember, you are a guardian, you should be putting your allies first.
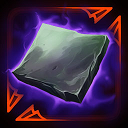 Tainted Steel
 Chalice of Healing
 Chalice of Mana
 Magic Shell
For Newcomers to Jorm please feel free to swap shoguns out with genjis if you find yourself struggling with cooldowns, genjis will allow you to use your abilites more often as long as you stay on top of your mana consumption. When it comes to relics it really is dependent on your allies and the team you are facing, if you feel like you need to use beads or aegis then please do, they are always a safe bet. I use shell and belt quite often however as I find it allows me to extend myself where I otherwise couldnt had, belt will especially help in taking down tower/phoenix in a pinch. The game is all about what feels comfortable to you however so use what you find most fitting.
 Tainted Breastplate
 Shogun's Kusari
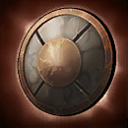 Gladiator's Shield
 Prophetic Cloak
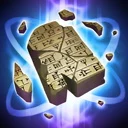 Tablet of Destinies
 Spirit Robe
 Chalice of Healing
 Chalice of Mana
 Fortifying Shell
 Belt of the Berserker
 Tainted Breastplate
 Genji's Guard
 Gladiator's Shield
 Prophetic Cloak
 Tablet of Destinies
 Spirit Robe
 Chalice of Healing
 Chalice of Mana
 Fortifying Shell
 Belt of the Berserker
 Tainted Breastplate
 Shogun's Kusari
 Gladiator's Shield
 Prophetic Cloak
 Genji's Guard
 Spirit Robe
 Chalice of Healing
 Chalice of Mana
 Fortifying Shell
 Belt of the Berserker
I hope that everyone that uses this build enjoys geometry because you will be seeing circles everywhere you go. Venomous Haze will place a field that does a small amount of damage, the main use of this ability is not the damage however but the fact that being near one of these circles will buff Consuming Below. In order to use this to its fullest potential you must first use Venomous Haze, then enter into Submerge, when in this state you will be able to place two more toxic clouds when near your original placement, this allows 3 clouds to be down at once, if you are able to get all 3 near an enemy then using Consuming Below will not only allow you to do an annoyingly large amount of damage but also inflicting Trembling and Slowing
Tap each threat level to view Jormungandr’s threats
Tap each synergy level to view Jormungandr’s synergies
Welcome, fearless warriors of the battleground! As you step into the chaotic realm of Joust, you may find yourself drawn to the enigmatic and serpentine presence of Jormungandr, the World Serpent. A formidable guardian of Norse mythology, Jormungandr emerges from the depths of the abyss to wreak havoc upon any who dare to challenge him! In this guide I will explain not only how to properly build the titan of a god but also ways to play him with keywords explained, important words are color coded and each chapter will have the color in its name. I also have left notes on various areas that expand on what I show and or say. Welcome all!

Immovable - This is Jormangandrs passive, Jormangandr is so big that he cannot be affected by any hard displacement, instead he will be dazed which is a slow that will fade over time, while dazed he will take more damage, Jormangandr's basic attacks cannot proc item hit effects.
Venomous Haze - This ability fires noxious spit that deals damage while any god stands in its area, these areas will last for 20 seconds and also inflict 20% slow.
Damage: 80/120/160/200/240 (+40% of your Magical Power)
The main use of this skill is not the damage itself but the use of it in a combo which will be explained at the end of this section.
Consuming Bellow - Consuming Bellow is a roar that takes 1.2 seconds to charge, at the end of this charge it will deal damage to any nearby gods, it will also inflict trembling and slowing, slow is applied at 30% for 1.5 seconds. Consuming Bellow is buffed when an noxious spit is around, this will be our main source of damage. At the end of the roar you will also be empowered, while empowered your basic attacks will fire faster, this is the only way to buff your attack damage as Jormungandr's attacks are not affected by fire rate items, him and King Arthur are the only two gods who have this effect.
Damage: 120/180/240/300/360 (+45% of your Magical Power)
Buffed Damage: 20/25/30/35/40 (+10% of your Magical Power)
Empowerment last for 2 seconds.
Submerge - Submerge sends Jormangandr into a hidden state, in this state you will sink into the ground, turn invisible, allow you to sense nearby enemies, and gain a movement speed buff. This state last for 5 seconds, at the end of these 5 seconds or when using the ability again you will leap out of the ground and throw nearby gods into the air, Emerging near a toxic cloud will create two new ones in the direction Jormungandr is facing. these will not last as long as others however. If you are hit while in stealth you will not leave the state however you will be visible to gods. Gods cannot see you in stealth but there are sound cues that enemy gods can use to figure out where you are.
Damage: 70/125/180/235/290 (+50% of your Magical Power)
Movement speed buff: 35%
The World Serpent - When using this ability you will charge up before diving into the ground, once in the ground you will enter an invincible state. You will then be able to choose an area to leap to, when leaping you will be in an enlarged state and deal damage on anyone you hit on the way down, leaving behind a noxious cloud where you hit. when emerging and submerging you will also knock any nearby god into the air. You are able to leap 3 times before you are returned to a normal state.
Submerge Damage: 150/200/250/300/350 (+35% of your Magical Power)
Emerge/Crash Damage: 75/100/125/150/175 (+20% of your Magical Power)
COMBO - In order to chain your abilities first place Venomous Haze either near enemies or at a location where enemies will be, next use Submerge. When enemies are near Venomous Haze go next to them while in submerge and emerge, this will knock the enemy up and place 2 more Toxic Clouds, Next activate Consuming Bellow and try to keep the enemy god near your toxic clouds, if you hit the enemy with Consuming Bellow you will deal an immense amount of damage. Your ultimate should be reserved for either finishing off enemy gods or escaping a tense situation.
_______________________________________________________________________________________ OTHER GOD ABILITES EXPLAINED
Rain Fire - Rain Fire is Agnis ulitmate ability, he can summon a giant meteor at his ground target location. 1 can be summoned every .8 seconds. 3 total. this is an ability to watch out for.
Mounted Archery - This is Hachimans ulitmate ability, Hachiman will ride a horse and charge forward, making him immune to crowd control and allowing him to fire an arrow. Jormangandr has very little escape so be careful when facing a hachiman as he can easily chase.
Shogun's kusari is an item that gives:
+45 Magical Protection
+150 Health
+20 MP5
+10% Cooldown Reduction
It will also give an aura around the player that boost any nearby allies attack speed by 30%.
If you find yourself struggling with cooldown rates you can swap out Shogun's kusari for Genji's Guard
Genji's Guard will give:
+100 Health
+60 Magical Protection
+40 MP5
+10% Cooldown Reduction
Very comparable to Shogun's kusari however its passive will help any cooldown rates. When you take any magical damage from abilities your cooldowns are reduced by 3s. This can only occur once every 30s.
Jormungandr may be one of my favorite gods in the entirety of smite, he is an exceedingly good guardian that can both tank damage and dish it out. Some of the most fun I have had in Smite is playing as Jormungandr while with my friends. I hope that everyone picking him up enjoys him just as much as me. If you have any tips, comments, or feedback please feel free to let me know as this is my first guide!

SMITEFire is the place to find the perfect build guide to take your game to the next level. Learn how to play a new god, or fine tune your favorite SMITE gods’s build and strategy.
Copyright © 2019 SMITEFire | All Rights Reserved
I mean the point of getting Tablet early is to get more out of it. If you're getting it that late there's no point building it.