
This guide has not yet been updated for the current season. Please keep this in mind while reading. You can see the most recently updated guides on the browse guides page
Vote received! Would you like to let the author know their guide helped you and leave them a message?

Given Death's toll Mana regen, you should be able to hold your own with only healing potions (yet multipots can be usefull too).
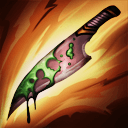
 Death's Toll
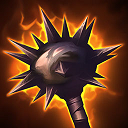
 Mace
Mace
 Healing Potion
 Multi Potion
Very occasionally you'll have the bonus proc for Silverbranch bow with full tide. Specifically for Charybdis, I dont find it useful for pen. Shadowsteel can aid a lot more for increased crit + strong end-game antiheal. Atalanta's or Executioners are also good viable options
 Death's Embrace
 The Crusher
 Asi
Asi
 Demon Blade
 Envenomed Deathbringer
 Shadowsteel Shuriken
Fail not can be used mostly for the reduced CD%, as the ultimate is focused in securing kills, rather than engaging in combat
Ichaival excels at countering enemy ADC early game (I go for it instead of crusher)
Qin's for engagin in tankier enemies
Rage for overall crit builds
Shifter's Shield only if defense is sorely needed
Executioners for rapidly shredding down tanks
 Atalanta's Bow
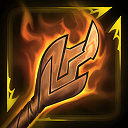
 Death's Temper
 Fail-Not
 Ichaival
 Qin's Sais
 Rage
Rage
 Shifter's Shield
 Silverbranch Bow
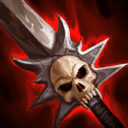
 The Executioner
 Toxic Blade
Death's Embrace
The Crusher
Asi
The Executioner
Qin's Sais
Toxic Blade
Death's Embrace
The Crusher
Asi
The Executioner
Qin's Sais
 Dominance
Any deathbringer morph suits this build fine
Death's Embrace
Ichaival
Asi
Demon Blade
Shadowsteel Shuriken
 Deathbringer
Capsize benefits the most from prog dmg increase and is a very good early skill, as giving slow, debuff protections and good range ar optimal to get some early kills.
Whirlpool Form is arguably the best escape (if not best skill) ingame. An Aegis + Beads that can damage and knockup enemies is as insane as it sounds. Level it up 2nd for the reduced cooldown
The Maw Hungers should be leveled as available, given the good dmg scaling.
Spike Shot should be leveled last, as it increases cost and it does not benefit so much of the increased dmg.
 Y
Y
 B
B
 A
A
 X
X

Tap each threat level to view Charybdis’s threats
Tap each synergy level to view Charybdis’s synergies
SMITEFire is the place to find the perfect build guide to take your game to the next level. Learn how to play a new god, or fine tune your favorite SMITE gods’s build and strategy.
Copyright © 2019 SMITEFire | All Rights Reserved


Leave a Comment
You need to log in before commenting.
Collapse All Comments