
Vote received! Would you like to let the author know their guide helped you and leave them a message?


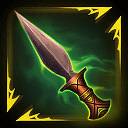
![]() Bumba's Dagger upgrades to
Bumba's Dagger upgrades to ![]() Bumba's Spear, which is our best damage option late game.
Bumba's Spear, which is our best damage option late game.
 Bumba's Dagger
 Mace
Mace
 Healing Potion
 Blink Rune
 Horn Shard
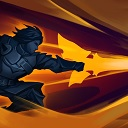
Deals the highest amount of ability damage. Immunities from his kit and his mobility lets him get away with full damage builds.
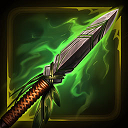 Bumba's Spear
 Jotunn's Wrath
 Brawler's Beat Stick
 Runebreaking Hammer
 Serrated Edge
 Heartseeker
 Temporal Beads
 Scorching Blink Rune
![]() Mantle of Discord would replace
Mantle of Discord would replace ![]() Heartseeker if you want the extra defense for the 1v1 / dive.
Heartseeker if you want the extra defense for the 1v1 / dive.
![]() Bloodforge would replace
Bloodforge would replace ![]() Heartseeker if you wanted more sustain / snowball.
Heartseeker if you wanted more sustain / snowball.
![]() Hydra's Lament would replace
Hydra's Lament would replace ![]() Runeforged Hammer if you are used to this playstyle. The damage is about the same, except you have to be in melee range.
Runeforged Hammer if you are used to this playstyle. The damage is about the same, except you have to be in melee range.
 Mantle of Discord
 Bloodforge
 Shadowdrinker
 Y
Y
 B
B
 A
A
 X
X
Tap each threat level to view Lancelot’s threats
Tap each synergy level to view Lancelot’s synergies
|
Passive -
|
|
Ability 1 -
If he's mounted, this ability will instead cause him to dismount, causing his horse to dash through enemies, dealing damage and slowing all enemies in-front of him. |
|
Ability 2 -
If mounted, |
|
Ability 3 -
If he is stunned or the shield is broken, he is forcibly dismounted. If used while mounted, |
|
Ultimate -
|
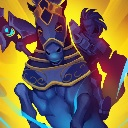
![]() Lancelot is a highly mobile assassin, and his kit is designed to excel at dodging enemy abilities. When played at his best, he becomes very oppressive to play against. I'd like to use this part of the guide to give a thank you to his horse, truly the MVP at carrying fights. Thank you for making the 1v1 a 2v1 Mr. Horse, and I hope to work well with you in the future ^^
Lancelot is a highly mobile assassin, and his kit is designed to excel at dodging enemy abilities. When played at his best, he becomes very oppressive to play against. I'd like to use this part of the guide to give a thank you to his horse, truly the MVP at carrying fights. Thank you for making the 1v1 a 2v1 Mr. Horse, and I hope to work well with you in the future ^^
SMITEFire is the place to find the perfect build guide to take your game to the next level. Learn how to play a new god, or fine tune your favorite SMITE gods’s build and strategy.
Copyright © 2019 SMITEFire | All Rights Reserved


Leave a Comment
You need to log in before commenting.
Collapse All Comments