Smitefire logo

Join the leading SMITE community.
Create and share God Guides and Builds.

Create an MFN Account


Or

Vote received! Would you like to let the author know their guide helped you and leave them a message?

Banner for Chronos guides

GRANDMASTER CHRONOS ADC GUIDE!

2 0 4,976
by TottiGR updated April 9, 2024

Smite God: Chronos

Build Guide Discussion 0 More Guides
Tap Mouse over an item or ability icon for detailed info

Chronos Build

Starting Chronos Build

Notes Sands of Time will provide you of good MP5 and cooldown during early game.

Golden Shard it is always the best choice because will provide you with Golden Gooseberries's passive so you will have a really good early push!

Notes

Sands of Time will provide you of good MP5 and cooldown during early game.

Golden Shard it is always the best choice because will provide you with Golden Gooseberries's passive so you will have a really good early push!

Build Item Sands of Time Sands of Time
Build Item Spellbook Spellbook
Build Item Healing Potion Healing Potion
2
Build Item Multi Potion Multi Potion
Build Item Golden Shard Golden Shard
Build Item Purification Beads Purification Beads

Full Chronos Build

Notes The Alternate Timeline is the best starter with mages because if you get killed, you will get revived.

Book of Thoth provides you with a lot of damage and penetration.

Spear of Desolation is a really good choice, gives you penetration, good power and CD.

Polynomicon is the best item in this build, a cool choice for bursting enemies after using one skill.

Typhon's Fang is a perfect lifesteal item for sustaining yourself during midgame/lategame fights. It also has penetration that fits perfectly for your first objective that is killing tanks.

Calamitous Rod of Tahuti is good if you feel like not having enough magical dps, this item is going to fit perfectly with the pen %.

Notes

The Alternate Timeline is the best starter with mages because if you get killed, you will get revived.

Book of Thoth provides you with a lot of damage and penetration.

Spear of Desolation is a really good choice, gives you penetration, good power and CD.

Polynomicon is the best item in this build, a cool choice for bursting enemies after using one skill.

Typhon's Fang is a perfect lifesteal item for sustaining yourself during midgame/lategame fights. It also has penetration that fits perfectly for your first objective that is killing tanks.

Calamitous Rod of Tahuti is good if you feel like not having enough magical dps, this item is going to fit perfectly with the pen %.

Build Item The Alternate Timeline The Alternate Timeline
Build Item Book of Thoth Book of Thoth
Build Item Spear of Desolation Spear of Desolation
Build Item Polynomicon Polynomicon
Build Item Typhon's Fang Typhon's Fang
Build Item Calamitous Rod of Tahuti Calamitous Rod of Tahuti
Build Item Temporal Beads Temporal Beads
Build Item Aegis of Acceleration Aegis of Acceleration

Other Items

Notes Phantom Shell is a strong option when the enemy team has an auto attack jungler like Mercury, Kali or Bakasura... instead of buying Aegis as second active (mitigations will save your life while you can use autos).

Obsidian Shard one of the best choices if you need penetration.

Bancroft's Talon can always help you to have a sustain during laning phase and lategame fights.

Breastplate of Determination is one of the best defensive choices for hunters, as it provides you with a good amount of magical and physical defenses and cooldown reduction.

Notes

Phantom Shell is a strong option when the enemy team has an auto attack jungler like Mercury, Kali or Bakasura... instead of buying Aegis as second active (mitigations will save your life while you can use autos).

Obsidian Shard one of the best choices if you need penetration.

Bancroft's Talon can always help you to have a sustain during laning phase and lategame fights.

Breastplate of Determination is one of the best defensive choices for hunters, as it provides you with a good amount of magical and physical defenses and cooldown reduction.

Build Item Bancroft's Talon Bancroft's Talon
Build Item Breastplate of Determination Breastplate of Determination
Build Item Obsidian Shard Obsidian Shard
Build Item Phantom Shell Phantom Shell

Chronos's Skill Order

Time Rift

1 X Y
Time Rift
1 4 6 8 9

Accelerate

2 A B
Accelerate
3 12 13 15 16

Stop Time

3 B A
Stop Time
2 7 10 11 14

Rewind

4 Y X
Rewind
5 17 18 19 20
Time Rift
1 4 6 8 9

Time Rift

1 X
Chronos creates a rift in time, damaging all enemies in the area.

Ability Type: Circle, Damage
Damage: 80 / 125 / 170 / 215 / 260 (+80% of your Magical Power)
Radius: 10
Cost: 50 / 55 / 60 / 65 / 70
Cooldown: 5s
Accelerate
3 12 13 15 16

Accelerate

2 A
Chronos accelerates himself over time, allowing him to move faster initially and gain speed over time. While active, his Attack Speed is increased. This ability also stops the Wheel of Time.

Section I: Heal 1% Max Health Per Second
Section II: 100% Mana Refund On Abilities
Section III: +35% Magical Power
Section IV: +35% Magical Power Contribution to Basic Attacks

Ability Type: Buff
Movement Speed: 20% Initial + 12 / 14 / 16 / 18 / 20% over time
Attack Speed: 25 / 27.5 / 30 / 32.5 / 35%
Lifetime: 7s
Cost: 60 / 65 / 70 / 75 / 80
Cooldown: 14s
Stop Time
2 7 10 11 14

Stop Time

3 B
Shooting forward spinning gears of time, any enemies hit by Chronos' attack have their Attack Speed reduced and Ramp to a Stun, taking damage on the initial hit and again when they are stunned.

Ability Type: Line, Crowd Control, Damage
Damage (Applied Twice): 50 / 75 / 100 / 125 / 150 (+45% of your Magical Power)
Stun: 1s
Cost: 65 / 70 / 75 / 80 / 85
Cooldown: 16 / 15.5 / 15 / 14.5 / 14s
Rewind
5 17 18 19 20

Rewind

4 Y
Chronos travels through time to where he was 8 seconds ago, gaining Health and Mana back to the values of that time. All of his Cooldowns are instantly reset as well.

Ability Type: Buff
Cost: 100
Cooldown: 100 / 95 / 90 / 85 / 80s

Chronos Threats

Tap each threat level to view Chronos’s threats

Max
4
Major
0
Even
0
Minor
0
Tiny
0

Chronos Synergies

Tap each synergy level to view Chronos’s synergies

Ideal
3
Strong
0
OK
0
Low
0
None
0

Introduction

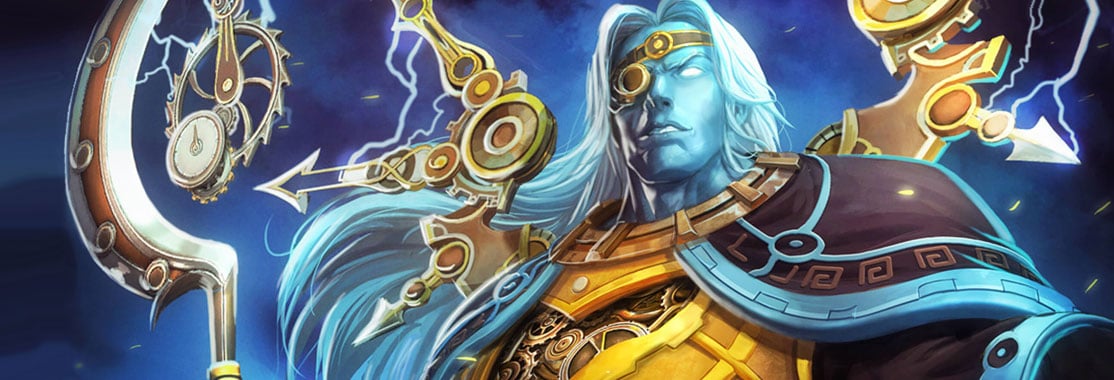
Hey, this guide is brought to you by TottiGR! I started playing Smite on PC in February 2014. I have been playing competitive since 2016 and I have been a professional Smite player between March 2020 to July 2023. I have played in different teams like JustF6, Gilded Gladiators or Tartarus Titans this last year in the Smite Pro League (You can always check the SmiteVod Youtube Channel where there's my professional games recorded). I have peaked 3500 MMR GrandMaster/Masters in Ranked Conquest on PC platform every season since 2017 (SEASON 4). I also made Smite Masters (LAN) 4 times in 2022 so I really think I have the knowledge in guiding about the ADC role in SMITEGAME. I hope you find this guide as a useful learning resource for playing Chronos as an ADC.


Here are my socials:

Abilities

Chronos' Abilities


Passive - Time Lord

Chronos becomes empowered as time flows around him. Every 2 minutes he gains a Stack that increases his Magical Power. Stacks up to 25 times, Stacks are permanent.

This passive helps Chronos become really strong in lategame. He gains every 2 mins magical power for 25 stacks so you need to play passive during early game and try to stay safe before lategame fights, this is one of the main reasons you should always build high magical power items.

I do really recommend to buy Polynomicon because the passive is indirectly an enhancer to the burst focused build.


Ability 1 - Time Rift

Chronos' main clear and poking ability. It has a really low cooldown so you should always look to try to poke the enemies instead of pushing the wave because you will always have before level 12 your shard that will help you a lot with the push.

You will always have Sands of Time that will decrease even more the CD's of this skill so it is always good to know and play around this skill!


Ability 2 - Accelerate

This ability is one of the most, if not the most, important ability of Chronos,
as it steadily provides a boost to his movement and attack speed.

There is also a second mechanic that ties directly into his Wheel of Time. Depending on when you activate this skill, you can also obtain an extra bonus. The first section heals you for 1% of your HP per second. The second section recovers all the mana used when you activate your skills. The third one increases your Magical Power and finally, the fourth section provides your AA extra damage based the Magical Power you have.


Ability 3 - Stop Time

It is basically a skillshot that Chronos sends out in a straight line, and if a minion or an enemy god gets hit, they will take damage and get stunned.

This skill has two ticks, the initial one when the enemy first gets hit, and a subsequent one once they get stunned.

You should always look to use this skill when fighting against the other hunter to force them to use Temporal Beads or ultimate. You can also save it for enemy ganks or in cases when you get dove during teamfights by enemy frontlaners.

!NEVER FOR PUSHING!


Ultimate - Rewind

Chronos' ultimate ability - it sends him back in time to where he was 8 seconds ago, and all of his cooldowns, HP and Mana are instantly recovered as well as he was eight seconds ago.

You are always immune to CC's while casting the skill but you can also get killed during the cast. It also makes the enemy curse you out each time you use it, on account of how annoying it is to lose out on a kill.


MAIN Chronos COMBOS:

Time Rift > Accelerate (Section 3 or 4) > Auto Attack ( Polynomicon Proc) > Stop Time > Basic Attack ( Polynomicon Proc) > Time Rift > Basic Attack (Polynomicon Proc)

Repeat again (you will have low CDs so you won't have any problem about repeating the same combo twice) or you can just use Rewind to comeback to the first step with all the CDs reset.

Accelerate (section 3 or 4) > Stop Time > Basic Attack (Polynomicon proc) > Time Rift > Basic Attack

Play with your low CDs and keep doing the same combo over the time, just try to poke as much as possible because in order to master this god, you need to adapt yourself to the poking playstyle!

How To Play Chronos

Gameplay Start / Early Game:
  • Start at the Gold Fury side Green buff. When it spawns, hit it with an auto attack to leash/aggro the camp and pull it towards the exp camp, meanwhile the support deals damage to the camp, after doing both things, you two will go to the purple buff, do it and then come to lane to push the minions.

  • After these camps are cleared you will be level 2 so you should level up your Stop Time so you will have an skill that can easily avoid ganks or getting killed by stunning the enemies while dealing damage over them.

  • After pushing 3 wave, shield buff will spawn so your support and you will go for it depending of the pressure wave; if you have no wave pressure you will need to ask your jungler for coming to fight it or just leave it, but if you have hardly won the push of the wave you should use your attack speed shard to do it as quick as possible, for securing the buff you should always play around the Time Rift cooldowns. If someone comes to contest, you should always try to fight them instead of securing the buff because you have a really good god for early fighting.

  • After picking it up make your way back to the centre of the lane. If you think it's going to be hardly difficult to secure the buff, just run back into the lane and pressure the enemies by pushing the wave quickly.

  • From here you will usually fight the enemy ADC and support during wave pushes in lane with your own support. Most of the fights you should take are around shield buff and depending on yours and their early pressure/clear around your own purple buff or theirs (remember you can pull the Purple buff wherever you want so if you have no pressure / you are low hp ask your support to be in the pit before it spawns and tell him to leash it as far as needed to not get invaded by the other duo lane)

  • This GOD has a really good fighting kit of skills so you should be always looking to poking trades 1vs1 with the other ADC (if you are ahead). Don't try to risk your life so you can poke the enemy ADC from the distance by using Time Rift with the Stop Time that can easily get an stun on him and create a possibility to kill him, if you don't wave any wards spotted on the map remember to take care of it. Just be confident during laning phase, you should always look to maintain a poking playstyle from the distance, your confidence will play a really good paper on succeeding, so just try it out. If you don't risk you will never achieve :p.

  • An important advice as an ADC main is to be active in communication, always try to tell all the information you can to your team like your own purple, shield and their purple timer (if possible), if there is any one spotted in the wards you placed, if someone is trying to dive you, if they are doing Gold Fury... This type of information will make your jungler and support pathing to gank your lane easier and make you having bigger chances of getting a lead over the other hunter.

  • REMEMBER to always buy wards, warding correctly with aggressive Sentry Wards will determine half of the game around the Gold Fury objective and warding defensively will make you be more aware about possible ganks so you will be safer in lane.

Mid Game:

  • As the match goes towards the mid game, other than the usual farm opportunities you'll be looking to rotate over the Stygian Beacon for your team and try attempt, contest and steal (if the enemy is attempting to kill them) the Gold Fury.

  • Remember to rotate when there is no duo jungle remain like purple or shield buff and to have the wave pushed before rotating because you will fall much behind in farm compared to your enemy ADC. (DO NOT ROTATE IF YOU ARE 2 OR MORE LEVELS BEHIND THE OTHER HUNTER!)

  • When the Beacon spawns often both teams will try rotate over to control it, especially the mid, support and jungle. You will need to think about who is more likely to have their teammates to rotate over first to impact your decision if contesting the beacon will be worth it and if there is any kill potential around the objective.

  • As for Gold Fury opportunity they will vary on factors such as: your team's overall objective shred, your ADC's current objective shred / build, your team's map pressure, how strong each team's teamfight is, where on the map everyone is (i.e. if one team is doing Gold, the other may decide to do Pyro as a smaller trade), if any members of the enemy team are on a respawn timer, etc...

  • It is so important to have warded (with Sentry Wards if possible) the Gold Fury during the Mid Game because it is the principal objective between minute 10 to 20 with the Pyromancer.

  • Stay aware of rotations (jungle and support) during this minutes because your death as ADC will be a really good factor over pulling Gold Fury or even burst it. So your team won't have any chance of contest.

  • Not dying over rotations, map awareness and warding are highly important over the games. You will always need to position yourself beside de midlaner for peeling each other over team fights (call who is doing engage on you, relics and this type of stuff that is going to make an easier way to make your team win the team fight)


Late Game:
  • As for late game teamfights, most often you should position yourself safe, in the "backline" (behind your team's solo and support - who generally are the "frontline") and will play around your midlaner to deal with the enemy frontline and jungler, while making sure to put out as much damage as possible to the highest threats on the enemy team.

  • Make sure you have upgraded Temporal Beads and Aegis of Judgement before going into the Fire Giant. I really good advice is to use actives as soon as the solo laner, support or jungler engages on you to try to avoid as much damage and crowd control as possible, if you stay safe as an ADC on a late game teamfight, your team will have enough DPS to do Fire Giant or if you kill all your enemies, you can even finish the game.

  • When it comes to Fire Giant opportunities, often there can be stalemates where both teams will try to force a teamfight or look for lone picks in order to gain an advantage, sometimes involving one team going for a non fully committing attempt at doing the objective to bait the other team to step up.

  • IT IS SO IMPORTANT TO USE YOUR ULTIMATE AS AN ENGAGE OR EVEN ESCAPE DURING TEAMFIGHTS. It can also be used to burst objectives like Fire Giant or Gold Fury because the enemies will be slowed and won't be able to cast quickly their abilities without using Temporal Beads or an immunity ability.

  • BE CONSTANTLY CALLING ALL THE INFORMATION: WHEN THEY ARE ENGAGING ON YOU, BE ALWAYS SURE ABOUT YOUR DECISION MAKING, IF YOU DOUBT YOURSELF OR EVEN YOUR TEAMMATES YOU WILL NEVER SUCCED!

How To Ward

Low Pressure Warding:

Here are warding spots for ADCs if you are behind with gold or experience compared to the other hunter. If the enemy team has your purple timer you should always try to Sentry Wards your purple buff and make sure to call your teammates at least 1 minute before spawning.


In case you have low pressure god but none is invading purple you can also ward like in the photo below. You will always know when someone is coming and you won't have to outposition yourself to ward so you will be safe.


Normal Pressure Warding:

Over here is shown the ideal normal pressure warding spots around duo lane, you should always look to Sentry Wards defensively and use a normal ward on the offensive position. Enemies could Sentry Wards your normal ward so you should call your support for warding there.


High Pressure Warding:

In case you have a high pressure duo set up (hunter with good clear and fighting capability and a support with crowd control, push and mobility) you should look to invade purple buffs. This type of wards will make an easier way for you and your teammates to come over purple pit before spawning and being ready for stealing it [you will always know who is coming to gank you so you must be prepared for getting ganked over duo] .


Late Game Warding:

When you start fighting around Fire Giant, you should always look to ward in the same places as a midlaner because you two (ADC and Mid) form what we call as "backliners" (the roles who are supposed to deal DPS and damage to enemies), you will be sharing the responsibility for this rather than handling it alone, especially when it's not safe for you to step up to place deeper wards. Any wards placed closer to the objective within the Fire Giant pit tend to get destroyed by Sentries more often than not, so they tend to not be reliable.

Remember, minions act as moving wards in the lanes, and are able to spot nearby gods. If your towers are down, keep your minions pushed up as much as possible to provide an extra set of eyes and pressure.


  • White Circles: These are all offensive locations that allow you to spot enemies near to or approaching objectives, and are helpful in covering multiple approaches. The closer you get to the Fire Giant, the more contested those spots will be and the more likely enemies will try to counter-ward. The ones closest to the enemy base can give you very early notice.

  • Red Circles: Fairly obvious, but it's always good to have vision on the main jungle objectives, especially the Fire Giant. Sentry Wards are key here, as they allow you to spot and remove enemy wards. You can place wards directly on top of the objectives, or put them slightly to one side to try to spot enemy wards or protect yours from being detected.
Counter-Warding: Enemies may drop wards on your defensive side in similar (opposite) spots to where you would place yours. If the Fire Giant is already covered and you have a spare Sentry Ward, place them in these spots to limit the enemy's vision on your team.

Defensive Warding: If you're pushed back to your phoenixes or inside your base, locate your wards in the nearby jungle and general approaches.

Leave a Comment

You need to log in before commenting.

Collapse All Comments

Loading Comments...
Load More Comments
League of Legends Build Guide Author TottiGR
GRANDMASTER CHRONOS ADC GUIDE!
Table of Contents

SMITEFire is the place to find the perfect build guide to take your game to the next level. Learn how to play a new god, or fine tune your favorite SMITE gods’s build and strategy.

Copyright © 2019 SMITEFire | All Rights Reserved