
Vote received! Would you like to let the author know their guide helped you and leave them a message?

![]() Eye Of The Jungle upgrades to
Eye Of The Jungle upgrades to ![]() Seer Of The Jungle, which will give us a strong dps increase with the attack speed/% objective damage
Seer Of The Jungle, which will give us a strong dps increase with the attack speed/% objective damage
 Eye Of The Jungle
 Mace
Mace
 Healing Potion
 Golden Shard
 Blink Rune
![]() Heartseeker can be exchanged with
Heartseeker can be exchanged with ![]() Mantle of Discord if you like having defense.
Mantle of Discord if you like having defense.
Your abilities will hit the hardest with this build, and it scales with your passive physical power bonus ![]() Initiative.
Initiative.
![]() Mantle of Discord can be swapped with
Mantle of Discord can be swapped with ![]() Heartseeker to give stronger survivability and 1v1, at the cost of burst damage.
Heartseeker to give stronger survivability and 1v1, at the cost of burst damage.
 Seer Of The Jungle
 Jotunn's Wrath
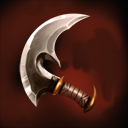
 Brawler's Beat Stick
 Hydra's Lament
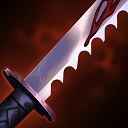 Serrated Edge
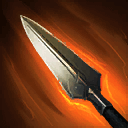 Heartseeker
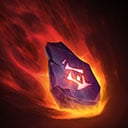
 Temporal Beads
 Scorching Blink Rune
A fun crit build, but can hyper carry late game. The first 4 items are the exact same as the standard build, you can decide if you want to have harder hitting auto attacks or abilities. This gives a stronger 1v1, but you are vulnerable to ![]() Spectral Armor.
Spectral Armor.
Seer Of The Jungle
Jotunn's Wrath
Hydra's Lament
Serrated Edge
 Rage
Rage
 Devoted Deathbringer
Temporal Beads
Scorching Blink Rune
Devoted Deathbringer
Temporal Beads
Scorching Blink Rune
![]() Spectral Armor is a good pickup if 2+ enemies have crit, as it makes you win almost every 1v1 against crit gods.
Spectral Armor is a good pickup if 2+ enemies have crit, as it makes you win almost every 1v1 against crit gods.
![]() Mantle of Discord is a good pickup if you need more survivability, and helps you win the jungle 1v1.
Mantle of Discord is a good pickup if you need more survivability, and helps you win the jungle 1v1.
 Spectral Armor
 Mantle of Discord
Tap each threat level to view Awilix’s threats
Tap each synergy level to view Awilix’s synergies
|
Passive -
|
|
Ability 1 -
|
|
Ability 2 -
You are temporarily unhittable while midair, which makes it strong at avoiding certain abilities. |
|
Ability 3 -
|
|
Ultimate -
|
![]() Awilix boasts a highly aggressive early game, with a mechanically intensive rotation reliant on proper dodging and knock ups. She is a very fun jungler to learn, and can punish the enemies super hard due to her movement speed from
Awilix boasts a highly aggressive early game, with a mechanically intensive rotation reliant on proper dodging and knock ups. She is a very fun jungler to learn, and can punish the enemies super hard due to her movement speed from ![]() Summon Suku. I wish you the best of luck in your games, and don't forget to bring some catnip for Suku!!!
Summon Suku. I wish you the best of luck in your games, and don't forget to bring some catnip for Suku!!!
SMITEFire is the place to find the perfect build guide to take your game to the next level. Learn how to play a new god, or fine tune your favorite SMITE gods’s build and strategy.
Copyright © 2019 SMITEFire | All Rights Reserved


Leave a Comment
You need to log in before commenting.
Collapse All Comments