Smitefire logo

Join the leading SMITE community.
Create and share God Guides and Builds.

Create an MFN Account


Or

Not Updated For Current Season

This guide has not yet been updated for the current season. Please keep this in mind while reading. You can see the most recently updated guides on the browse guides page

x

Vote received! Would you like to let the author know their guide helped you and leave them a message?

Banner for Ratatoskr guides

Keep your eyes off my nuts! In-depth Ratatoskr Build

0 0 11,428
by OdinBiceps updated February 5, 2017

Smite God: Ratatoskr

Build Guide Discussion 0 More Guides
Tap Mouse over an item or ability icon for detailed info

Ratatoskr Build

Starter, Early power (Purchare the Acorn of Yggdrasil as soon as you can)

Build Item Acorn of Swiftness Acorn of Swiftness
Build Item Bumba's Mask Bumba's Mask
Build Item Healing Potion Healing Potion
2
Build Item Mana Potion Mana Potion
2

Double Starter (Bumba's is a must, I recommend bluestone, but other options work aswell) Remember to get T2 Acorn when you have enough

Build Item Bumba's Mask Bumba's Mask
Build Item Bluestone Pendant Bluestone Pendant
Build Item Death's Toll Death's Toll
Build Item Rangda's Mask Rangda's Mask
Build Item Healing Potion Healing Potion
2
Build Item Mana Potion Mana Potion
2

Must-have items (Any order works)

Build Item Jotunn's Wrath Jotunn's Wrath
Build Item Hydra's Lament Hydra's Lament

Go nuts! (Bloodforge if you are winning hard, swap Ichaival later)

Build Item Brawler's Beat Stick Brawler's Beat Stick
Build Item Titan's Bane Titan's Bane
Build Item Ichaival Ichaival
Build Item Frostbound Hammer Frostbound Hammer
Build Item Bloodforge Bloodforge

Protect your nuts!

Build Item Void Shield Void Shield
Build Item Shifter's Shield Shifter's Shield
Build Item Breastplate of Valor Breastplate of Valor
Build Item Bulwark of Hope Bulwark of Hope
Build Item Hide of the Urchin Hide of the Urchin
Build Item Magi's Cloak Magi's Cloak
Build Item Mantle of Discord Mantle of Discord

Situational

Build Item Hide of the Nemean Lion Hide of the Nemean Lion
Build Item Pestilence Pestilence
Build Item The Crusher The Crusher
Build Item The Executioner The Executioner
Build Item Winged Blade Winged Blade
Build Item Witchblade Witchblade

Late-game Example #1

Build Item Acorn of Yggdrasil Acorn of Yggdrasil
Build Item Jotunn's Wrath Jotunn's Wrath
Build Item Hydra's Lament Hydra's Lament
Build Item Bloodforge Bloodforge
Build Item Void Shield Void Shield
Build Item Mantle of Discord Mantle of Discord

Late-game Example #2

Build Item Acorn of Yggdrasil Acorn of Yggdrasil
Build Item Jotunn's Wrath Jotunn's Wrath
Build Item Hydra's Lament Hydra's Lament
Build Item Brawler's Beat Stick Brawler's Beat Stick
Build Item Frostbound Hammer Frostbound Hammer
Build Item Magi's Cloak Magi's Cloak

Late-game Example #3 (Tankytoskr

Build Item Acorn of Yggdrasil Acorn of Yggdrasil
Build Item Jotunn's Wrath Jotunn's Wrath
Build Item Hydra's Lament Hydra's Lament
Build Item Hide of the Urchin Hide of the Urchin
Build Item Mantle of Discord Mantle of Discord
Build Item Shifter's Shield Shifter's Shield

Relics!

Build Item Hand of the Gods Hand of the Gods
Build Item Aegis Amulet Aegis Amulet
Build Item Purification Beads Purification Beads
Build Item Sundering Spear Sundering Spear
Build Item Horrific Emblem Horrific Emblem
Build Item Blink Rune Blink Rune

Ratatoskr's Skill Order

Dart

1 X Y
Dart
2 8 10 11 12

Flurry

2 A B
Flurry
3 13 14 15 16

Acorn Blast

3 B A
Acorn Blast
1 4 6 7 9

Through the Cosmos

4 Y X
Through the Cosmos
5 17 18 19 20
Dart
2 8 10 11 12

Dart

1 X
Ratatoskr dashes forward, damaging and slowing enemies for 3s. Dart pierces through minions and stops at the first god hit. Also, Dart's cooldown is reduced by 1s for each enemy god hit by Flurry or Acorn Blast.

Ability Type: Dash, Slow, Damage
Damage: 70 / 105 / 140 / 175 / 210 (+70% of your Physical Power)
Slow: 20 / 25 / 30 / 35 / 40%
Range: 55
Cost: 50 / 55 / 60 / 65 / 70
Cooldown: 14s
Flurry
3 13 14 15 16

Flurry

2 A
Ratatoskr spins around in a flurry of attacks, damaging nearby enemies and reducing their Physical Protections up to 4 times.

Ability Type: Circle, Debuff, Damage
Damage: 25 / 40 / 55 / 70 / 85 (+25% of your Physical Power)
Physical Protection Reduced Per Stack: 2 / 3 / 4 / 5 / 6 per stack
Radius: 20
Cost: 60 / 65 / 70 / 75 / 80
Cooldown: 14s
Acorn Blast
1 4 6 7 9

Acorn Blast

3 B
Ratatoskr shoots a blast of three acorns forward in a cone, each dealing damage. Enemies hit by multiple acorns take 40% less damage on each acorn, down to a minimum of 20% damage. Enemies hit by 3 acorns are stunned for 1s.

Ability Type: Cone, Stun, Damage
Damage: 70/90/110/130/150 (+55% of your Physical Power)
Range: 55
Cost: 60 / 65 / 70 / 75 / 80
Cooldown: 12s
Through the Cosmos
5 17 18 19 20

Through the Cosmos

4 Y
Ratatoskr charges up then leaps from the ground to a branch above his head. He may jump to 2 more branches before choosing a landing location. Upon landing he deals damage and Knocks up enemies. Through the Cosmos can be canceled or timed out from any of the branches, causing Ratatoskr to strike down at the current target location.

Ability Type: Circle, Knockup, Damage
Damage: 200 / 260 / 320 / 380 / 440 (+90% of your Physical Power)
Radius: 20
Cost: 100
Cooldown: 110 / 105 / 100 / 95 / 90s

Basic Information

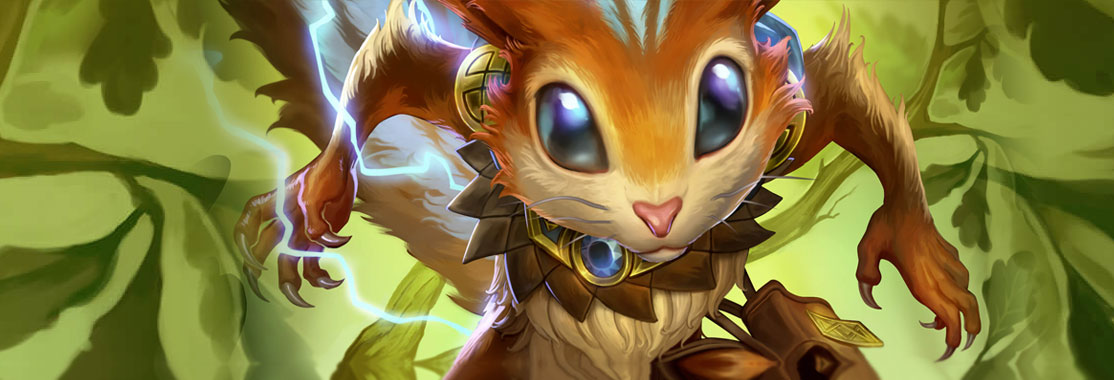
Allways get your T3 (or T2) acorn as soon as possible! Both T2 and T3 acorn can be purchased without needing to be in base, which gives him a huge early-game potential.

When engaging, your most important combo is 1 + 3, the 1 will slow and the 3 will stun if you hit all 3 nuts, you can stun multiple opponents as long as every nut hits. You can also use your 2 before your 3 to get more damage in, but it can be harder and sometimes not worth it. If possible, try to get basic attacks in-between abilities (works well with hydra's).

Whenever you use an ability, the cooldown on your 1 decreases, making it an excellent tool for chasing down opponents.

Your ult is in most cases used to engage in a teamfight, get a safe escape, or chasing down an opponent. The more jumps you do, the bigger the radius becomes and it could make a huge difference in a teamfight.


This was my first guide, hope it was helpfull! Remember to give me feedback if there is something I missed or did wrong. Thanks!

Leave a Comment

You need to log in before commenting.

Collapse All Comments

Loading Comments...
Load More Comments
League of Legends Build Guide Author OdinBiceps
Keep your eyes off my nuts! In-depth Ratatoskr Build
Table of Contents

SMITEFire is the place to find the perfect build guide to take your game to the next level. Learn how to play a new god, or fine tune your favorite SMITE gods’s build and strategy.

Copyright © 2019 SMITEFire | All Rights Reserved