
This guide has not yet been updated for the current season. Please keep this in mind while reading. You can see the most recently updated guides on the browse guides page
Vote received! Would you like to let the author know their guide helped you and leave them a message?
 Benevolence
 Cloak
Cloak
 Chalice of Healing
 Healing Potion
 Cloak of Meditation
Benevolence
Cloak of Meditation
Benevolence
 Prophetic Cloak
 Lotus Sickle
 Spirit Robe
 Pestilence
 Contagion
 Divine Ruin
 Heartward Amulet
 Spectral Armor
 Magi's Cloak
![]() Stone of Binding is a situational item in some games. If you feel like you're needing more physical prots here you can always grab something like
Stone of Binding is a situational item in some games. If you feel like you're needing more physical prots here you can always grab something like ![]() Emperor's Armor in this slot.
Emperor's Armor in this slot.
 Heroism
Prophetic Cloak
Lotus Sickle
Heroism
Prophetic Cloak
Lotus Sickle
 Shogun's Kusari
 Stone of Binding
Spirit Robe
Stone of Binding
Spirit Robe
 Cloak of Ascetic
 Fortifying Shell
Heroism
Prophetic Cloak
Fortifying Shell
Heroism
Prophetic Cloak
 Gauntlet of Thebes
Stone of Binding
Lotus Sickle
Spirit Robe
Cloak of Ascetic
Fortifying Shell
Heroism
Prophetic Cloak
Lotus Sickle
Shogun's Kusari
Spectral Armor
Spirit Robe
Cloak of Ascetic
Fortifying Shell
Gauntlet of Thebes
Stone of Binding
Lotus Sickle
Spirit Robe
Cloak of Ascetic
Fortifying Shell
Heroism
Prophetic Cloak
Lotus Sickle
Shogun's Kusari
Spectral Armor
Spirit Robe
Cloak of Ascetic
Fortifying Shell
![]() Mail of Renewal can be swapped for any physical protection item that you feel like you need in this slot
Mail of Renewal can be swapped for any physical protection item that you feel like you need in this slot
Heroism
Prophetic Cloak
Lotus Sickle
Pestilence
 Mail of Renewal
Spirit Robe
Cloak of Ascetic
Mail of Renewal
Spirit Robe
Cloak of Ascetic
 Blighted Ankh
You can switch between maxing the ![]() Mending Waters or the
Mending Waters or the ![]() Riptide after finishing your
Riptide after finishing your ![]() Bouncing Bubble / Moonstrike. Maxing the
Bouncing Bubble / Moonstrike. Maxing the ![]() Riptide early provides your team, and yourself with early protections.
Riptide early provides your team, and yourself with early protections.
 Y
Y
 B
B
 A
A
 X
X

Tap each threat level to view Yemoja’s threats
Tap each synergy level to view Yemoja’s synergies
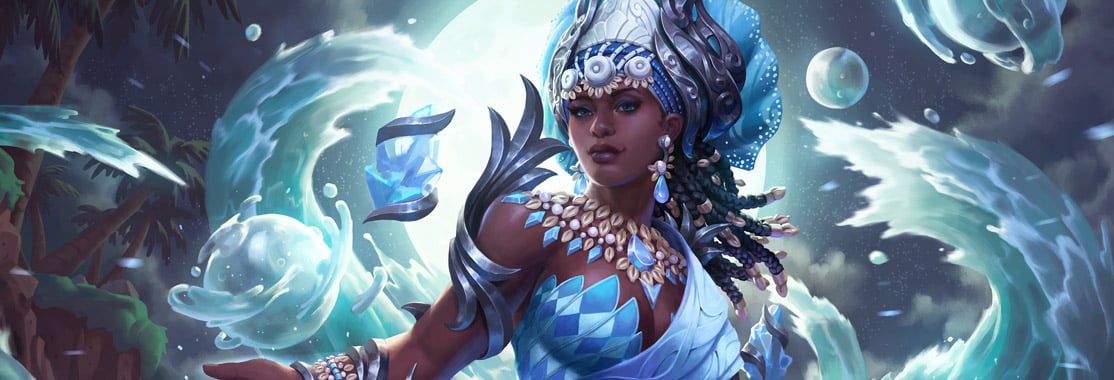
Yemoja is considered to be the best support in the game at almost all ranks. Between her abilities not using mana, and each ability offering something extra there really is no end to the possibility with this goddess. Yemoja does have a high skill ceiling, this god will be a win factor, or you'll be the reason for your team losing. A large part of this gods kit is set up, and sustain for your team during mid to late game fights. You have early potential, but you shine in the mid to late game the brightest.
|
|
|
|
Looking at the options presented to us, and basing every game on the idea it will be a standard conquest match we are able to piece together these 6 items into our build. For simplicity's sake I will list each item below along with the reason it works so well on Yemoja.
![]() Bouncing Bubble / Moonstrike - This ability early is key to a lot of early fights. After using your 1 once, your 1 will change to a stun for the next time its casted. The center of moonstrike will cause anyone in the AoE to be stunned. Since you do not use mana with Yemoja, you are able to use your 1 as many times as you would like as long as you have the Omi for it. This lets you get off multiple moonstrikes in a short burst.
Bouncing Bubble / Moonstrike - This ability early is key to a lot of early fights. After using your 1 once, your 1 will change to a stun for the next time its casted. The center of moonstrike will cause anyone in the AoE to be stunned. Since you do not use mana with Yemoja, you are able to use your 1 as many times as you would like as long as you have the Omi for it. This lets you get off multiple moonstrikes in a short burst.
![]() Mending Waters - will shine the brightest in the mid to late game. You do not have to aim this heal at anyone aside from one close teammate, it will bounce across to every close teammate healing them, and applying your
Mending Waters - will shine the brightest in the mid to late game. You do not have to aim this heal at anyone aside from one close teammate, it will bounce across to every close teammate healing them, and applying your ![]() Lotus Sickle passive to each of them. Late game your 2 will be a giant win factor for your team. Sustain is the key to winning with this god.
Lotus Sickle passive to each of them. Late game your 2 will be a giant win factor for your team. Sustain is the key to winning with this god.
![]() Riptide - This ability has some of the most potential to be a true hard carry for a match. This wall lets you rip your enemies back into your team, or help your team escape a bad situation. Among applying a slow to your enemies, this ability also provides protects to allies that pass through it. This makes it a very versatile ability, and not just a funny push the bad guys away move.
Riptide - This ability has some of the most potential to be a true hard carry for a match. This wall lets you rip your enemies back into your team, or help your team escape a bad situation. Among applying a slow to your enemies, this ability also provides protects to allies that pass through it. This makes it a very versatile ability, and not just a funny push the bad guys away move.
![]() River's Rebuke - Among all the support ultimate's in the game, this one stands the tallest (literally). Lifting 2 massive waves into the map you're able to hard stop the enemy, and press them into a tight situation. Finding immobile gods, or gods that just used their movement out with this ability is the best way to use it. While the waves are up the enemy can not pass through them, and will be trapped in the area you have created. This makes it a great tool for fighting in the jungle, or possibly cutting off paths into enemy towers.
River's Rebuke - Among all the support ultimate's in the game, this one stands the tallest (literally). Lifting 2 massive waves into the map you're able to hard stop the enemy, and press them into a tight situation. Finding immobile gods, or gods that just used their movement out with this ability is the best way to use it. While the waves are up the enemy can not pass through them, and will be trapped in the area you have created. This makes it a great tool for fighting in the jungle, or possibly cutting off paths into enemy towers.
Laning Phase - During the first 10 minutes while you're farming for your first item, and trying to hit level 5 you should have a pretty good time with Yemoja. Your ![]() Bouncing Bubble / Moonstrike is one of the strongest early game support abilities since it does not have a cooldown. You will be able to clear wave quickly, poke the enemy, and heal your ADC with your heal over time in your passive. If you reach level 5 first you have a great chance to grab a set of beads off of the enemy ADC by using your ultimate correct, along with your
Bouncing Bubble / Moonstrike is one of the strongest early game support abilities since it does not have a cooldown. You will be able to clear wave quickly, poke the enemy, and heal your ADC with your heal over time in your passive. If you reach level 5 first you have a great chance to grab a set of beads off of the enemy ADC by using your ultimate correct, along with your ![]() Riptide. Aside from having an easy lane due to press, you have to watch for the enemy jungler coming to punish you for standing high in lane. Remember to not waste Omi clearing waves when you have pressure since your ADC can do that for you. Save your abilities for trying to catch out the enemy duo, or the ganking jungler.
Riptide. Aside from having an easy lane due to press, you have to watch for the enemy jungler coming to punish you for standing high in lane. Remember to not waste Omi clearing waves when you have pressure since your ADC can do that for you. Save your abilities for trying to catch out the enemy duo, or the ganking jungler.
Mid Game - Moving into the mid game you will have numerous chances to find the Jungler, or Mid with your ultimate. Make sure you are watching the map so you know where your team is. If you find a great chance to wall off one of these 2 from safety AND see your team is around to follow up, take that chance! While fighting in your ult make sure you are using your ![]() Mending Waters to sustain up your Mid / Jungle so they are able to keep fighting, and possibly dive the enemy. With your sustain mid game, you can almost always win an engagement if you are the initiator. Aside from this, walking around warding enemy buffs, and seeing if anyone is out of position will be your job. You are great at punishing out of position players since you have so many forms of cc.
Mending Waters to sustain up your Mid / Jungle so they are able to keep fighting, and possibly dive the enemy. With your sustain mid game, you can almost always win an engagement if you are the initiator. Aside from this, walking around warding enemy buffs, and seeing if anyone is out of position will be your job. You are great at punishing out of position players since you have so many forms of cc.
Late Game - Late game is the true shining star of this goddess. Finding that one player out of position, or slightly standing off from their allies lets you get a proper ult on them, and easy follow up from your team. Enemy teams will burn a lot of buttons and actives to try and escape your wall late game since it should almost always be a death sentence for the person in it. When you do ult make sure you are watching your backliners as well. Once the ult is down the enemy team will try to counter attack your backline. This is when your actives, and ![]() Mending Waters really has a chance to be seen. If you are using defense relics on top of your 2 spam your teammates will live the dive, and you are able to fight back.
Mending Waters really has a chance to be seen. If you are using defense relics on top of your 2 spam your teammates will live the dive, and you are able to fight back.
TLDR: Using ![]() Mending Waters in a team fight mid to late game is extremely strong, and lets you out sustain the damage the enemy is doing, causing the fight to lean in your favor.
Mending Waters in a team fight mid to late game is extremely strong, and lets you out sustain the damage the enemy is doing, causing the fight to lean in your favor. ![]() Riptide lets you catch enemies running around, and toss them into your team, or pull them off your teammates.
Riptide lets you catch enemies running around, and toss them into your team, or pull them off your teammates. ![]() River's Rebuke lets you catch out enemies for easy kills.
River's Rebuke lets you catch out enemies for easy kills.
This section is dedicated to those who want to know the itty bitty details that nobody really brings to light, the WHY you pick this god, and the WHY you wouldn't want to. The combo's you can do, and the times you should not press buttons.
How do you play Yemoja? This character flexes very well, if you are someone that can bend between initiator, and back line peeler this character is for you! Having high CC let's you really get into the fight, or force people off your targets. With large sustain, and a heal that reaches any teammate around you, you are able to totally dominate the fight from all positions.
Let's get into lobby picks and bans. We know when we hit the screen we want Yemoja first pick because we love the god. First picking Yemoja is not bad, it will invite the other team to pick gods that can escape the walls, but at least now our team is able to pick into the gods they have chosen. Times we typically do not want to pick Yemoja would be the other way. If we are 5-10th pick, and the top 3 gods on the enemy team have an easy way to escape the walls, and have ways to punish us - displacement ultimate's like Daji, Ares, this would be a time you might consider going someone else. You can still pick it if you really want to, but you have to play careful to not get pulled around, and punished.
SMITEFire is the place to find the perfect build guide to take your game to the next level. Learn how to play a new god, or fine tune your favorite SMITE gods’s build and strategy.
Copyright © 2019 SMITEFire | All Rights Reserved


One of the thing i love the most from Yemoja is using her 3 (ring) to basically prevent Ares and Da Ji ult! It's so fun! Which is why i dont really get beads for Ares!
If you place the ring correctly you can just get your whole dragged team away from him right after his ult ^^
I personally would go for the standard build, but opting for Sov over Heartward sometimes depending on the game.
Also in the first build yes you get the extra Omi with
For the other build - Yeah you lose that Omi piece - but the trade off for