 Fafnir is a great support, and needs items that makes sure that he can do as much as possible as long and as often as possible. Down below are explanations of what you may consider to build.
This starter is a must buy for every support. It gives 100 health, protections of each kind, and extra gold on minion assists, which combines great with
Fafnir's passive.
Also, giving 7 health and mana on each assist of a minion, along with increasing the amount of idle gold/gold per every 5 seconds you get, this item makes supports stay relevant throughout the game. After 50 minion assists, you will gain +1 gold every second, from 3 to 4, which adds up nicely.
Now is the hardest part of the build, made easy depending on your playstyle: Which boots do I buy? Each one compliments a different
Fafnir, so picking one may default you to that specific persona.
 Shoes of the Magi is for the fight-starter. It has a high amount of power, and added pen for that early pressure and damage. It doesn't seem like a lot, but early game, the other guardian and solo will have about 30 protections naturally, and the squishier gods even less so. This means that this little amount of pen is beneficial to some early ganks and attacks. Buy if leading/given an early kill and can steamroll into late game.
 Shoes of Focus is the standard choice. It gives you power, mana, and cooldown reduction, allowing you to fire off abilities more, but isn't really meant for attacks. The cooldown can help with clear and with rotations, due to your abilities having high cooldowns. It can also help with ganks, since none of them reduce in cooldown as you level them. Buy if you like more opportunities opened up for you/are indecisive.
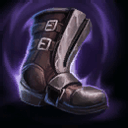 Reinforced Shoes is for the persistent fighter. Less aggressive and more counterattacking. Giving protections for taking damage, it is great for just menacingly waddling towards the enemy, building up the stacks. It's also a risky tossup, as you have to take damage willingly, which is never good. Buy if you like to be a tanky nuisance.
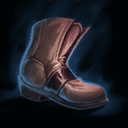
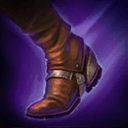 Traveler's Shoes is for the everyman. With this, you can start to become a mapwide presence. Move out of base faster, along with the highest movement speed at 25%, and rotations will be a breeze. You can also get out of fights quicker, chase down enemies, gank quicker. But then again, all it provides is speed, it's up to you to make use of it. Buy if you want to help wherever, whenever.
The good thing about Relics is that you're not limited to how you want to use them. You can choose two, and have completely different uses for them than intended. But then, what are their intended uses? What do they even do? Keep reading.
- First up in the list is
 Belt of Frenzy. This gives everyone around you 10% extra damage to everything and 15% extra attack speed for 5 seconds. Upgrade it for 500 gold, and they also get 10 flat penetration, and a longer duration of 8 seconds. This is the objective destroyer. Meant for game-changing teamfights or objective pushes. Either way, it can turn a game around, with just brute strength.
 Blink Rune lets you literally teleport in front of yourself, allowing for a surprising and rewarding 3-5 man Dragonic Corruption AoE damage and zone. An upgrade on it means you get 10% damage mitigation for 2 seconds after blinking. I mean, even the pros can wow the audience with this relic. This relic is able to give Fafnir the engage he needs.
- Skrr Skrr, gotta go fast. Popping
 Heavenly Wings gives everyone 30% additional movement speed, and an immunity to slows. If you've got some LMB-holders in your squad, the upgrade will give them an immunity to basic attack movement penalty for the duration, 5 seconds. It's not uncommon for a fight to go to the fan, and you need to get out of there fast. Then this is for you.
 Horrific Emblem surely looks and works horrifically. Slow every enemy's movement and attack speed by 40% and 25% respectively. Furthermore, 500 gold will decrease the damage that affected enemies do by 20%. If you are often in the middle of everything, popping this can make quick work of your slowed foes.
 Magic Shell gives you the opportunity to give your shield to your teammates. A shield with a maximum health of 340 health at level 20, to be exact. Upgrade it, and the next two basic attacks that connect to you won't do any damage. While it has a short duration of 3 seconds, those precious life points can save someone from getting annihilated.
- Getting close to the end of the list, up next is a very niche relic, up until this season.
 Phantom Veil still retains the ability to let all allies pass through both players and all player made objects for 5 seconds. Additionally, make it better for 500 gold and you double the duration, and add a 15% damage mitigation to everyone affected. Usually you would get this when facing an
  Odin, but with the new upgrade, you can turn a fight around if the other team does less damage to you.
- Alright so, you know how you need to regenerate health AND mana? And then there's Meditation Cloak, that gives you a maximum of 315 health, as well as giving you 30% of your mana back. The upgrade is great, reducing your mana costs by 30% and all your cooldowns by a quick second. This is for either a second teamfight, where some people have died and both sides are set on complete desolation, or in the middle of a current one, where your team is severely overwhelmed. Pop it, and get back in the fight, you greedy son of a dwarf.
- Last but not least,
 Cursed Ankh reduces all enemy healing by 50%. An upgrade makes those who heal during the duration of 10 seconds take 20% more damage. This is a good anti healing relic, should be bought to counter at least 1 healer in the enemy team.
Now to go over what items you will be building specifically and what they can provide you.
 Physical Defense: Sovereignty
Ole Reliable. Gives health, more health regeneration/Health per 5 seconds, and protections. Additionally, buying this item will give all teammates around you protections and HP5.
You would buy this if you intend to stay with your team and initiate team fights often. It ensures that if your team gets attacked by physical enemies, that they will receive less damage. Also, the HP5 helps keep teammates alive, as out of combat, this counts as passive healing, and not fighting for about a minute can restore about a quarter of your or someone else's health bar.
Physical Defense: Midgardian Mail
As of this season, this item has become a must have in a support build. This one will slow anyone who basic attacks you, movement and attack speed wise. This slow can stack up to three times, and is an independent slow, allowing other slows to still be applied.
To remind you, when changing from dragon to dwarf, you are targetable, so this is able to add an effect to any who damage you while you are helpless.
Physical Defense: Mystical Mail
One of the most famous physical defense items. In the same tree as
 Sovereignty
, it gives health, protections, and the newly added crowd control reduction. It also deals damage to those around every second. You can see this in game as an orange pulsing aura.
This item has one major use. If you are present by your team, and/or like to stay behind in a teamfight to make sure everyone else got to safety, this item will help give those little points, and you can bet they add up. It can also help chase enemies, because while their running, they'll probably be out of range from your abilities, but not from this aura.
Quick note, this item's damage is affected by protections. Therefore, those with less magical protections take more damage.
Physical Defense: Emperor's Armor
Man, the emperor has two items, lucky guy. This armor piece gives protections and health, but at a lower value then of those stated before. It also reduces the attack speed of towers and phoenixes by 30%, while secondly increasing your own structures firing speeds by 40%.
This is for the objectively minded. One kill, and you are rushing that tower, getting some gold, some xp, and some leverage.
Quick note, you have to be in the structure's targeting range of 55 units for this passive to work. There is a circle under every structure that dictates its range. If you are not sure if it has worked, look at the structures. Yours will have blue swirls and theirs will have red ones.
Physical Defense: Breastplate of Valor
Great overall pick, can't go wrong with this one. Protections, Mana, MP5, and cooldown. Pure stats, yet so many possibilities in game.
This item will usually be built mid game, to give you that edge in survivability and usefulness. With it, you can rotate faster with your dash and ult, taunt more times in a fight, last longer in a fight because of both protections and mana+mp5, just do more.
Physical Defense: Hide of the Nemean Lion
This is one of those prominent counter-building items. Gives physical protections, mana, and some MP5 with said mana. Along with that, every basic attack that hits you will also hit the giver by 25% of said damage.
This can help with fighting a lot of AA gods, like more than hunter, as all you have to do is get hit to apply damage. The damage is also applied before mitigations (before protections are calculated into the damage). What this means is that they will take their full amount of basic attack damage, and you will receive the reduced amount. This also applies to crit.
Physical Defense: Jade Emperor's Crown
A certainly interesting item, it gives health, magical power, and physical protections. Secondly, it reduces the physical power of all enemies around you by 30.
This is mainly bought against a team with a lot of physical power or against gods that have ridiculous scalings It can also counter a jank comp, one without a true tank, so something like an
Odin support.
Lastly, while 30 physical power doesn't sound like a lot, take into account that this could negate a whole item's worth of physical power. And because of it's cost, early mid game, where the adc is building stacks, or the solo has just started his power item, this could very much reduce the enemy's damage output.
Magical Defense: Heartward Amulet
Starting off the list is the most prominent magical protection item in almost every support build, just like
Sovereignty. Magical protections and health, while also providing an aura of magical protections and MP5 to your allies.
This item can be a substantial help. The magical protections really help your team against that spell-slingin' mage they have. The MP5 also helps with mana regeneration for you and your allies, so that they can get off more abilities over a period of time.
Magical Defense: Pestilence
Antiheal, antiheal, antiheal. Highest magical protection, with some health too. Also, all enemy health regeneration, including healing, HP5, and Meditation, is reduced by 25%. Any and all health regeneration, when around you, is only 75% as effective. The greatest counter to healer based comps, and overall a great item.
Magical Defense: Talisman of Energy
A criminally under picked item, this item provides health and magical protections. It provides movement speed, attack speed, and MP5 to any allies near you for killing or getting assists on enemies, including minions.
This works great with
Fafnir because buffing an ally with
 Coerce
 and having them farm a minion wave will build these stacks for you, because the extra damage from
Coerce is counted as assisting the enemy with the minions. That can lead to faster rotations, an objective secure, or a crucial gank after a single minion wave.
Magical Defense: Shogun's Kusari
A fairly new aura item, it has great synergy with
Fafnir. Magical protections, MP5, cooldown reduction, and even some crowd control reduction. The aforementioned aura makes all allies near you get a 20% increase in attack speed.
Another objective item, it can help shred some towers. It can also be bought if you have more than one hunter, like a
 Neith
Neith mid or solo, or if you have a hyper carrying jungle like
 Kali
Kali. Combine all the above together, and this item will lead to faster kills, faster objectives, faster wins.
Also, the crowd control reduction can keep you up and running faster, as it will get you out of CCs like stuns and roots faster.
Magical Defense: Oni Hunter's Garb
The usual health, magical protections, MP5, and crowd control reduction. It's current passive gives you 2% damage mitigation for each enemy near you, stacking up to 3 times.
Damage mitigation is not the same as protections, which reduce a specific kind of damage. This reduces ALL damage entirely. There are abilities and items that bypass protections, like good old tank shredder
 Qin's Sais
 and pesky gods like
 Serqet
 and her ultimate.
In game, it can help you in a team fight, seeing as you will often be near enemies, this will reduce the damage those enemies deal to you.
Magical Defense: Void Stone
Giving health, magical power, and protections, it also reduces the magical protections of enemies around you by 20.
That amount doesn't seem like a lot, but squishies like the enemy hunter and mage, they don't build protections, and have like, 30-50 tops naturally. It can give your own mage that little bit extra damage he needs. Also, if buying it early game, you can deal basically true damage to the enemy squishies.
Hybrid Defense: Hide of the Urchin
The most recognizable of hybrid items. Gives health, mana, and of course protections of both kinds. Another stacking item, every kill or assist on a god gives you 3 additional physical and magical protections, to a max of 21 of each. As of this season, it also evolves now, to give you a regenerating shield with a maximum health of 200.
This is for the
Fafnir that takes a fight at every corner. You're ganking left lane, you're not leaving without that enemy dead. They're dead, on to the next. Gotta stack em all. The shield itself is useful for being that type of person, going in and out of fights. In a fight, take less damage from your actual health bar. Out of combat, get it back up fully in 30 seconds. Usually bought mid to late game.
Hybrid Defense: Gauntlet of Thebes
Standardly, it gives health and HP5. Also, when you get an assist for minion kills, you gain stacks of physical and magical protections, up to 50. After 50, the item will glow, providing an aura of physical and magical protections to allies around you.
This is a great hybrid item, and you can stack it easily by just buffing someone who is farming their lane with
Coerce. The aura is small, only 10 protections, so you can consider it a bridge item and replace with something later on.
Hybrid Defense: Stone of Binding
Magical power, protections of both kinds, good stuff. And then, whenever you land a CC, you and your allies around you will get some free penetration.
This item sponsors the aggressive. In the duo lane, land your
 Cursed Strength
 or
 Underhanded Tactics
, and your is doing more damage off of that. That's because again, protections early game are negligible. Later on though, you'll have to sell it for something better, because 10 pen early game is nothing late game. All about percentage pen at that point.
Hybrid Defense: Magi's Cloak
Supports dish out CC, but what about when getting dished the CC? This item, giving health and protections of both kind, also negates CC once hit with one, for a whole second. The CC has to be a hard one, meaning that it must completely disable all of
Fafnir's movement for a while. This effect happens once every 70 seconds.
One thing that is very common: Supports don't need Purification. They are meant to take CC to the face and walk it off. This item will help with that. One hard CC hit, and you will negate all other ones for a whole second. This can burn ultimates from the enemy, giving your team the edge.
Hybrid Defense: Mantle of Discord
The
 Rod of Tahuti
 of defense items. A whopping 60 protections of both kinds, with a sprinkle of 10% cooldown reduction. But wait, there's more. If you take damage while under 30% of your maximum health, not only will you stun everyone close to you, you will be immune to CC for a second. The downside is the cooldown, 90 seconds,
but they'll pass quickly.
A luxury defensive item, bought usually dead last, because of it's cost. With it, you can either run in guns blazing to proc the stun and apply CC that you or maybe your team doesn't have. Secondarily, you can flee from your life, and a stupid assassin pops out the jungle, trying to claim the booty. But no, you stop them in your tracks, denying your assets, and dash away and give entrance to your allies. A beautiful tale.
Damage and Utility: Divine Ruin
Can I get some more antiheal please? Magical Power and some flat penetration. If you hurt someone, they will heal only 60% as much for 8 seconds.
This will be great, as you have quick one tap damage as a dwarf and easy to hit ticks as a dragon. Plus, the anti heal is substantial and for a while too, so it pays to be aggressive with this item.
Damage and Utility: Gem of Isolation
The earliest found synergy with
Fafnir's kit. A lot of power, some health, and Crowd Control Reduction. When damaging enemies, their movement speed will be reduced for 2 seconds.
Tons of applications with this. The best way is to jump in, ult into a dragon, and everyone who is taking damage from that AoE is also slowed.
Damage and Utility: Spear of Magus
Prince of Flat Penetration. Power and pen. Also, any damaging ability reduces the protections of enemies hit by 10, for a maximum of 5 stacks. This effect can be applied multiple times by one ability, i.e. tick and DoT damage like dragon form
Cursed Strength or
Underhanded Tactics.
This synergy applies to
Coerce, because each time someone you buff applies your bonus damage to an enemy, that is one stack of
 Spear of the Magus
 built. In dragon form, you can apply this to the whole team, as with any other damage item listed.
Shield of Regrowth
Damage and Utility: Shield of Regrowth
A great item for
Fafnir because he has a heal. When healing yourself, you move faster, on a short cooldown.
Obviously the use is for
Coerce, and would be utilized when running away from death because you will find yourself healing yourself while fleeing, so this will help immensely.
Damage and Utility: Winged Blade
Need for speed. Health, and a good amount too. CC reduction. Movement Speed, and if you didn't think you could go faster, whenever you're under a slow, instead, you move even faster and can't be slowed for 4 seconds, every 30 seconds.
This is such a hard counter item to so many gods in this game. Some gods only have slows in their kits too, like
 Ra
Ra and
 Nemesis
. This will definitely be useful when facing a team full of slows, or just if you need to exit fights faster.


 Guardian's Blessing
 Shoes
Shoes
 Healing Potion
 Mana Potion
 Midgardian Mail
 Mystical Mail
 Emperor's Armor
 Breastplate of Valor
 Hide of the Nemean Lion
 Jade Emperor's Crown
 Heartward Amulet
 Pestilence
 Talisman of Energy
 Shogun's Kusari
 Oni Hunter's Garb
 Void Stone
 Hide of the Urchin
 Gauntlet of Thebes
 Stone of Binding
 Magi's Cloak
 Mantle of Discord
 Divine Ruin
 Gem of Isolation
 Breastplate of Regrowth
 Winged Blade
 Cloak of Meditation
 Y
Y


Also this one needs an update
Here are some general thoughts I had while reading the guide:
Item Choices
Your item choices are generally solid. However, I feel that you neglected to mention a few. Some of the items I will suggest are more core, while others are more situational.
Oh, also, I would recommend
Introduction
A pro that you mention is that Fafnir has great CC. I think you could be a bit more specific in the fact that most of Fafnir's Crowd Control is single target (which he excels at), but lacks effective area control. So a pro could be that he has good single target cc, while a con could be that he has low area cc.
Also, I don't really agree with saying that his clear is horrible.
Abilities
Item Descriptions
Solid item descriptions. This probably took a while to write. Nice work.
Gameplay
I'm not really going to give much feedback on this section, as I feel it is the most difficult part to write out in a guide, and really depends on each individual's game knowledge.
Generally though, good tips.
Overall, a nice guide. Glad to see you creating content again, and hopefully we can play sometime :D
You might start prioritizing Coerce a bit sooner rather than maxing your 1 first. Has more benefits to leveling than just the damage from the 1.
Set example build is okay, but I just personally don't like heartward all that much these days. It doesn't see much use. Only time I feel it makes sense is when you've got 3 magical enemies. As for the mana regen, you get that in genji, oni, shogun, etc.
Instead of mana potions, you might get multi instead. You shouldn't need all that much mana early game and the blessing is better for mana than health imo.
I think Heartward is fine, especially when you consider that all gods have a standard 30.9 magical protections (up to 48 at level 20). Any additional magical prots you can give a squishy are going to be significant. Fafnir can also be mana hungry, so the MP5 is a good perk, plus Heartward gives you nice magical effective health. Not the worst item imo.
I would also suggest multi-potions, but consumables is really dependent on the individual's preferences and play style.
If you stop
To explain the maxing of
The example build is noob friendly, as my guides are intended "For Dummies," as I've always put in the past. I do agree with your disliking of the item though, as you can see my personal build does not have Heartward Amulet, but instead has
Lastly, mana pots are very much needed in the early stages, but I will look into building multi pots instead and come back with results.
Again thank you very much, and I'll keep you posted with my findings.